Vacuum, Phosphor and Patience
9 min read
After raving about VFDs in the last part, there is just no other way than diving into that topic here. I’ll cover trials and tribulations on the way to shoot electrons at phosphor in vacuum – or in more practical terms: setting up tools, wrestling with code, and convincing an unfamiliar microcontroller to light up a piece of gloriously retro tech.
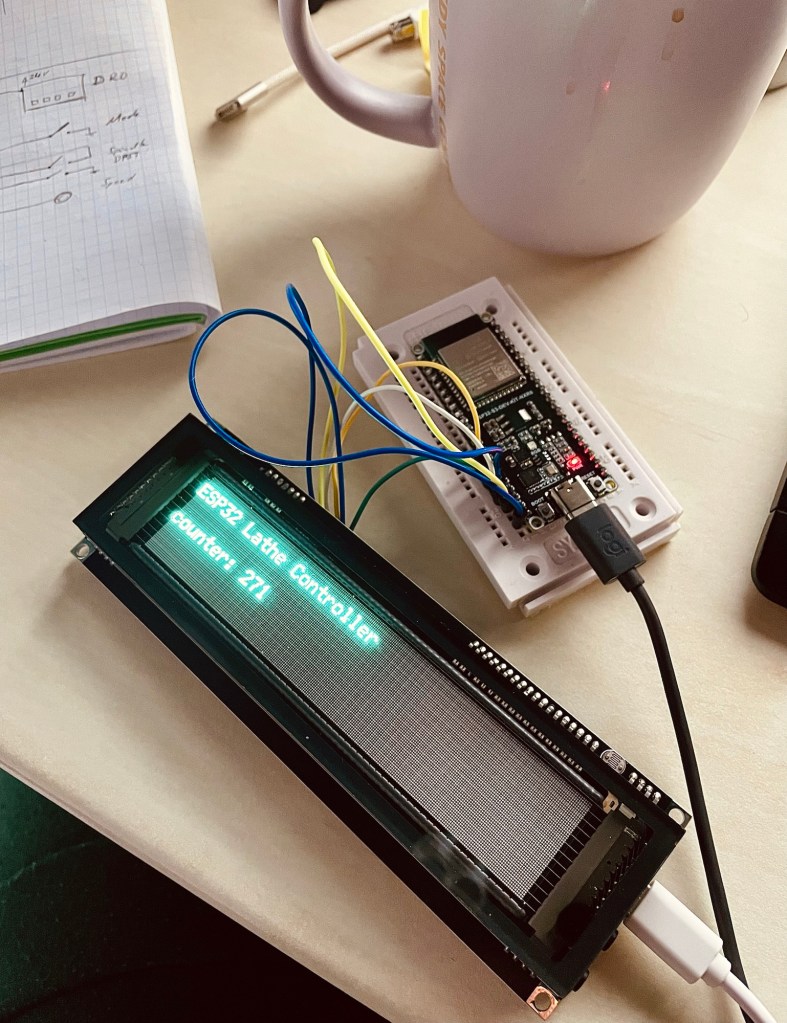
This is not the polished end result yet. It’s the messy middle: breadboards, compiler errors, questionable prompts, and small wins that feel disproportionately big. The goal for this stage was simply to get the display to show anything at all. The moment that faint blue glow appeared, the project shifted from “idea floating in my head” to “object emitting light on my desk,” which is a very satisfying transition.

Goal
- Get familiar with software tools like VS Code and GitHub
- Get familiar with a new microcontroller and FreeRTOS
- Set up a code skeleton
- Reach a first win by getting the VFD to display something
The above are the immediate goals covered by this post. Overall, I want the code to achieve these:
- Closed-loop spindle control: Run a 100–200 Hz PID loop to hold target RPM, with a setpoint mapper and support for Constant Surface Speed (CSS).
- Accurate RPM sensing: Use PCNT edge capture helpers to turn encoder edges into stable, real-time RPM readings.
- Clean actuator drive: Generate 15 kHz, active-high PWM for quiet, smooth speed control.
- Robust display UI: Drive a GP1294 VFD via U8g2 (software SPI), including quick (<2 s) boot animations and brightness control.
- Web control & telemetry: Expose REST endpoints and basic WebSocket updates for a lightweight browser UI (static assets served by the device).
- Operator inputs: Read panel switches and a speed potentiometer, with ADC filtering (EMA/median) for stable values.
- DRO/RS485 integration: Talk to an external DRO over half-duplex RS485 (UART with RTS as DE/RE) for position/speed data exchange.
Persistent configuration: Store/load user settings (PID gains, ranges, belt ratio, pins, etc.) in NVS. - Hardware abstraction layer: Isolate drivers (UART-RS485, PCNT, ADC, LEDC, GP1294 display) behind small hal_* modules to keep main/ logic portable and testable.
- Deterministic RTOS structure: Split responsibilities into focused FreeRTOS tasks (control_task, io_task, ui_web_task) for predictable timing and simpler reasoning.
Materials & Tools
- Breadboard and wires
- ESP32 and VFD
- Software toolchain: VS Code Web, GitHub, Arduino IDE
- AI
- Patience…

Process
It has been a couple of years since my last serious coding project at university. I have programmed microcontrollers since then for many hobby projects, but always stayed in the shallow end of the pool with simple scripts doing simple jobs. Now with AI seemingly everyone and their uncle can program high-level stuff. So I should manage to get my lathe controller up and running easily.
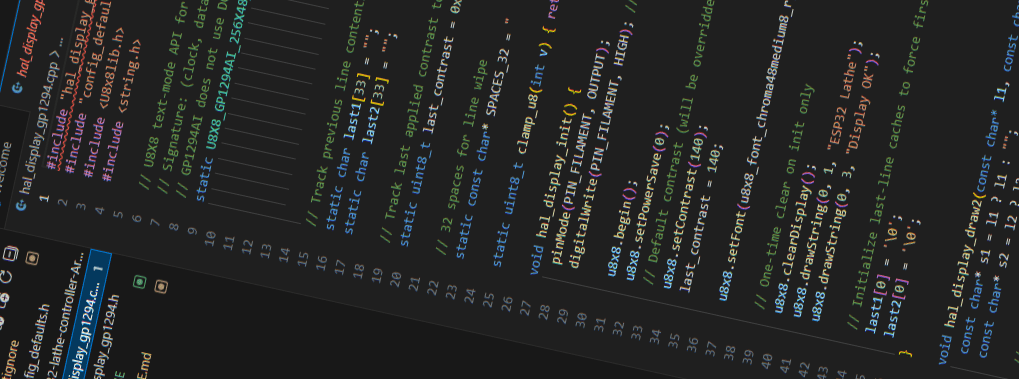
I sat down and told ChatGPT what I had in mind. The principle „shit in – shit out“ applied. It‘s obvious that you cannot just tell it to „code a controller for a lathe“ and the code is done, much more detail was needed. That’s not so easy as it turned out but Chatty McChatface helped with this task as well. My plan was to first build a code skeleton and then start inserting code step by step. I spent a good amount of time just engineering the prompt for the code architecture. In a long conversation I asked the Word Salad Machine to guide me through the process of defining all those details, for example by asking me questions or by proposing options for me to choose. In the end, I had Gepetto summarize all the information in a single prompt. This prompt was then used in a new chat as input to generate the code architecture.
With all the excitement of the amazing VFD I had been given by my good friend Ali, it was a no-brainer which part of the code to focus on first: I wanted to get the display working subito! Ali lists a project description on Hackaday where someone had already used this exact display with success. This and the rest of the display documentation gave me confidence and a good starting point. The source: trust me – bot spat out convincing code but it took a number of loops for the code to even compile. I would copy the error message to GPT McGee and copy back its correction… over and over. For hours. To be fair to the Thought Amplifier, it also helped me set up ESP-IDF, Git and Github, saving me some time there.
Eventually though, it worked. I did not even expect it and all of a sudden, there was that light blue glow next to me, a counter running, as if it was the most normal thing. Very cool!
Well… I had actually achieved the goal of displaying something. Naturally the next step was to display meaningful content and to interact through a web interface. In the datasheet I had also discovered an ambient light sensor and I thought I would loop this one in to automatically adjust screen brightness. How fun.
Well, no. Here is where things took a downturn. I told the Close Enough Machine to implement a WebUI with a brightness adjustment slider, from which I could update and control the display. It was as if ChatGeeProbably had lost context as we went on. At one point it was referencing file names that sounded sensible but did not exist, we had named them differently at the beginning. Then followed another endless loop of copying error messages and updated commands between terminal and YapGPT. With entirely convincing confidence it would say „ah, I see the error“ and „it‘s fixed now. It will work“ and so I kept going. Frustrated, I had to stop at some point, go back to versions that worked, even abandoned the ESP-IDF/terminal flow and jumped into the Arduino IDE. I think I had reached the limit of what was possible with the Confident Bullshitter and growing code.
Finally – gazillions of iterations later – I had reached a point where I was happy with the claim of having reached the intermediate goal: Something was showing on the display, the microcontroller was hosting a webpage and the screen brightness was adjustable with a slider.
For another project – peeerhaps you shall read about it at some point 🙂 – I was also tinkering with code and thought I‘d give an IDE-integrated agent a try. GitHub Copilot offers free 30-day trials and it plays wonderfully with VS Code. What a difference!!! The wasted hours still burning in my memory, the realization of what felt like quadruplification in efficiency made life worthwhile again. I‘m pondering restarting the entire code with a clean slate, this time with Copilot in the driver‘s seat (at my skill level, I‘m happy to have him at the wheel, haha).
Challenges & Learnings
I learned a couple of things about good ol‘ Autocomplete With Opinions
- Shit in, shit out. This is not new, but sometimes I forget. The answers will be equally vague as to how you ask it.
- ChadGPT does not fix all your problems, nor does it code a complete and working thing for you. Small steps are better.
- Specific agents are better at their specialty. The Plausible Answer Generator sometimes forgot what it had told me at the beginning of a long chat, making me screw up hours of work. There are specific coding agents and some IDEs even have integrated ones that will do a much better job. It‘s like in real life: You can dig a hole with a toothpick, but it‘s much easier with an excavator.
I did eventually switch from doing copypasta between ChatG-Loremipsum++ and a terminal to a free trial (that’s how they get ya) of GitHub Copilot in VS Code. What a difference! Already, I see some unbeatable benefits- Obvious: no copypasta needed
- Complete control of any code change. They are clearly highlighted and can be reverted easily.
- Copilot has direct access to the codebase and is aware of every line of code. So unlike The Confident Bullshitter, it does not forget the context or change code in long conversations.
- Because Copilot is integrated, it can output directly to the terminal and catch its error messages. It will propose a solution and you just click „accept“.
- Git is a lifesaver too. None of my early scripts ever got to see the world, meaning they lived locally on whatever computer I had at the time. No version control, no backup. No más!
Result
I end this post with a first successful demonstration of my ability to download VS Code and start a free trial of Copilot, a working VFD that‘s controlled by an ESP32 hosting a web UI.

Reflections
Defining Requirements is a technical way of describing „what you want“. I find it incredibly difficult to do – and I would love to get better at it. I think it is a useful skill to have. In the context of my project, being able to formulate exactly what I want to achieve has a direct influence on the outcome: The more detailed my description is, the quicker I can find solutions. This applies to both the electrical layout for example, and the code that GuessGPT can give me. „The ESP32 shall control the spindle motor“ is a requirement, but a very broad one. In the electrical layout this only gives me a general connection between the two. In the more detailed case, if I say „The ESP32-S3 shall control the spindle motor as a 3.3 V PWM signal on pin 13 and a dedicated PWM driver off a 24 V supply“ I already know what components I need to buy and how to hook up the controller, the driver and the spindle motor*.
*I know, I know. Strictly speaking the requirements should remain solution agnostic and only define generally what needs to happen, the specifications then would specify how this is achieved. My second example is in fact a design specification. But this is a hobby project, so gimmeabreak🙂
Task specific AI I am not a professional programmer – not even an intermediate one. All I know up to now is simple scripts. But perhaps the professionals agree when I say AI agents specific to coding are one of the most powerful tools out there. Readtheinstructionstermsandconditionsapply…andsodoestheprincipleshitinshitout.
If it sounds like I am complaining about Chatty G, let it be said that without it I would progress only at a fraction of the speed and that I think the technology is groundbreaking. I am deeply grateful it exists and I am able to use it. We get used to novelty very quickly. What was at first beyond imagination and truly astonishing to everyone who experienced it is now part of the everyday toolbox, expected to work and immediately cursed when it doesn‘t. Reminds me of what comedian Louis CK said about air travel, funny stuff.

Resources
Have you tried something similar? Got tips or questions? Feel free to leave a comment below.

Leave a reply to Mini Lathe – Part 3 – Into the blue Cancel reply