When the concept works beautifully – except in reality
8 min read
This week we will take a small break from the Mini Lathe story, a series that is getting longer and longer.
I knew it had to be around here somewhere…where could it be? Probably on that shelf behind this box…No – but it’s GOTTA be here in the garage… Ah, in here maybe? Again no, but wait, what is this???
My blog is about documenting what I make. Not all of it works. The blog is also about things I learn and in the failure of this project, there is definitely a lesson to be learned.
I was looking for an ESP32 microcontroller I knew I had somewhere and eventually located it in one of my project boxes. The box contained an abandoned project that I had put away in frustration. I am writing this blog post in retrospect and not while I am building it.
Goal
The goal of this project was to make my own dehumidifier. The apartment I was living in had a bit of a mold problem and the best way of dealing with it would be turn it into a project. Right? Riiight???
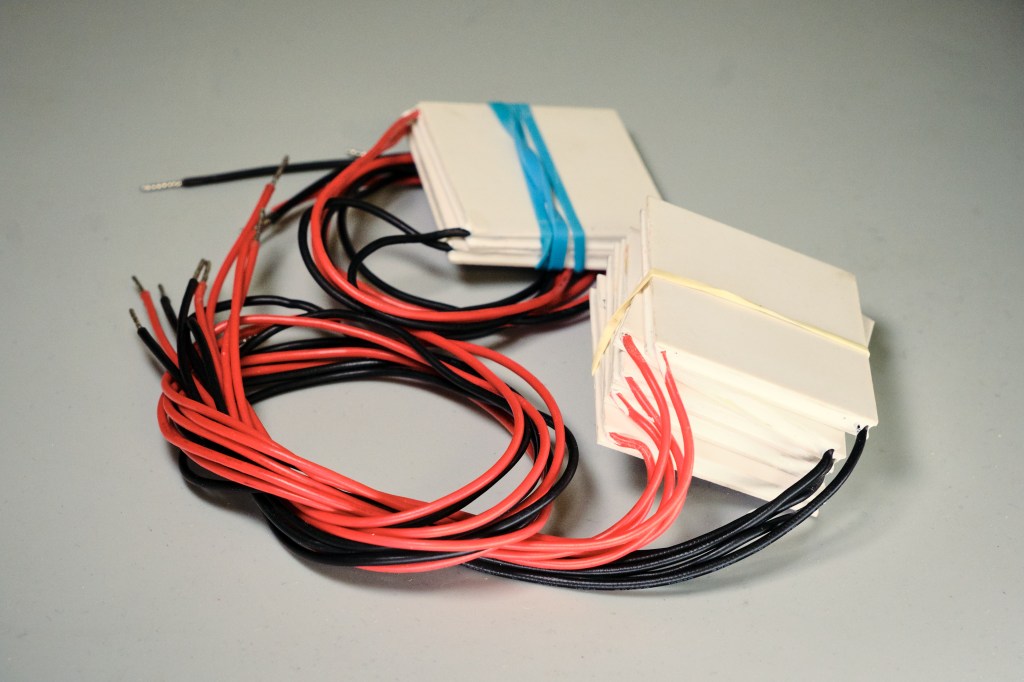
For a long time I had a small pile of Peltier elements waiting for a purpose, and this felt like the perfect opportunity. So the idea was simple: build a dehumidifier with Peltiers at its core.
First of all, what the hell are Peltier elements? In short: black magic. In long: A fascinating piece of technology – it usually comes in the form of a little flat white square with two wires – that converts electrical power into a temperature gradient. Meaning that you apply a voltage across the two wires and one side of the Peltier gets hot, the other gets cold. Another way of thinking about it is that it transports heat from one side to the other. And all of that without a single moving part!
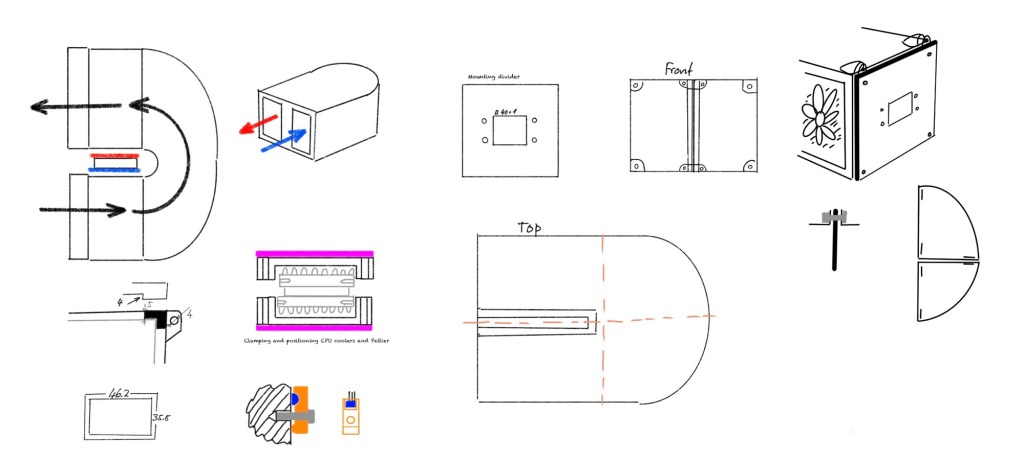
The idea was to route humid air past the cold side of the Peltier first, condensing part of the moisture, and then guide that same air past the hot side to warm it up again. I loved this concept because the airflow closes the loop so neatly.
A Peltier element can only do its job if heat is continuously removed from the hot side. It actively transports heat from one side to the other, but once that heat starts to accumulate, efficiency drops rapidly.
Cooling air is an effective way to remove water from it: colder air holds less moisture, so the excess condenses. But since the goal was dehumidification without cooling the room, sending cold air straight back out was not ideal. By reheating the air on the hot side of the Peltier, the system removes moisture while keeping the room temperature essentially unchanged.
In addition, it would be my first time working with an ESP32 and another goal of the project was to learn more about this type of microcontroller.
Materials & Tools
- Peltier Elements
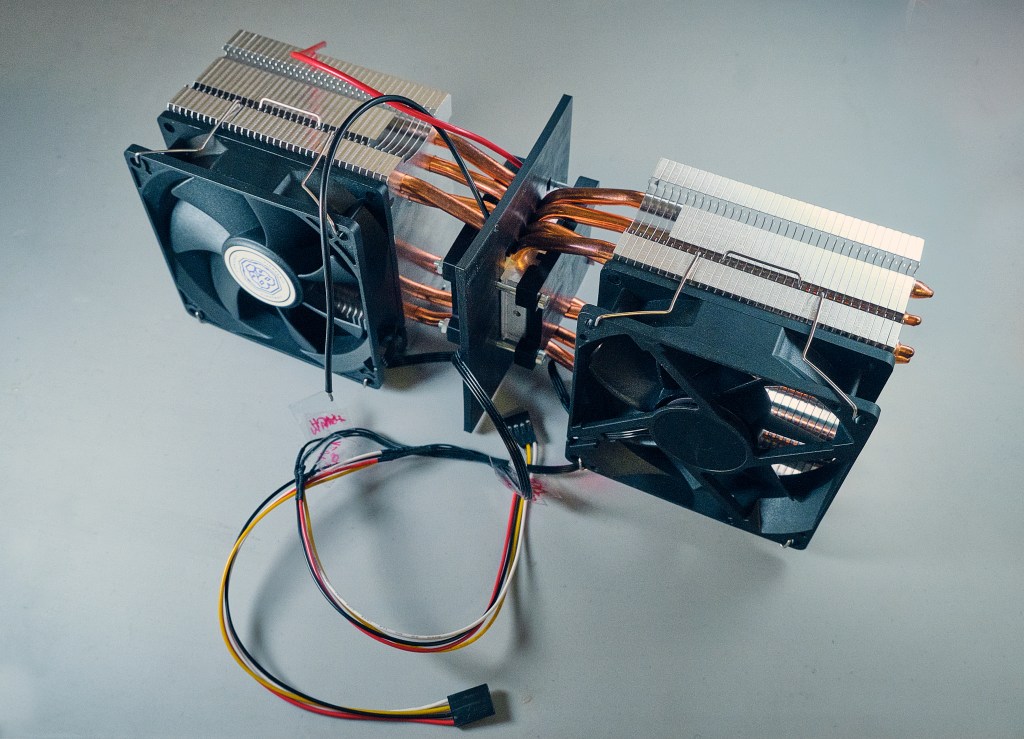
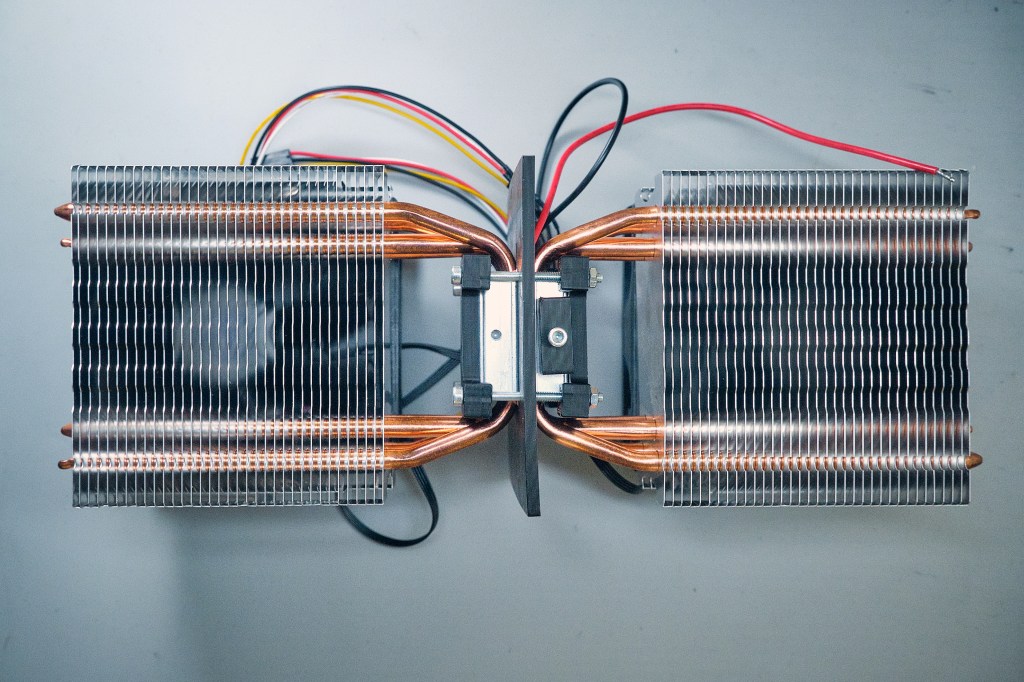
- 2 CPU coolers with 4-pin fans
- ESP32 Microcontroller
- Temperature sensors
- Humidity sensor
- Power Supply
- 3D Printer
Process
I began this project by trying to coax a reaction out of this new and unknown microcontroller. Honestly, I was ready for weekends of trial and error, tenacious resistance from the computer, compiler, libraries and a wall of error messages. Nothing of the sort: the ESP32 can be programmed and flashed with the Arduino IDE and it ran on the first couple of tries.
Also new to me was coding with AI. I let ChatGPT do the heavy lifting and only took corrective actions and some adjustments. Fairly quickly, the code was taking care of:
- Reading temperature sensors on the hot and cold side of the Peltier element
- Running a PID control loop to regulate power to the Peltier
- Reading a humidity sensor to calculate the dew point of the surrounding air
- Reading a water level sensor to stop operation
- Controlling and reading two independent CPU fans via PWM and sensor interface
- Hosting a web interface to show all sensor readings and provide controls for controller setpoint temperature and PID parameters
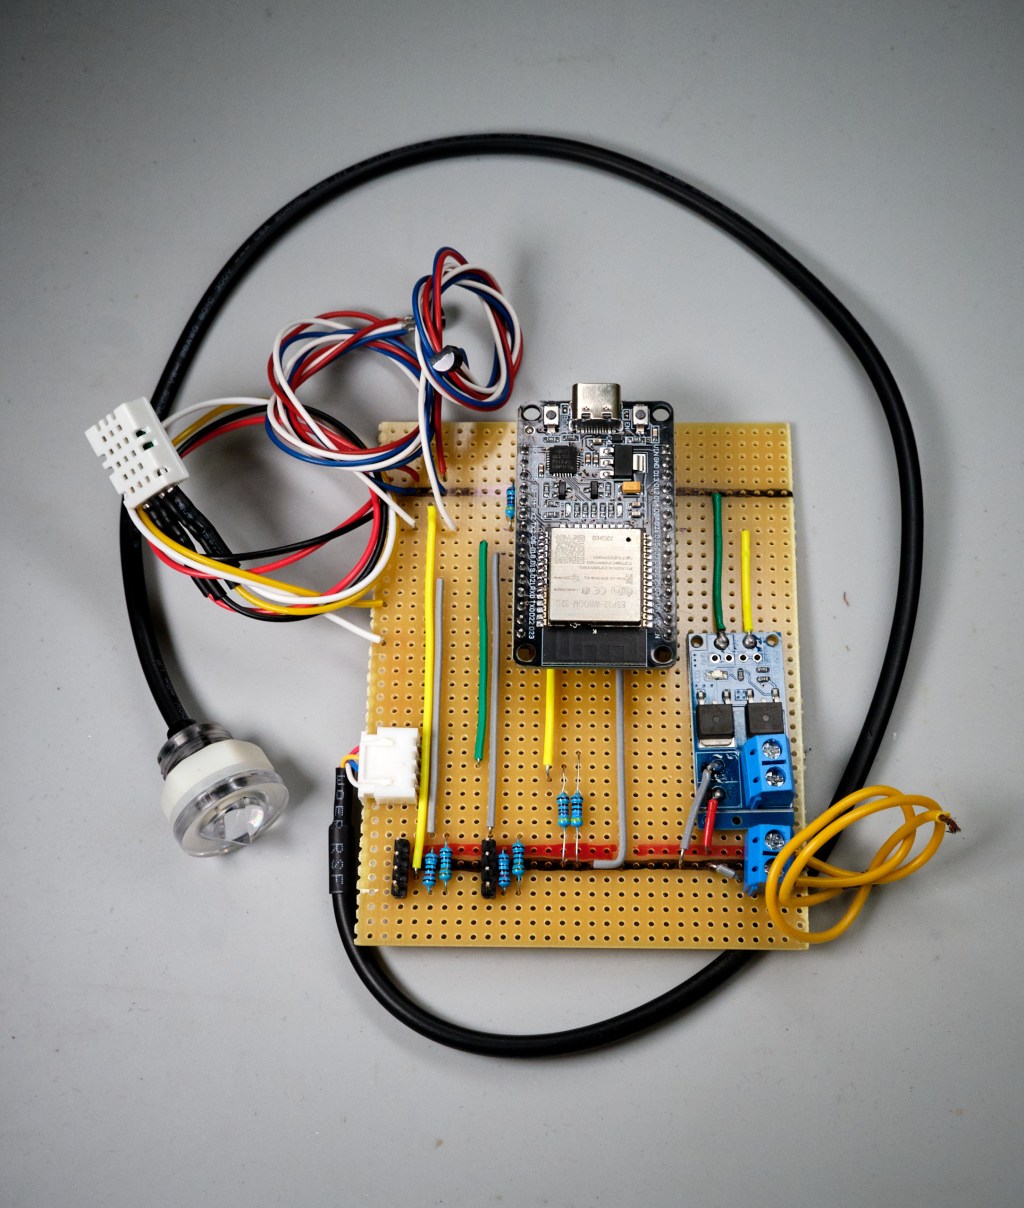
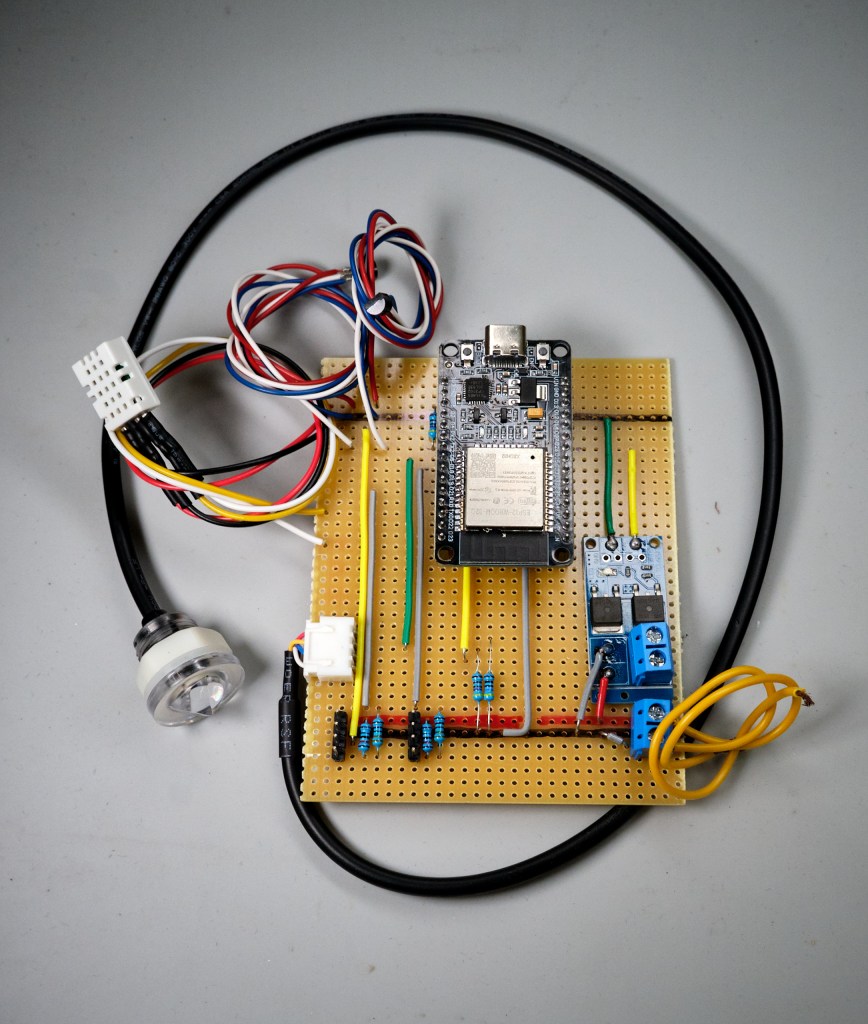
The code was of course linked to an electrical diagram. Given the low complexity of the project, I did not want to fire up the circuit design software and kept it simple with a hand sketch (yes, this is my excuse for why the layout looks like it had been scribbled by a 5-year-old).
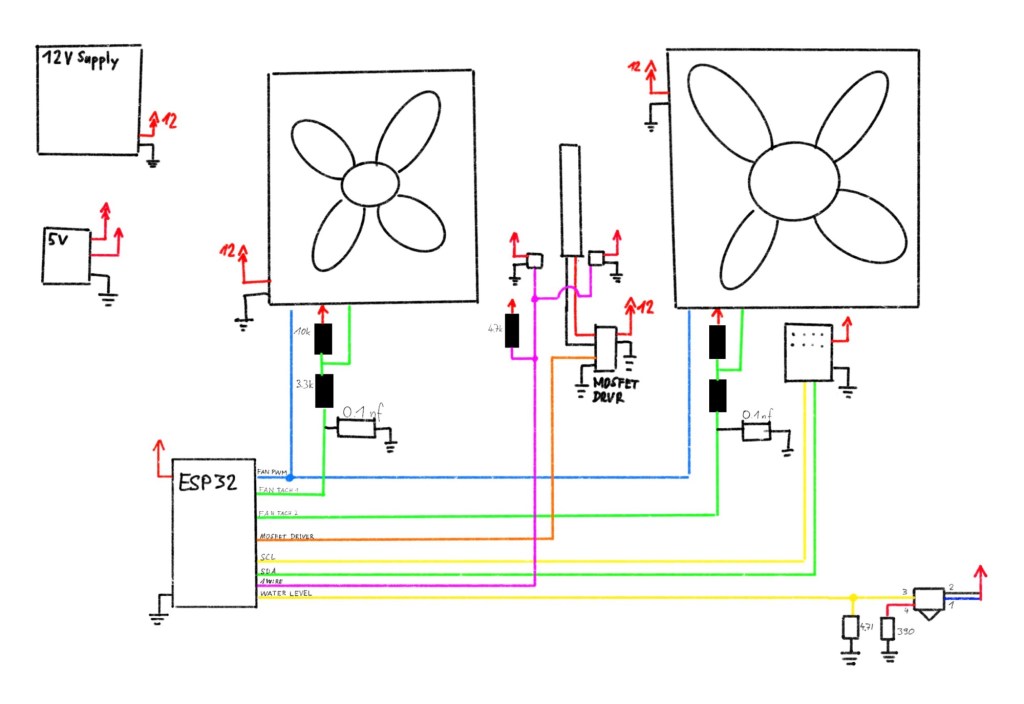
There are two power supplies, a 12 V supply feeding the fans and the Peltier element and a 5 V supply for the microcontroller and the sensors. The fans have two lines each going to the microcontroller, one is for setting the speed, the other is for reading the actual speed. Two DS18B20 one-wire temperature sensors read the cold and the hot side of the Peltier, while a separate SHTC3 sensor is reading ambient temperature and humidity. This one is controlled via I2C. A digital water level sensor is connected to a dedicated I/O pin. That‘s all there is to it.
The circuit is neither complex, nor did I have space limitations. So the easiest way is to throw it all on some stripboard.
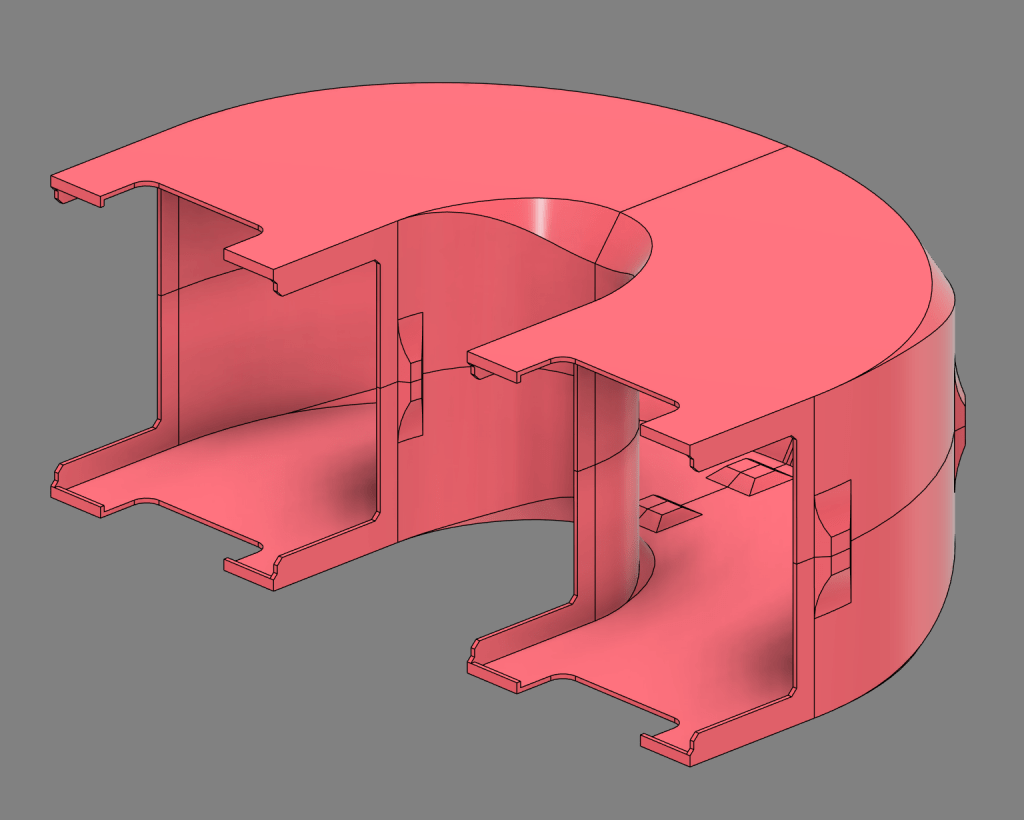
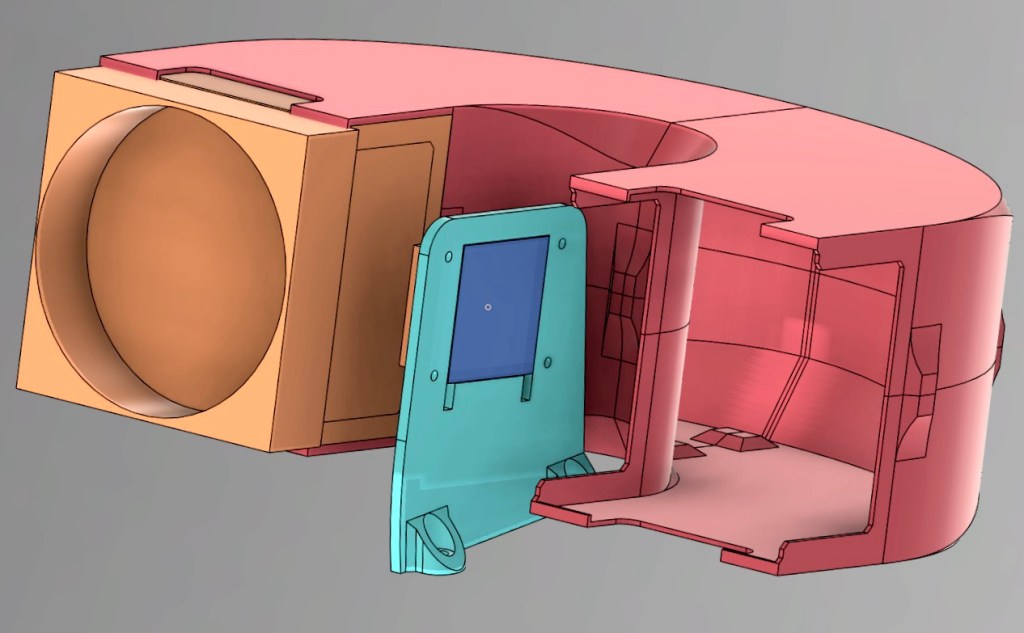
Now on to the mechanical assembly. My design was to use a simple bucket or another store-bought container and bolt my contraption to the top cover. This would make emptying a breeze and I would not have to build a watertight container myself.
Below are some design sketches for the air duct surrounding the Peltier and temperature sensor attachment.
„But Mr. intotheblue-guy, this project looks AMAZING, you’re such a superbrain. Why do you say it was a failure?“ you might say, dear reader. The failure was lurking deep, only to reveal itself here.
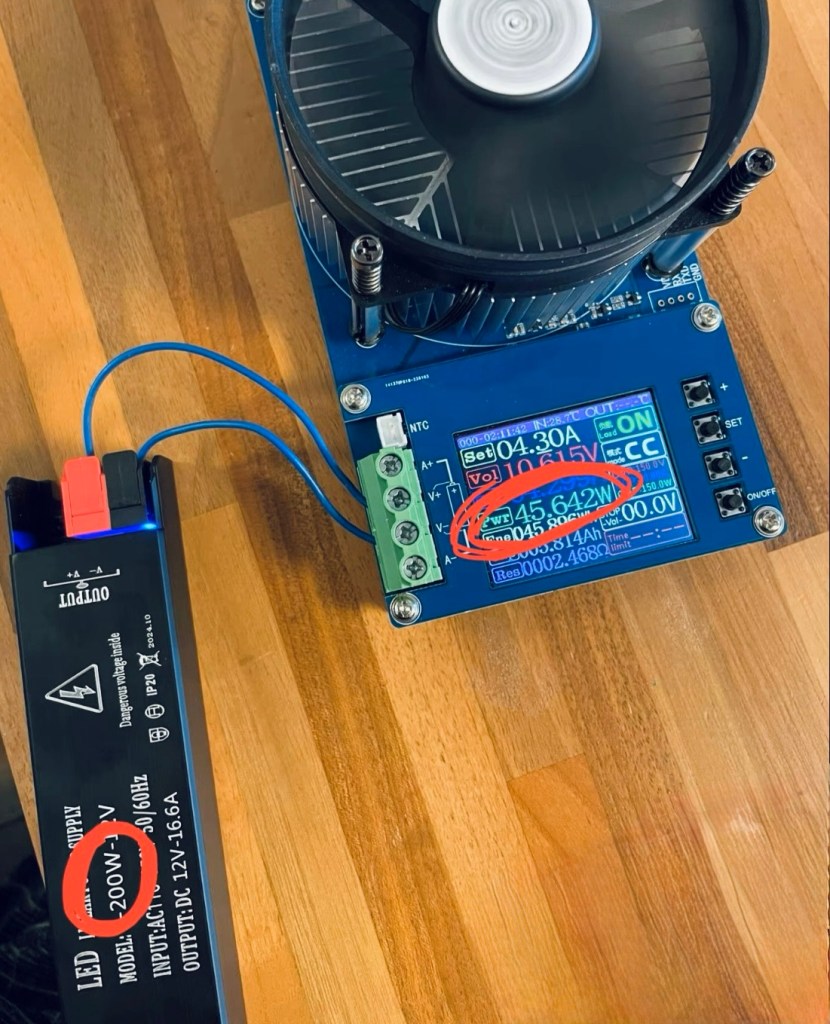
The code was written, the connections were made; it was time for testing. The cold side got cold and the hot side got hot, but far too slowly and far too little. Well, okay, maybe it would just take some time to get going….No, it just did not have enough power. Ha! Of course! Sometimes my friend Ali sends me sub-quality parts and most likely the power supply did not quite live up to its promise. The power meter confirmed my suspicion. Under load, the power supply failed miserably and did not deliver the advertised power – not even a quarter of the stated value! Another one delivered a bit more than half.
Okay then, so it‘s a simple issue of getting a proper power supply, right? Wrong. Even after I had ordered a beefy non-Ali power supply, the temperature of the cold side would not drop below the dew point. It finally dawned on me: I should have started the project with a quick calculation. After all, that‘s what makes engineering fun, right? Trial and error is fun in its own right, but a lot of the „error“ part can be avoided by up-front sanity checks. So let‘s do some numbers now.
The maximum power the Peltier can handle is 231 W, all of which is converted into heat. The specs of the Peltier say it can pump 134 W of heat. So both the generated and pumped heat need to be dissipated by the CPU cooler of the hot side. And its capacity is rated at …. 110 W. What that means is that even if the Peltier were moving no heat at all, the CPU cooler could not even get rid of the generated heat. Or the other way around, even if the Peltier itself did not generate any heat by itself, the pumped heat would be above the cooler‘s capacity for heat dissipation. In yet another formulation, it means the hot side cannot get rid of heat effectively enough to keep the other side cold.
Challenges & Learnings
The frustration of seeing how my contraption eats 200 W of electrical power to take zero humidity out of the air was high. The frustration over the realization that I could have avoided all of it by careful planning was even greater. I chucked the project in a box and left it.
I am not calling this a lesson because I have learnt it many times before, so let‘s call it a reminder: proper equipment costs money. To expect that power supplies deliver what they promise when next to nothing was paid for them is naïve. Not that Ali has bad stuff, he has sent me lots of good stuff, the trick is just to know when paying less makes sense and when it doesn‘t.
Reflections
If you’re a careful reader, you will have noticed that in my mini lathe project I claimed not to have worked with ESP32 before and my goal was to learn more. It turns out I had used an ESP32 before and also programmed it using AI, only to completely forget about it. This was not just an abandoned project, it was also a forgotten one.
I have not lost the fascination for Peltiers, though. If you have made it to this point and still think Peltier elements are not the bee‘s knees, consider this: They work in reverse too! Jaja, so if you heat one side and keep the other side cool, it will generate a voltage. Then they are called TEGs, thermoelectric generators, but it‘s the same thing. The reason why not everyone and their uncle is using them for everything is that they are abysmally inefficient. In the heat pump configuration you can expect 5-10% efficiency; in the TEG mode it’s somewhere at 2-5%.
Have you tried something similar? Got tips or questions? Feel free to leave a comment below.

Leave a comment