
It has buttons
9 min read
The first flight simulator I played must have been Flight Simulator II. I remember a black and white screen and the display of a cracked windshield when you crashed. Since then, flight simulation has advanced tremendously. Today I am enjoying astonishing realism in virtual reality. Supporting that realism are a flight stick and a throttle. I mainly use Microsoft Flight Simulator and, for a while now, also DCS. The more serious one gets in an area, the more the need for serious equipment grows. The F-16 in DCS is modeled with incredible detail. Every button can be pushed and every switch flipped. What is a bit cumbersome in VR* is trying to press buttons with the mouse. Not only are there a gazillion buttons, it‘s hard to hit them accurately, especially in a combat situation. For this reason it’s handy to have the most important functions on the flight stick and the throttle. However, sometimes even that is not enough.
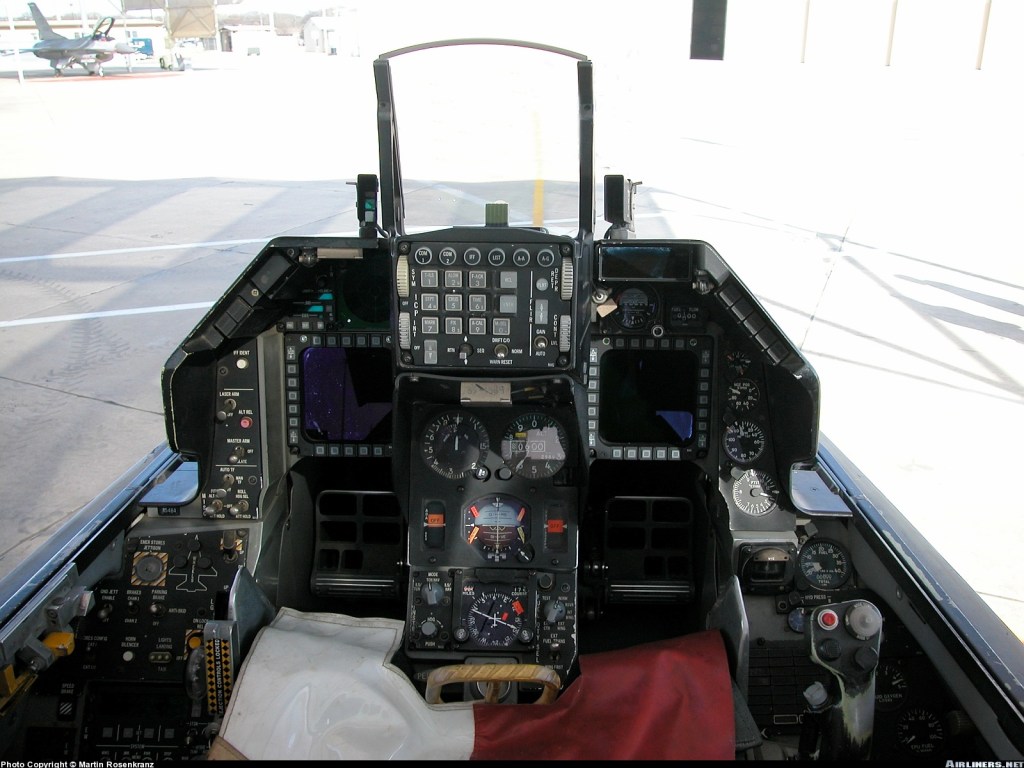
I looked around for the next addition to the VR desk-cockpit and thought an ICP would be good to have. The ICP, or Integrated Control Panel, sits right below the HUD and is the primary interface between the pilot and the aircraft systems. There are many commercial units available, but I found that even my good old friend Ali was not willing to cut me a good deal. Alright, time to DIY:)

* Don‘t get me wrong, VR is the bee‘s knees and I am thrilled to live in the age where I can just take control of a fighter jet from the comfort of my home. I don‘t mean to complain, I just want to make statements about incremental improvements.
Goal
The goal is to have my own ICP with physical buttons to interface with the DCS F-16. This would elevate realism and hopefully translate to more in-game success and fun.
Materials & Tools
- 3D printer
- Soldering iron
- Glue
- Thread inserts and tool
- Programming interface for STM32 microcontrollers
- PCB, Electronic components, USB cable, … (see BOM)
Process
I found a guide for a DIY ICP on GitHub by Martijnve23. It‘s a good source of information and he covers most of the steps. Considering it‘s fully free, there is not much to criticize.
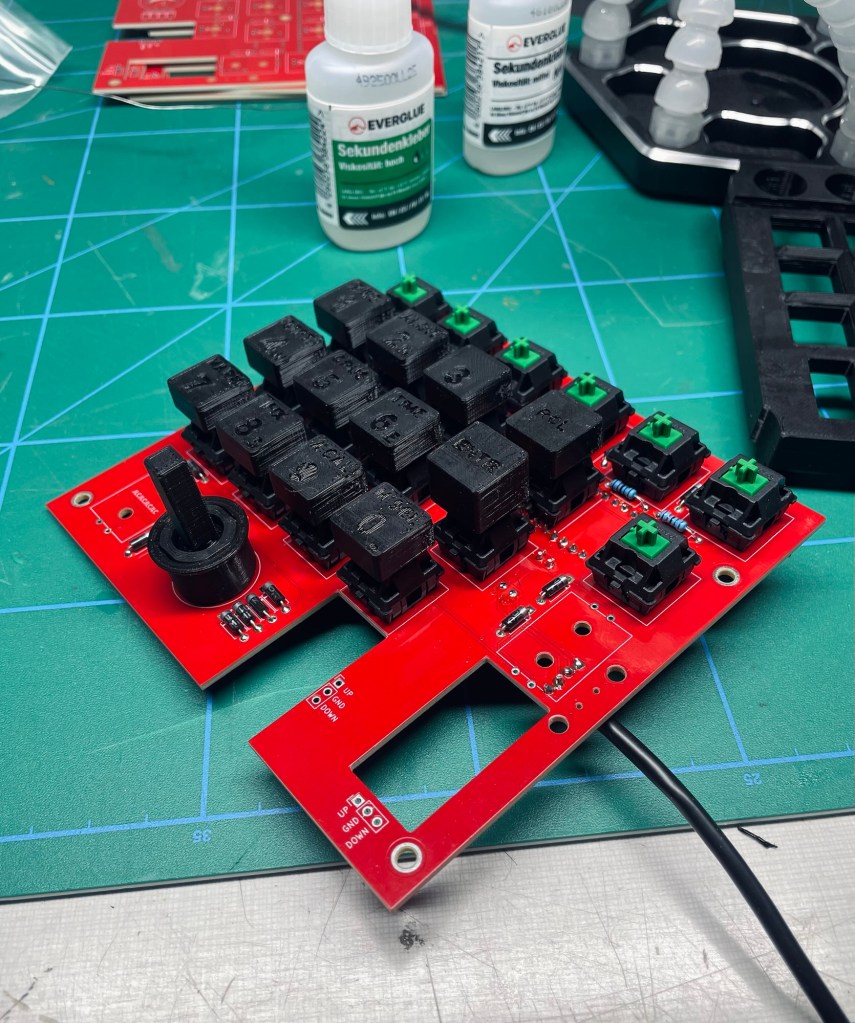
To begin, I sent the Gerber files to a PCB service, ordered the electronic parts and started 3D printing.
Luckily, the build was not complicated, it is just assembly. Of course that’s because all the development had already been done.
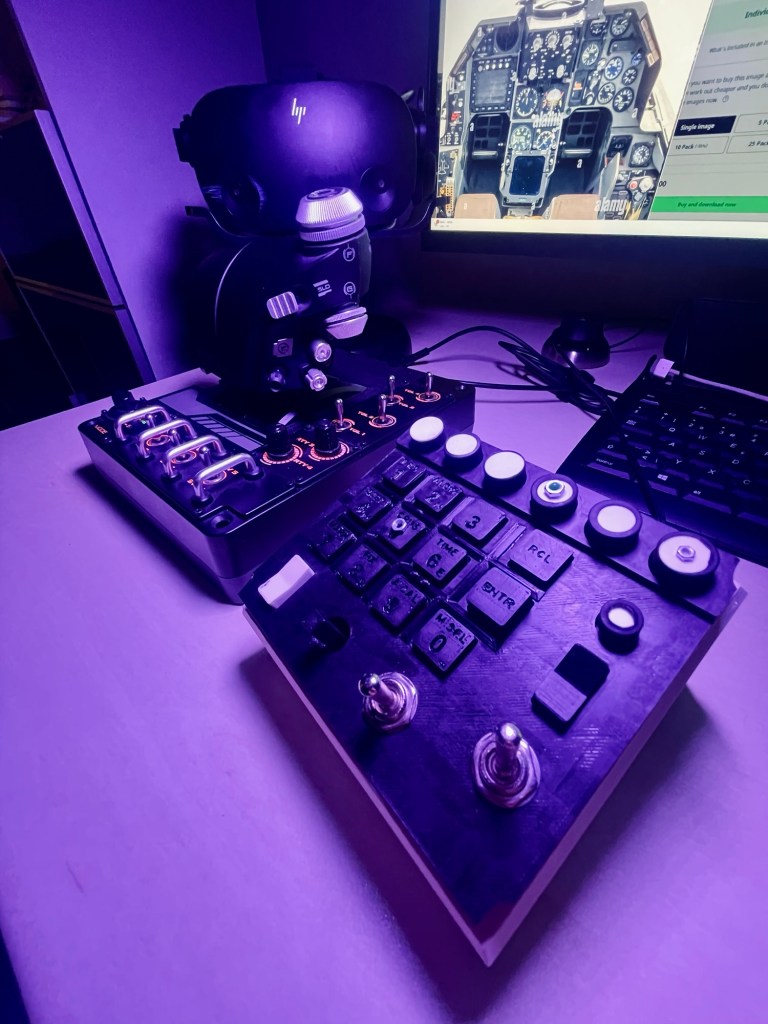
I spent a bit of time with the question of how the ICP would sit on my desk and integrate with the other controls. I am using the X56 Rhino set of controls and one option was to attach it to the back side of the throttle. The aim here was to prevent the unit from sliding around on the desk with every button press and to have it in a known and accessible position when „blinded“ with the headset. That‘s the thing about VR, you can‘t see your own hands and there is no visual reference to the real world. So any outside controls must be found by touch alone.
I was not happy with the above placement and tried either side of the throttle but it all felt a bit awkward. In the end I chose to have it as a standalone unit and place it directly in front of me between throttle and flight stick, leaving some space in between on either side for my arms when I needed the keyboard.
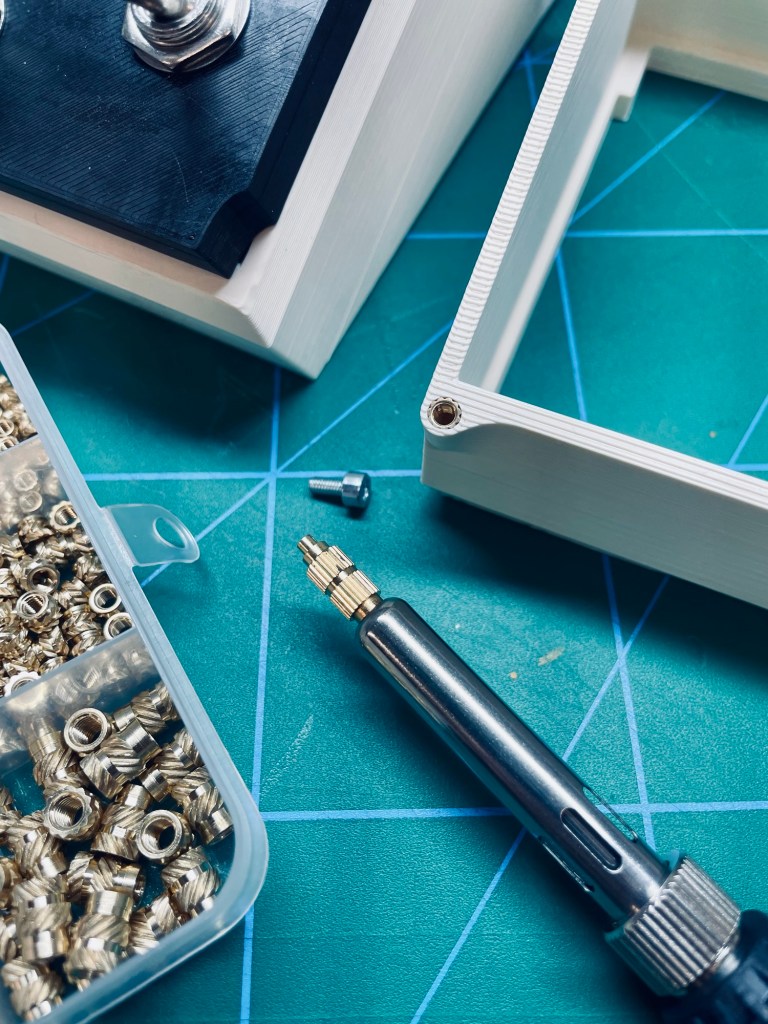
The GitHub build guide talks about different options for a desk stand but does not contain any. I took the flange part into Fusion 360 and converted it into a stand. To see which angle is more comfortable I printed two versions and settled with the shallower one.

This project was the first opportunity to use brass inserts for 3D prints. I had bought inserts and the tool a while ago but more with the thought of “For sure I’m gonna use it sometime, better to have it already” than an actual need (and yes, that’s how a lot of tool purchases happen:). The build guide also mentions thread inserts. Initially I printed the non-insert version and found that indeed I took everything apart and put it back together multiple times, so it’s definitely worth adding those.
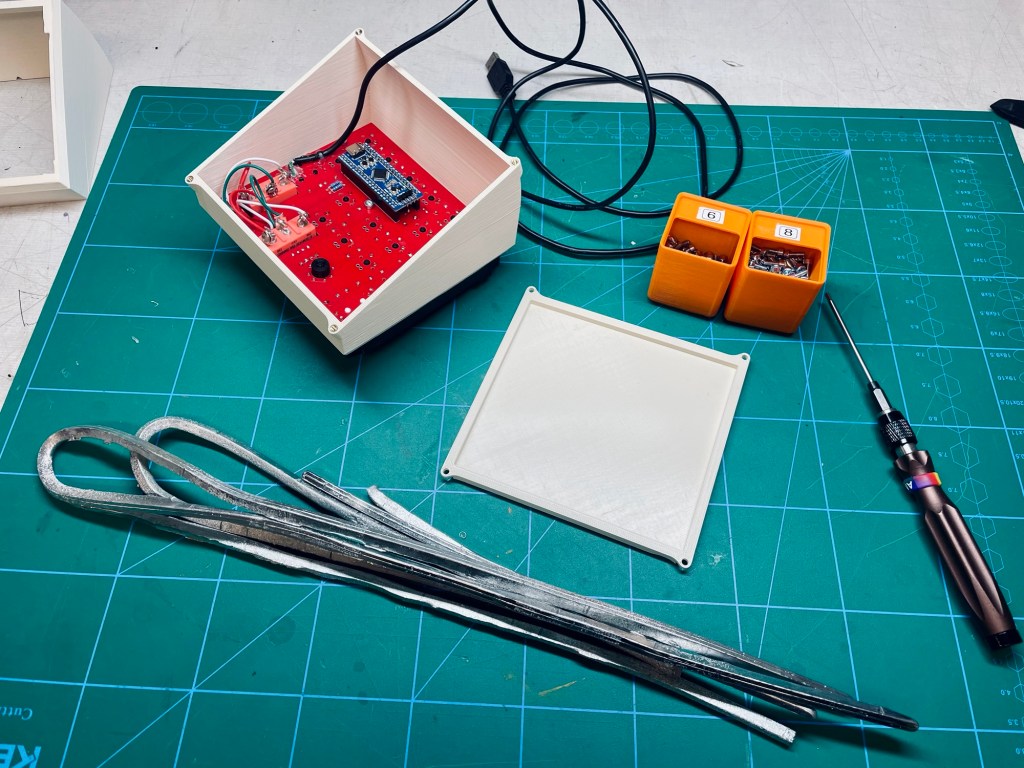
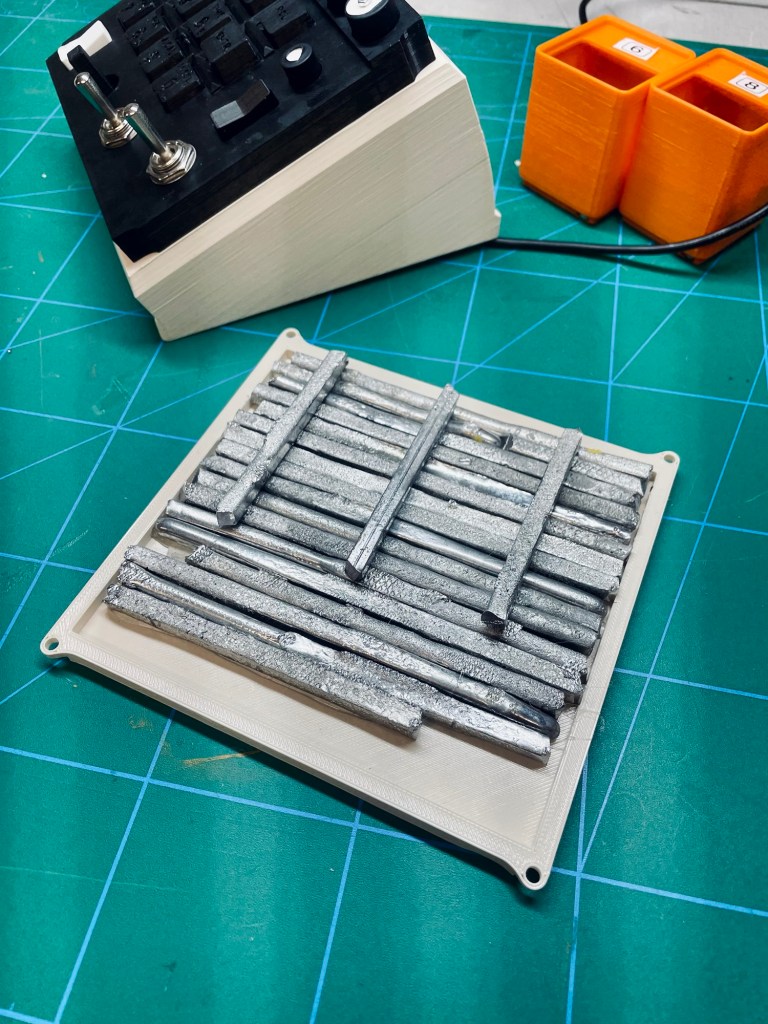
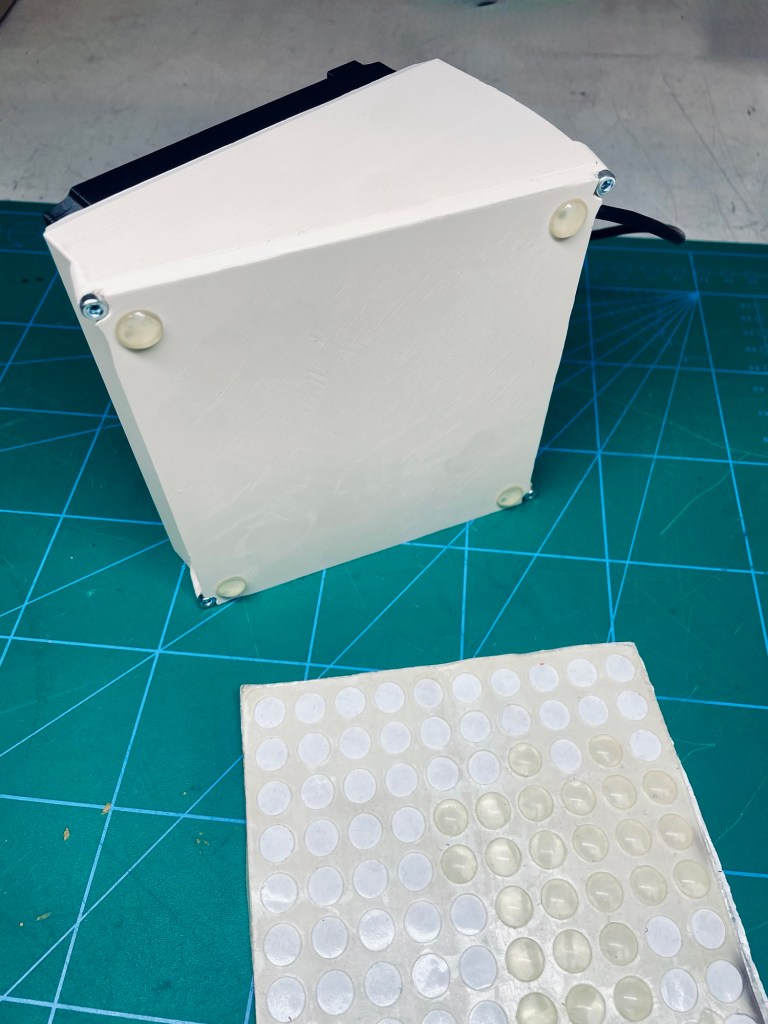
What I cannot stand about game controllers is when they are too lightweight and move around on the desk when in use. This ICP is just a circuit board and a printed shell which makes it as light as a feather. Perfect opportunity to make use of some leftover tin/lead mix I had from the terrarium projects. I cut it up and glued it into place with hot snot. Some rubber pads on the bottom finished it off.
Challenges & Learnings
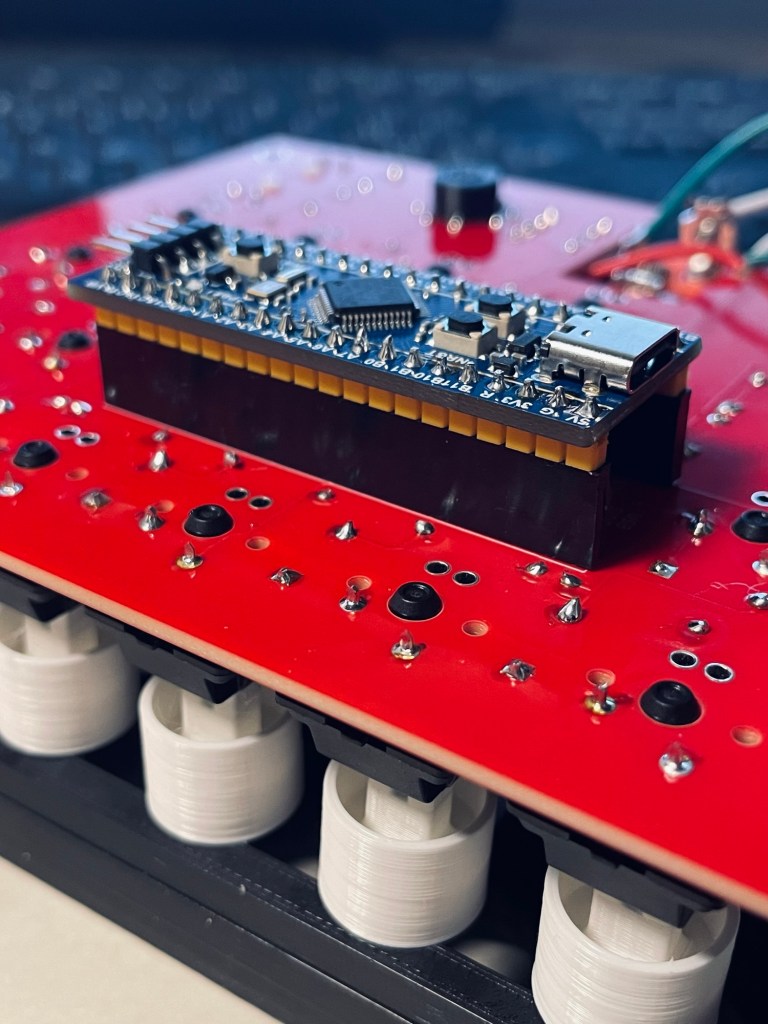
Blue pill / black pill The main hitch in this project was my inability to follow easy instructions. The BOM clearly states the need for a blue pill STM32 and I went out and bought a black pill. I have to admit I did not care at all about what’s inside the ICP and how it works. I treated the guide only as a means to get the ICP and not as a learning experience. Perhaps that‘s why I did not pay attention while buying the components. In any case, programming the controller was not an issue, but as soon as I plugged it into the headers, it shut down. There was a power supply pin being pulled to ground. ChatGPT helped to quickly trace the source of the issue and fixing it was luckily quite easy. One difference between blue/black pill (still don‘t know what they do, haha) is that the black pill has a 5V pin where the blue pill has a GND. The solution was just snipping it off and voilà, it worked.
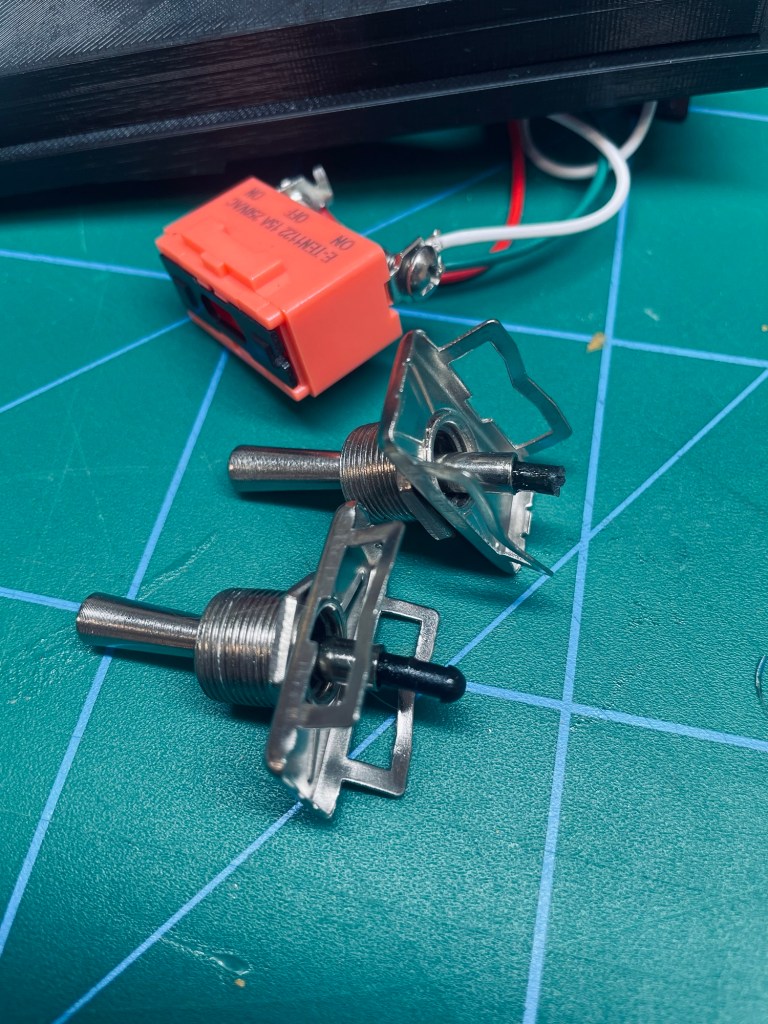
Tough switches Another issue came with the two 3-way switches. Flipping them took way too much force. That‘s likely fine for other use cases, here I would need to hold the entire ICP with one hand and operate the switch with the other. Hoping to find a good solution I opened them up and saw a way forward in those spring-loaded pins. They were simply too long for my needs and a quick snip with a side cutter was all it took.
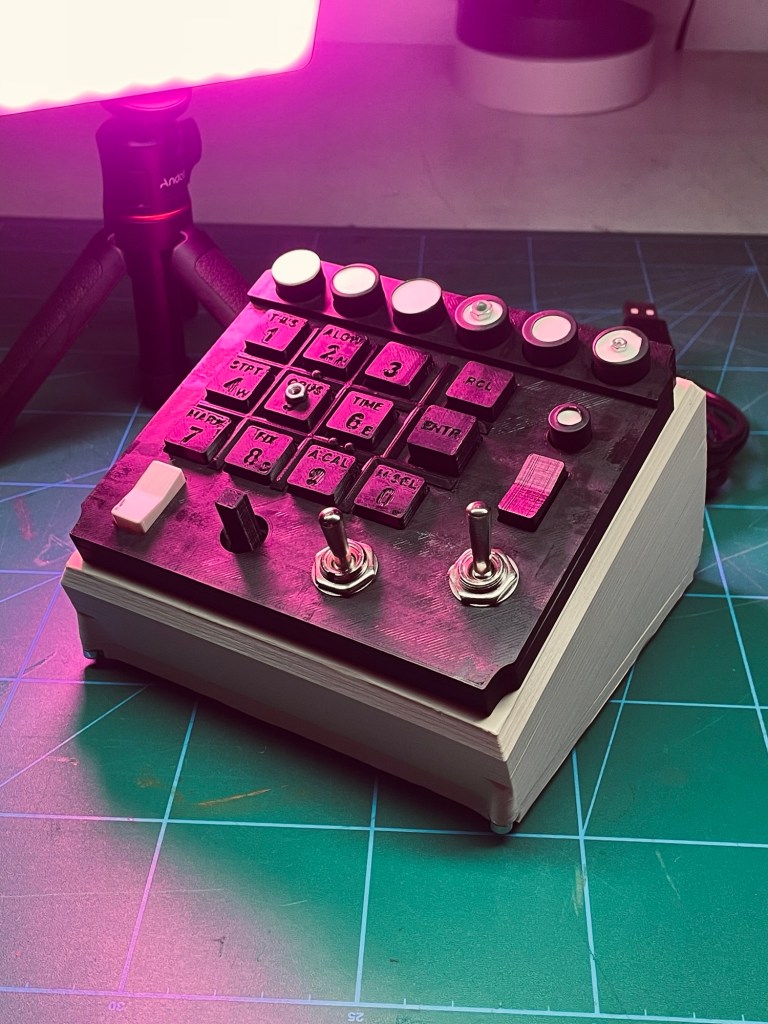
Being blind With the VR headset on, I cannot see where my hands are going and have to rely on touch. The buttons of the ICP are almost all identical. There are some clues (a single stub between keys 2 and 5, a double stub between 6 and 9, the ENTR key is longer than the others) but it‘s not enough. I glued nuts to some of the keys.
Missing stand The design folders on github do not include any files for a stand. So in that sense the build is incomplete. There is mention in the last step of stand options, but I am not sure if those are meant as ideas or reference files that are missing. Without a stand the ICP is not quite usable, there are wires and the controller is sticking out the back.
Layer lines Initially the buttons would make this raspy sound when pressed. It was caused by the layer lines of the buttons scraping against the layer lines of the case. I had printed both with coarse settings (layer thickness of 0.3 mm). I think even with a much smaller layer height the effect and sound would be present. This adds to the clicky-clacky-DIY feel of the ICP and I don’t like that feel for this project. I could either sand both buttons and case (yeah, right), cover it with some type of coating or the easiest option of shrink tubing. I had it in the right size and covered the round buttons with it. This completely got rid of all rasping noises and considerably lifted the button-press experience out of clicky-clacky-DIY territory.
5 for 1 The minimum order quantity for the PCB manufacturer was 5 pieces. The all-up cost of $ 44.95 (5 PCBs & shipping) was not high enough to make me want to do the PCB myself, even though I now have 4 extra PCBs that I am certainly never going to use. If you’d like to have them, let me know.
Result
The result is a functioning ICP for an F-16 and a feeling of accomplishment after completing a project. Let’s start there.
The glamour shots below try to hide it a bit, but the unit is not a pretty sight. Visible layer lines, uneven top surface, random print colors, unlabelled buttons, glued-on trinkets… There certainly could have been a lot more effort spent on making it look real and nice.
However, one has to bear in mind that its use is in VR, so any visual aspect is purely cosmetic for when it is not in use. In addition this was a project that was dominated by “I want to use it, not make it. NOW”-rushjob motivation. Often I fall into the perfection trap and never progress, not here.
The ICP is usable and perfectly fine for the occasions when I fly in the simulator. I would not call myself a heavy user, I have too much fun with many other projects for that. So the clicky-clacky-DIY-feel of it is tolerable. If I had motivation towards a more perfect version, I would focus on recreating all printed parts in something more solid, with more heft. For the sake of realism and immersion, especially the buttons would benefit from an upgrade. They are standard keyboard buttons and feel like them too. I am sure the real deal has a completely different button response. But down that road is darkness – if I start to think about perfecting the ICP, immediately I think it would not make sense without recreating more and more of the cockpit. The end of this trail of thought would then be a complete F-16 cockpit with all instrument panels, perhaps on a moving platform in its own room of the house.
Reflections
There had been a break in the project. I put it aside for a while after had motivation left me (and there was not a lot to begin with). I had done little to no research. The build guide images were proof enough for me that someone had done it before and that it would be simple enough. My assumption of a hassle-free assembly collided with the realization that there was no stand and I had to design one myself.
Making the stand took maybe 30 minutes, that was never the problem. It was about assumptions, realizations and low tolerance to frustration. In a project like this one where the motivation was only in the use of the end product and not in the build process, this meant there was no motivation for additional steps.
As a personal goal I would like to recognize these situations on a more objective level in the future. Instead of seeing this unexpected step as huge additional effort and stopping the project, I want to see it as just part of it and continue. Joe Barnard, one of my internet heroes, has a great video on finishing personal projects.
Resources
Have you tried something similar? Got tips or questions? Feel free to leave a comment below.

Leave a comment