A pile of wood
8 min read
At first glance, this is exactly what the title promises: a pile of wood. Strips, sheets, and small parts with a suspicious amount of confidence placed in the builder. Somewhere between these pieces and the picture on the box lies a ship. This post covers the early stages of closing that gap, one plank, drawing, and improvised solution at a time.
Goal
- The starting point had to be a kit. I was not interested in building a ship of this scale from scratch or starting with only drawings.
- I wanted the model to have respectable size; I was not going to go through all the trouble for a tiny tub:)
- I did not want to have a warship on display in my living room, so many of the better-known ships like the HMS Victory or HMS Bounty were out of the question.
- Looks count above all. The selection would be made for elegant lines and a pleasing overall look.
I found figureheads an interesting thing as well, so if the ship had one that would be a bonus.
Materials & Tools
- Model kit; I chose the Flying Fish by Model Shipways
- Glue (different kinds recommended, wood glue & CA)
- Clips to hold things in place while glue sets
- Sandpaper (Aaaaaahhh)
- Needle files
For the steam tube
- Steel pipe (I chose 1 1/4“ size), T section, cap and plug
- 200 W heating element
- Pipe insulation material
- Power cord, plug
- Teflon tape
Process
At first glance, the box is just a bunch of wood strips… What have I done? Joking aside, there were also a number of laser-cut sheets, metal castings and other small parts. Still, the main work will be to wrangle tree carcasses. How is this ever going to look like the image on the box??

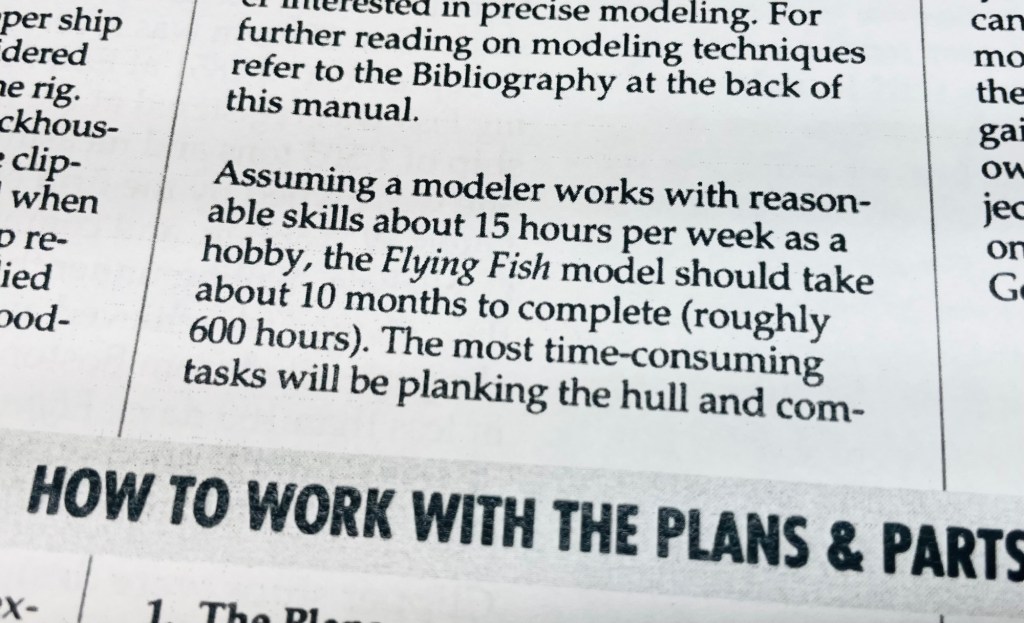
It‘s simple: The manual states that only 600 hours of work separate me from the end result. One thing is clear, I won‘t be finished anytime soon with this project.
The first step is to study the drawings to get a sense of it all. There are several large drawing sheets to take in, each chock full of information. It is definitely overwhelming at first, but fun and rewarding at the same time when all the lines start to make sense. Then it‘s on to the hull skeleton. The laser cut parts are of immense help here.
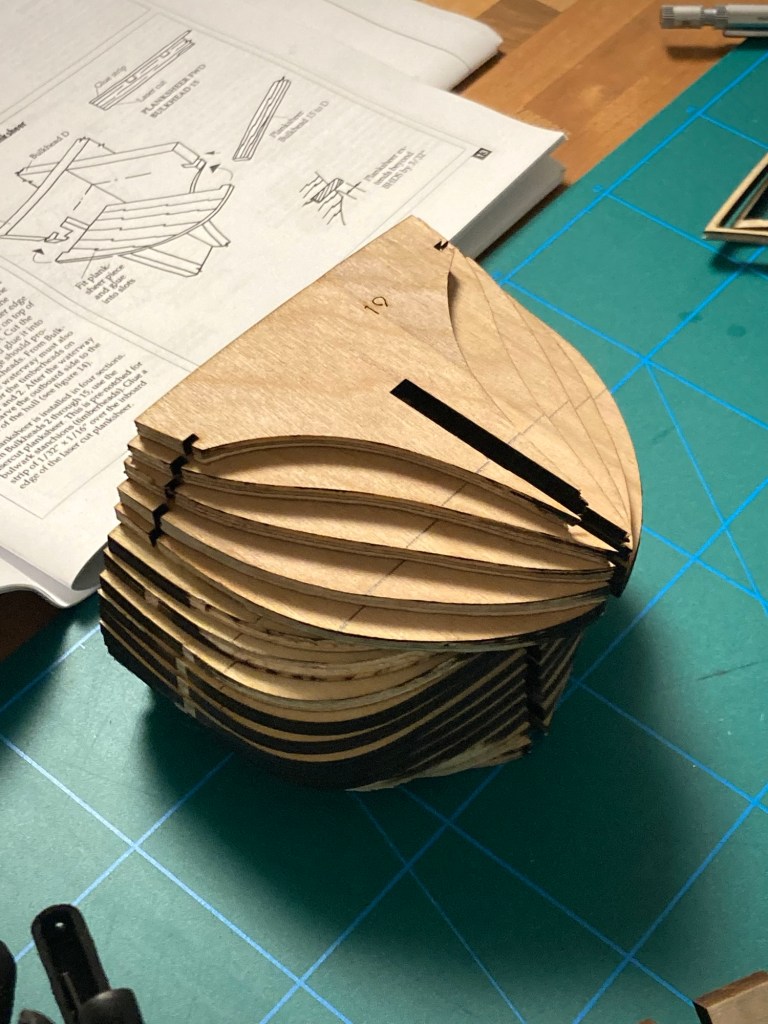
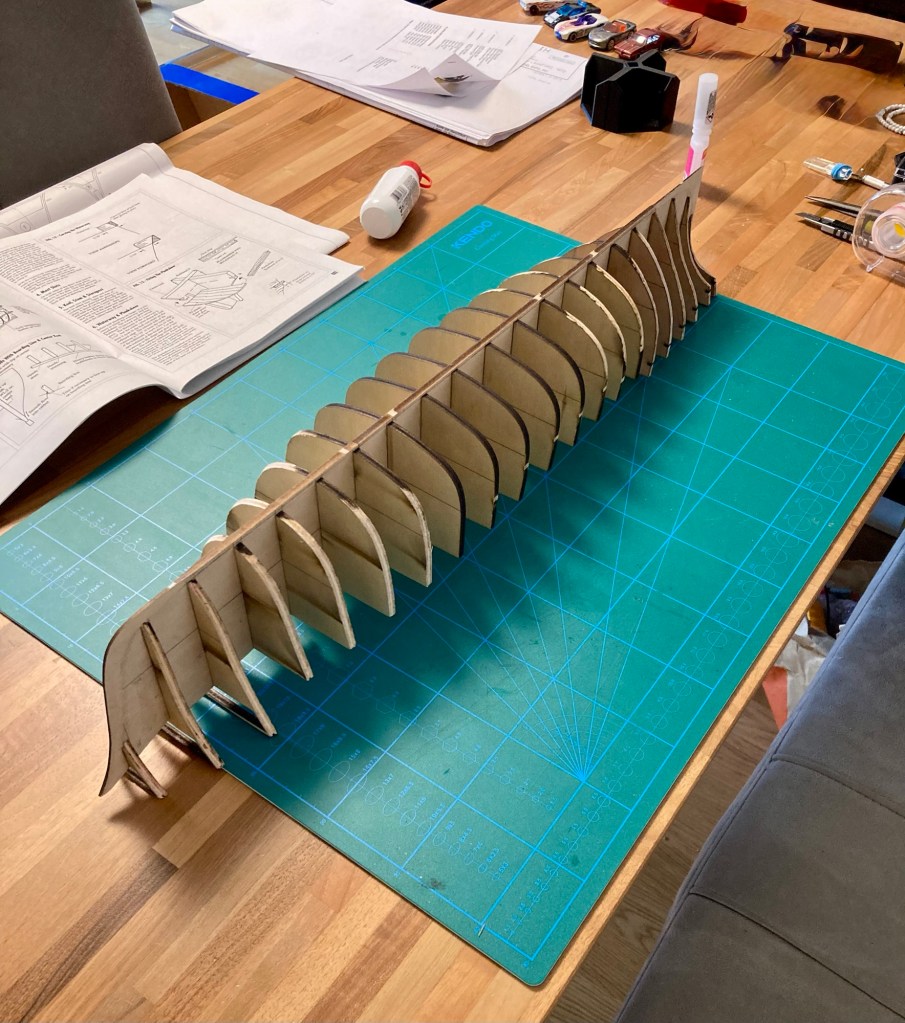
The bulkheads are lined up on the keel. Mistakes at this stage obviously later transfer onto the final shape of the hull. What was less obvious was that the laser cut parts were not a guarantee for precision. The only benefit was that their shape did not need to be cut out by hand. Once they were lined up, some fine-tuning with sandpaper and file was needed to get closer to the desired shape.
Peeking at the instruction manual I saw that the next step would be planking of the hull, which will take a very long time. And before this enormous step can even be kicked off, a means of bending the planks was needed. The instructions are funny in that sense, they will say „just steam-bend this and that“. Funny you! The „just“ implies that one simply has all that equipment sitting around. For me it meant I had to jump on a side project. Usually I like those, but knowing how much work was still ahead and then unexpectedly being diverted onto a side task killed the motivation. At this point the project was put on hold.
Fast-forward a full three years and I have gathered motivation for the project again. What was nice (and it often happens that I abandon tasks at 90%) is that I had already bought many parts for the steam tube. There was little effort needed to finish this side task and this „head start“ provided the needed boost in motivation.
The planks to be glued onto the hull will have to conform to its curvature. It is much easier to glue them when they have the correct shape than to force them onto the hull while the glue dries. Also given the high number of planks to be processed, this side project clearly pays off.
I designed the steam tube to hold the wood in the horizontal section. This way I could add strips of any length. In a vertical orientation only the longest strips would stick out and smaller ones would disappear to the bottom. The vertical section contained the heating element, the plug sealed off the „viewing port“ and refill opening. I had bought a heating element (from my good friend Ali of course) that came with a nut. The nut was brazed onto the pipe cap. All threaded sections were sealed with Teflon tape.

Short story from the first trial: Once everything was set up I filled the pipe with water, plugged it in and waited for the water to boil. It took a while to get there and then the horizontal section needed warming up too. Before the pipe itself gets to temperature, a lot of steam condenses on the walls and would not saturate and heat up the wood strips. Whilst I was waiting for this I thought I‘d go and have lunch. When I returned I was welcomed by an acrid smell. What the…? All the water had evaporated and the heating element happily continued heating. So much so that it started glowing and the steel pipe was melting the plastic insulation.
Planking the hull starts with transferring the hull lines onto the bulkheads. This is done in sections or „belts“. The space between belts is then later filled in. This was a tedious process (I bet the entire build will be tedious, haha) and mistakes made here show easily on the belt lines. I stuck to the markings only as a starting point and adjusted the planks by eye, looking to get smooth lines.
There was a small problem to solve when it came to gluing the planks to the bulkheads. I chose wood glue for this step which does not set instantly. This meant that the planks had to be held in place until that time but I did not have any tools to do that. I saw some people using pins but the bulkheads are made of plywood which makes driving pins into it hard. I took paper clips, glued pieces of sandpaper to the inside surfaces for additional grip and tacked a small M2 nut on the side. Now the clips had a solid grip on the bulkheads and the screw gave a precise and adjustable way of pushing the plank onto the bulkheads.

Now with a way of bending the planks and keeping them in place, it was a couple of hours of peaceful steam bending, clamping and gluing. Step by step the pile of wood started to look more like a ship.

Challenges & Learnings
- More is better The motto is not true for everything. For the heating element it would have been. Whilst the selection for the 200 W version was not completely wrong, it takes a while for the water to boil and then another while for the steam to heat the pipe and come out the other end to actually heat and soften the wooden strips. A more powerful element would get there faster and if too powerful can just be dialed down. Not a biggie though. (Yes, a quick calculation before buying could have saved the day as well, hehe)
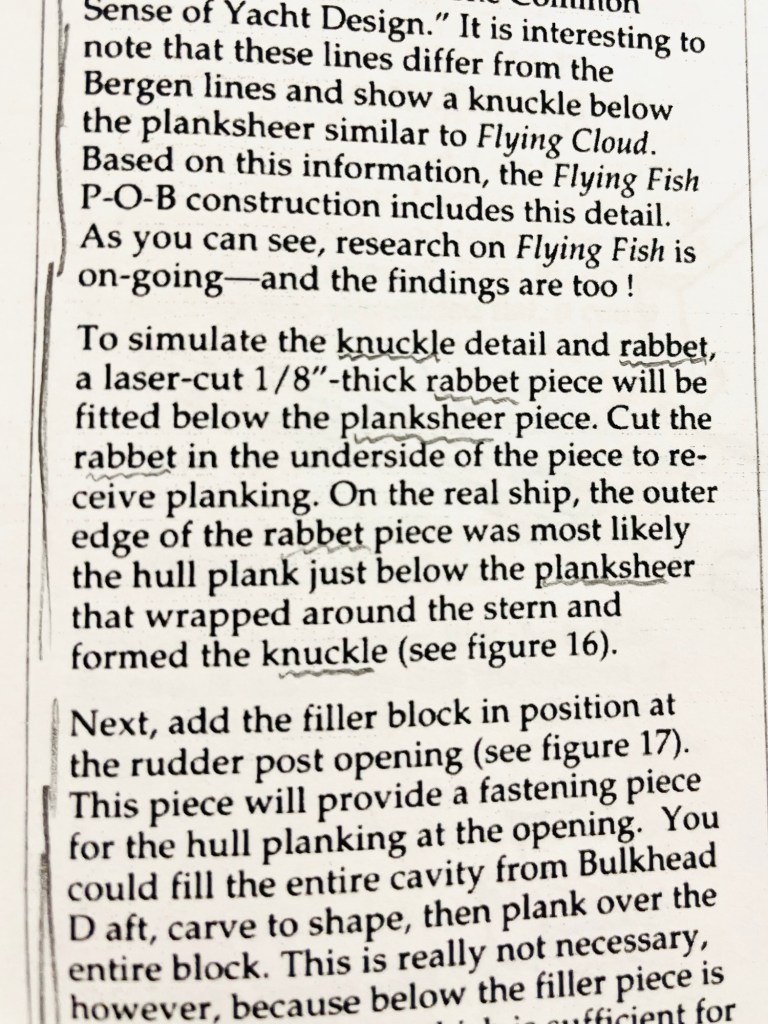
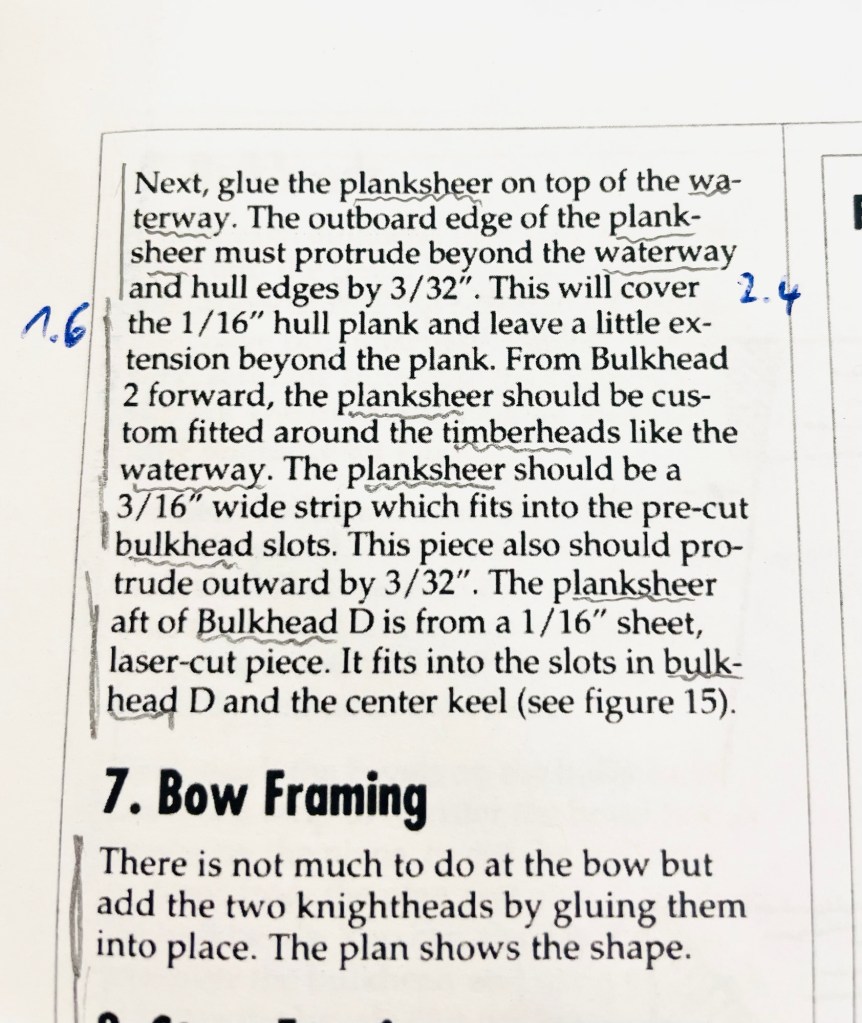
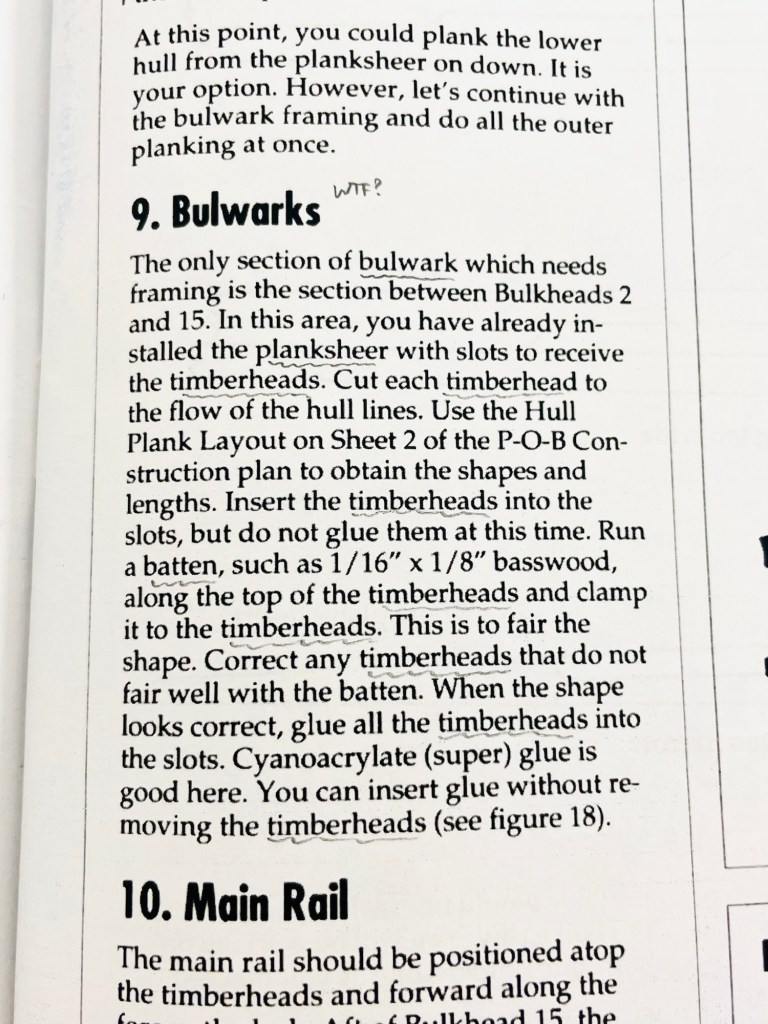
- Having no maritime experience to speak of, I often had difficulty making sense of what was written in the instruction manual. Take these passages for example:
- The build at the stage I am at takes patience. I would glue a plank, set it aside to dry and turn to do something else. It‘s not easy to keep working at it for long periods of time. Perhaps for the full planking I will switch to CA to speed up the process.
- It‘s of course not the first time I work with stupid units, so I can manage. But it‘s a pain to convert everything to sensible, clean and real units (yes, I’m on team metric. Metric – used worldwide. For reasons).
- The planks come in long strips and the instructions say to cut them to lengths of maximum 5“. This apparently is about the longest timber that would have been available. So to keep everything to scale I should cut up the long strips just to glue them back together on the hull. Haha, yeah, not doing that. Do I look like an idiot who would cut and glue wood for 650 hours? Certainly not. I look like an idiot who will only spend 600 hours, haha. I will just mimic joints with a scribe line.
Result
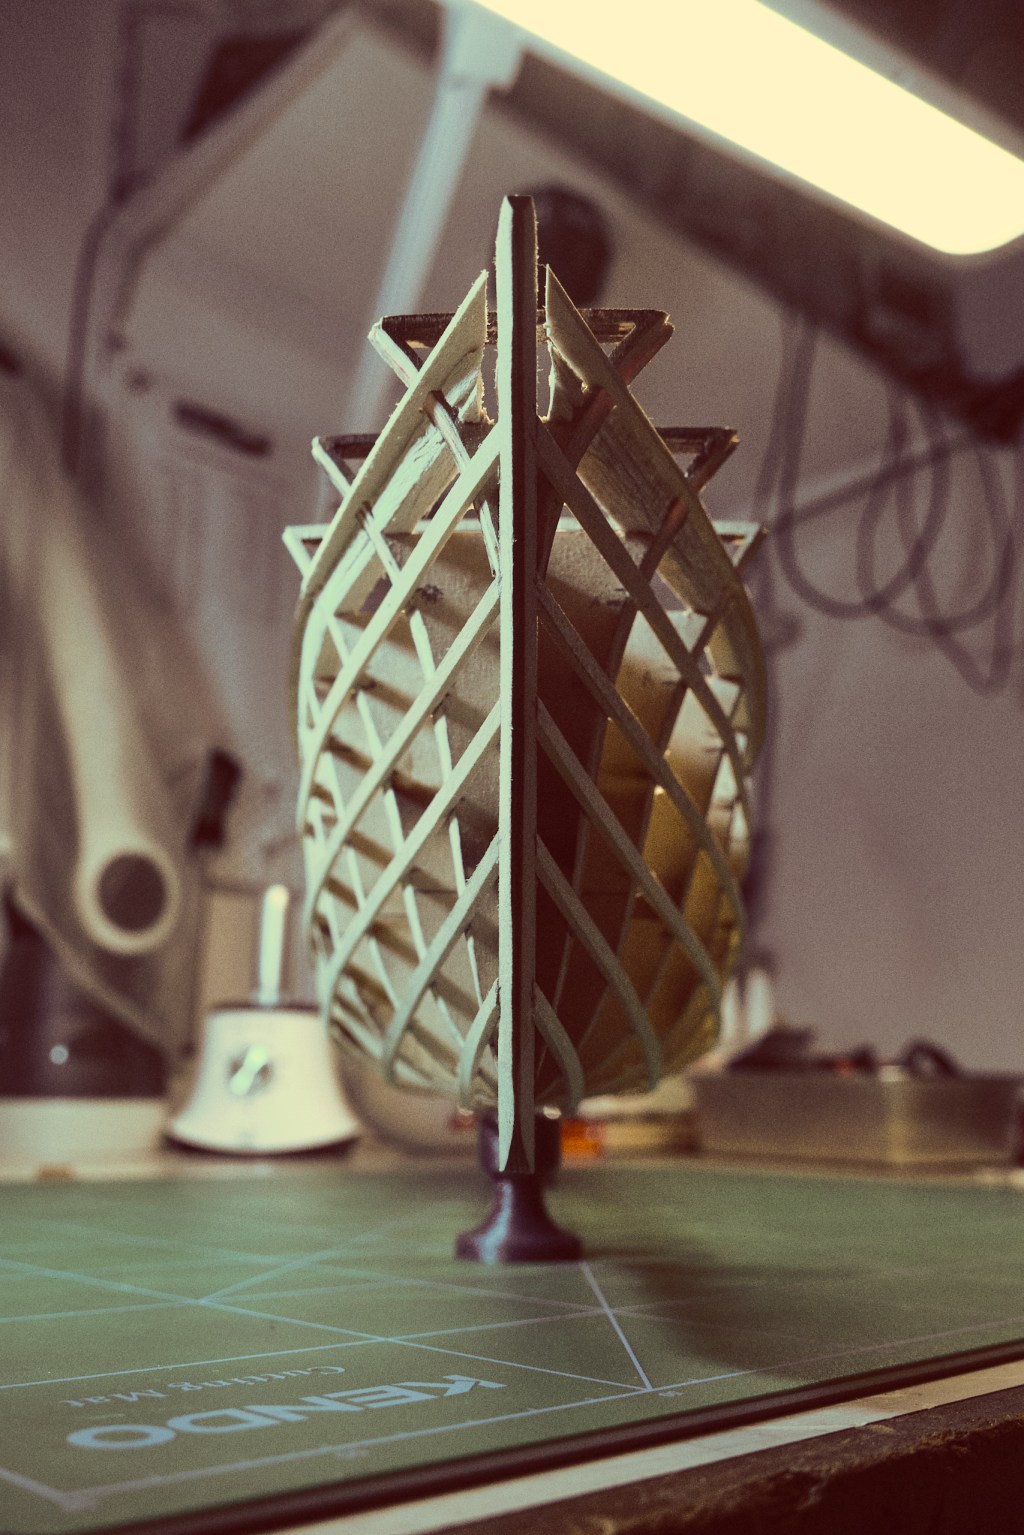
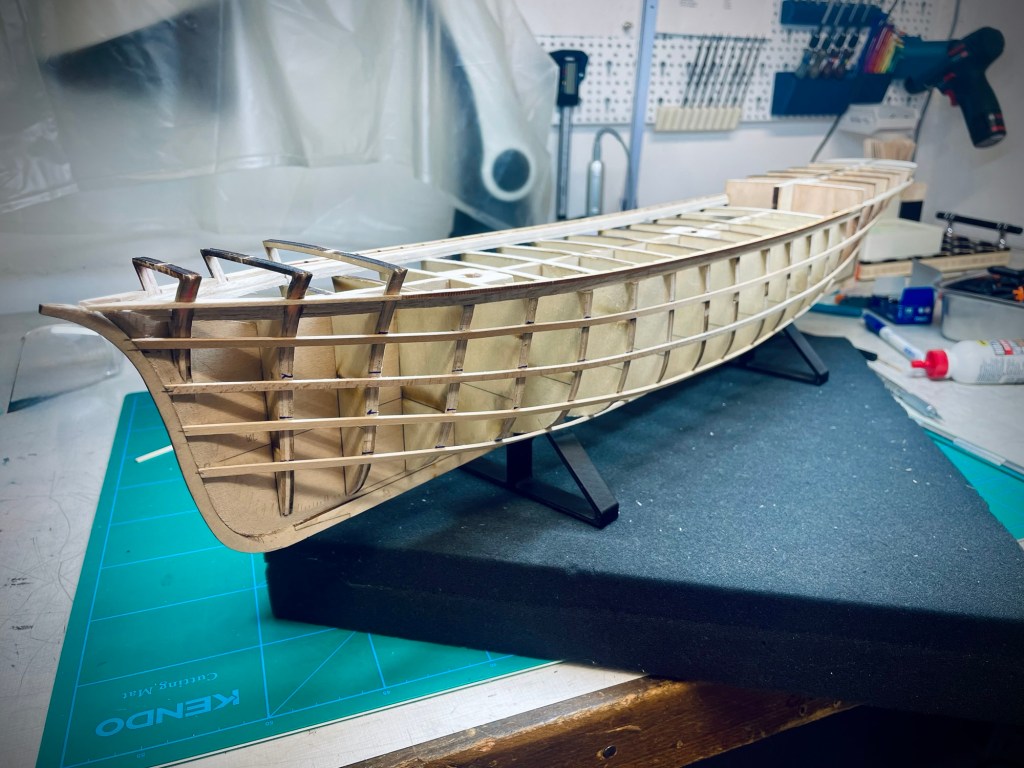
The main planks of all belts are in place and I already enjoy looking at it. I have become used to seeing the floating-bulkhead-look for a couple of years, now with the first planks on it already looks quite different.

Reflections
Would I change anything so far? Well this point is too late to change, but for next time I would definitely try to assess how much work it is going to cost me before launching into a project. Had I known the manufacturer estimates 600 h for the build, I might not have taken on this enormous project. Now that I have I will roll with it. It just means I will distribute the work over longer periods of time and it may take even years to finish.
What would have frustrated me in the beginning years of modelling is now a very satisfying part: Not having detailed instructions for every step. I prefer to solve problems my own way than go down a predefined path.

Resources
Have you tried something similar? Got tips or questions? Feel free to leave a comment below.

Leave a comment