Lost Heat
9 min read
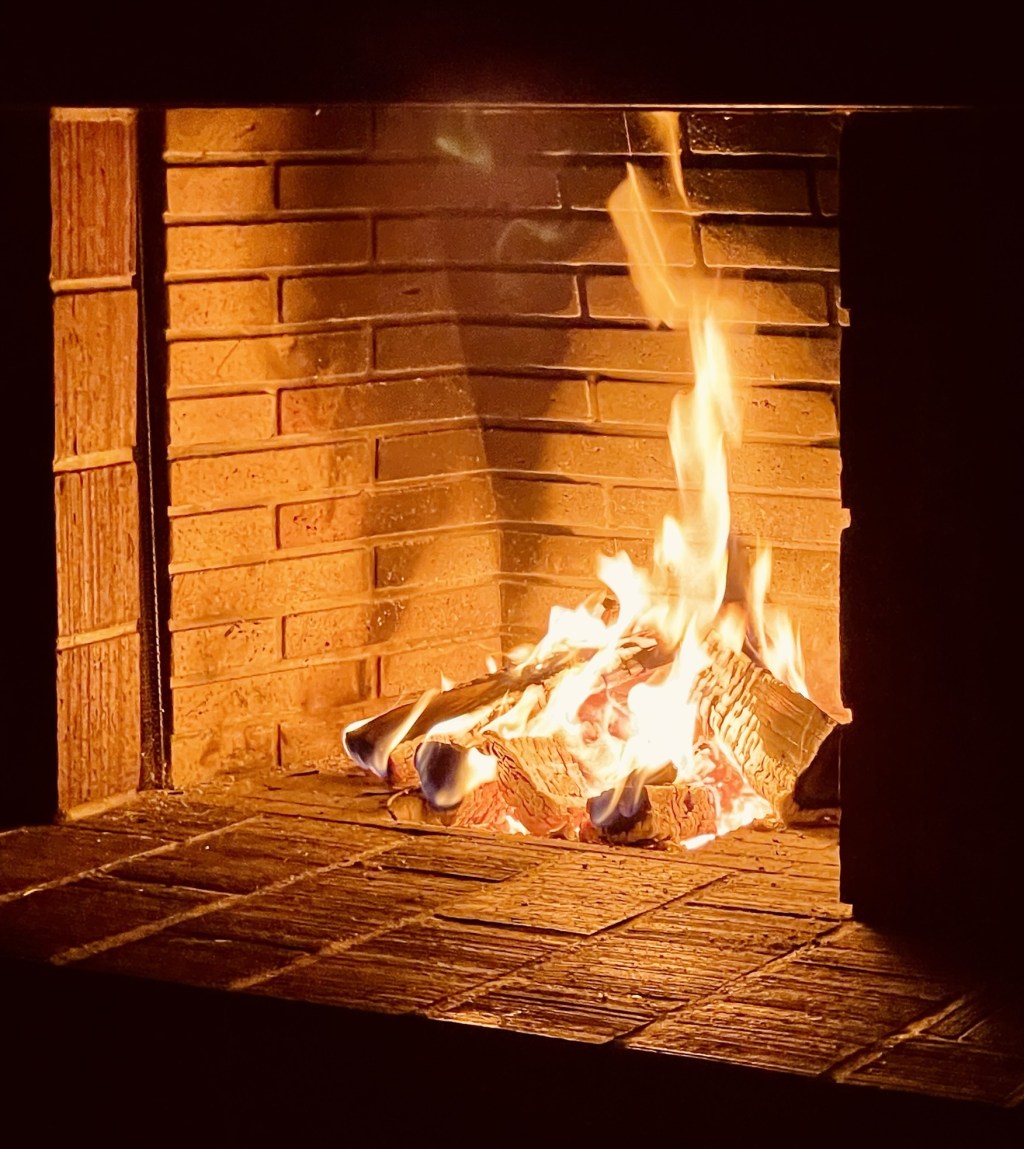
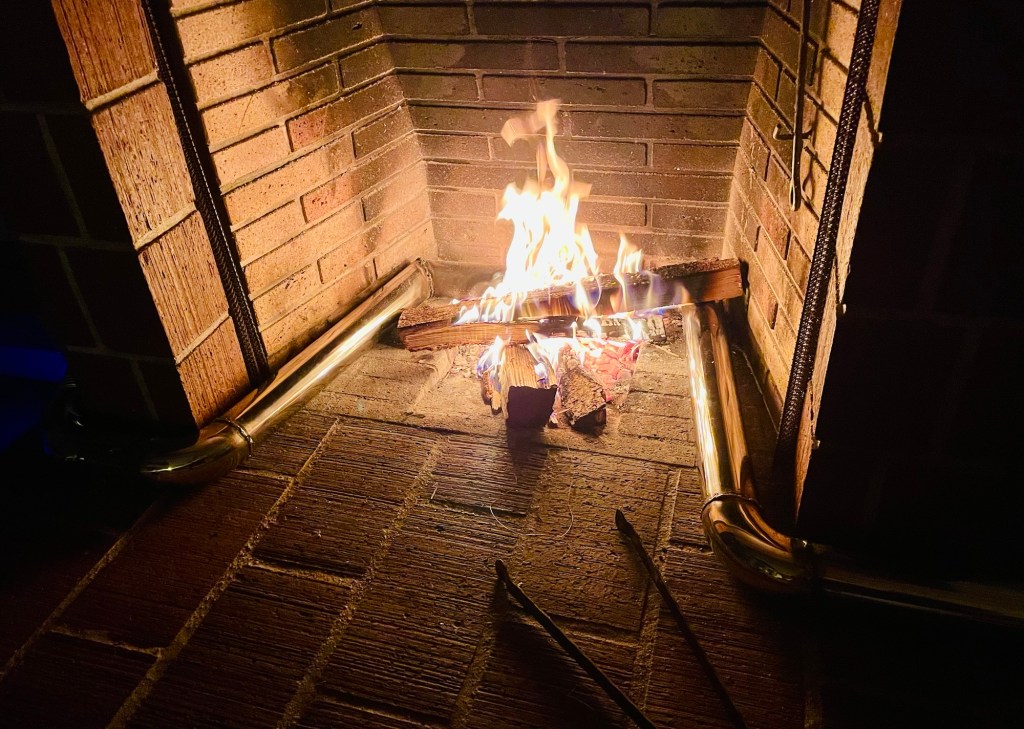
Having a fireplace is a wonderful thing. I cherish it. Lighting a fire at the end of the day changes the atmosphere instantly. The sound, the glow, the smell of burning wood – it all makes the room feel alive. There’s something deeply satisfying about it, watching the flames take hold and settle into their steady dance…
The problem with this fireplace though is that all the heat just goes straight out the chimney. Ciao. Gone. Adieu. Unless you stuff it with tons of wood and feel some of the radiated heat, you get no heat at all. I‘m not sure if that was the intention when it was built or if there is something wrong with it. It seems it’s more for show. In any case, I intended to fix it.

Goal
Straightforward goal: Rerouting the heat of the fire to heat the room.
The plan was to weld together a series of pipes and place them up above the fire, right before it all goes up the chimney. The passing hot gases would heat the pipes on their way out. A small fan at one end of the pipe pushes air through and thereby hot air out the other side. Sounds simple, right?
Materials & Tools
- Stainless steel pipe
- Welding equipment
- Angle grinder (only if you suck at welding. Just kidding, it‘s needed anyway)
- 3D printer
- Fan and power supply
Process
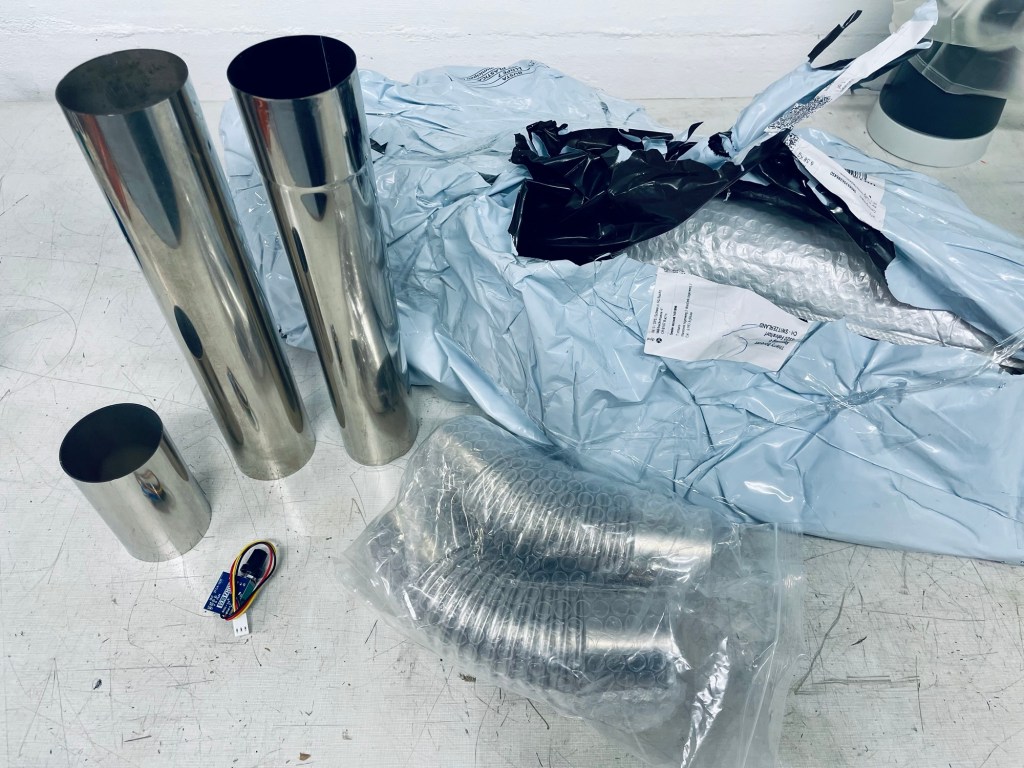
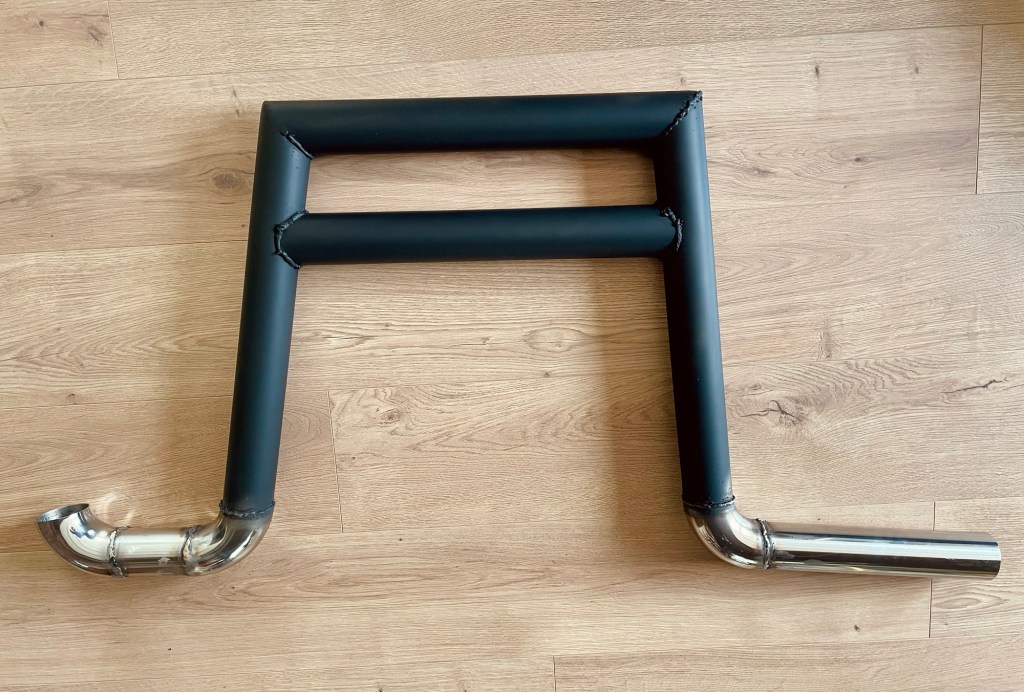
With size measurements from the fireplace, I ordered steel pipes in different lengths and shapes. The project was also a perfect excuse to buy a welder. I have always wanted to weld but never really had projects that would require one. Also, good equipment is pricey and the hassle of renting gas bottles prevented me from going down that path. I chose a cheapo flux core wire welder which does not need a separate gas supply.
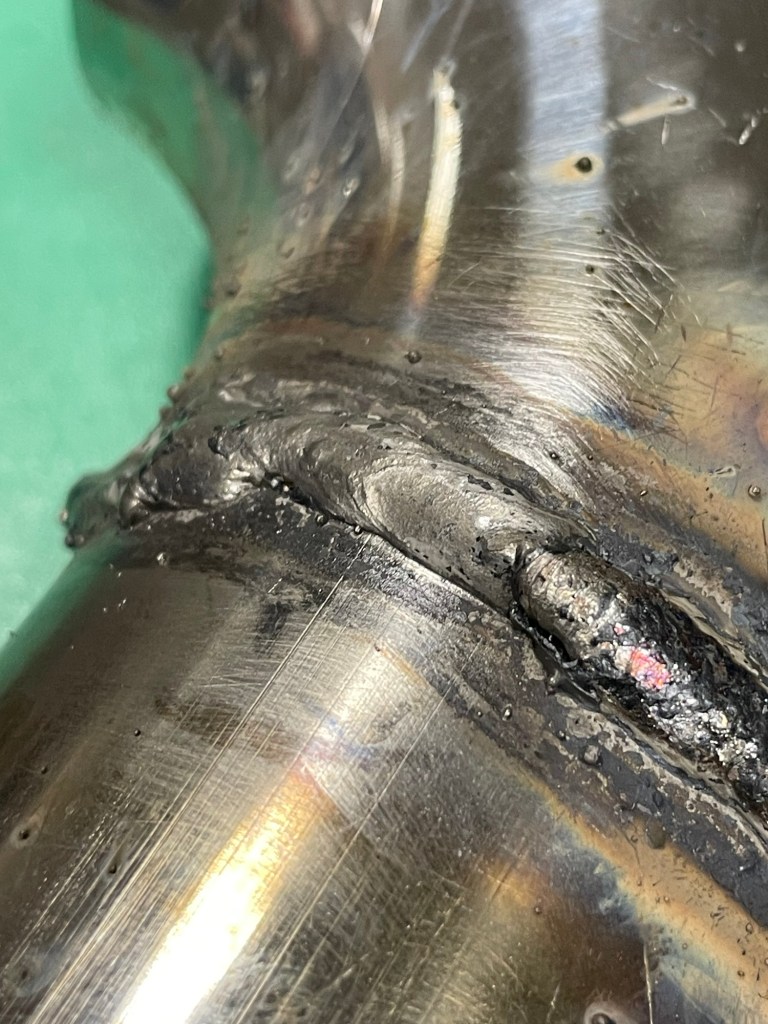
As it often happens though, you get what you pay for. Now I hear what you‘re saying, „Yea yea, buy cheap equipment and wonder why you get shitty results“. I‘m not. I admit that also I have no welding skills. But shitty welding skills coupled with shitty equipment really do not make for nice welds. See for yourself:
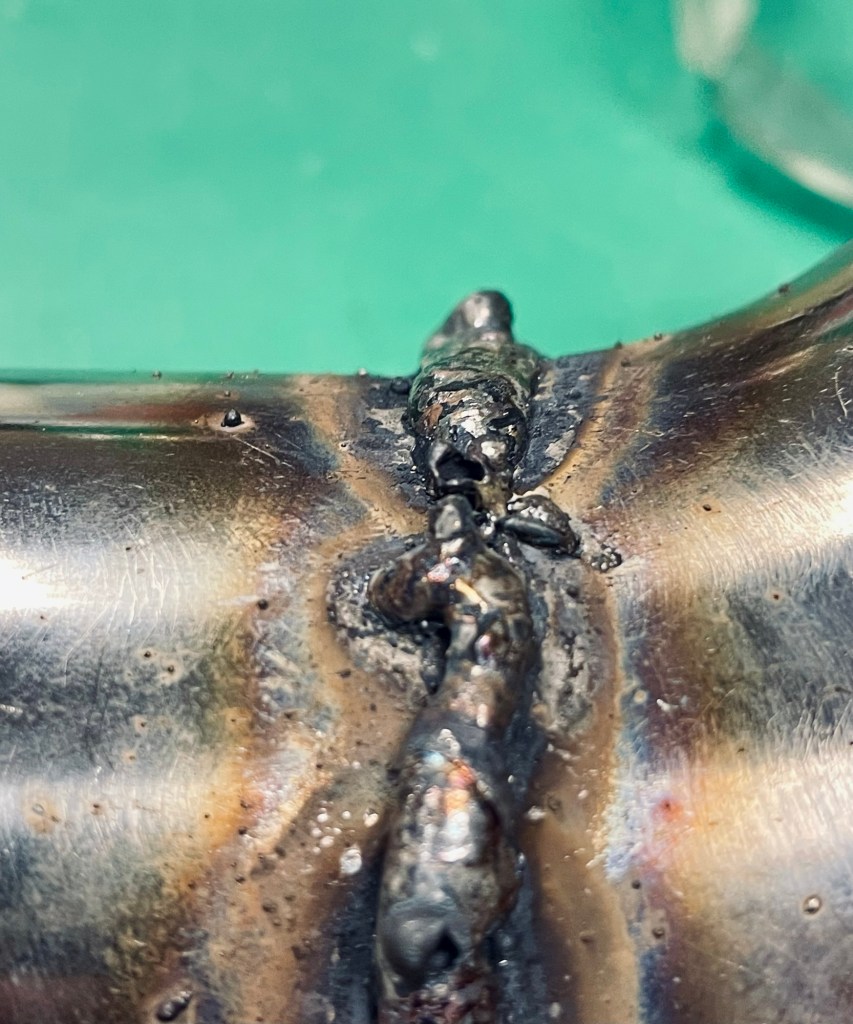
Any trained welder will shudder at the sight. I did too. I was secretly hoping for better results too to be honest. But this project was not going to be a major milestone of my life and so the emotional recovery was quite swift. Progress was more important than weld quality. Some turned out slightly better than others and the ones that didn‘t got a treatment with the angle grinder.
After the first couple of pipes were forcibly wrestled into a unit, I turned to designing the fan adapter piece. It was a simple part and worked on the first try. I was a bit concerned about directly attaching a plastic part to a steel pipe that could potentially get quite hot and melt it off.
Time for a first try. At that point I had not yet received the pipe clamps to secure it to the top and just shoved it in the fireplace at the bottom. For sure it would get hot there as well and give me an idea of how far my goal was from reality.

After I got a good fire going and the fan turned on, hot air was indeed coming out of the outlet. Interesting to see was how the intake side of the pipe stayed cool even about halfway into the fireplace. So my concern about melting off the fan adapter turned out to be unfounded, the cool air removes way more heat from that end of the pipe than what can travel through the metal the other way. All in all though, the heating power of my shiny hack job was quite underwhelming. There was more work to do.
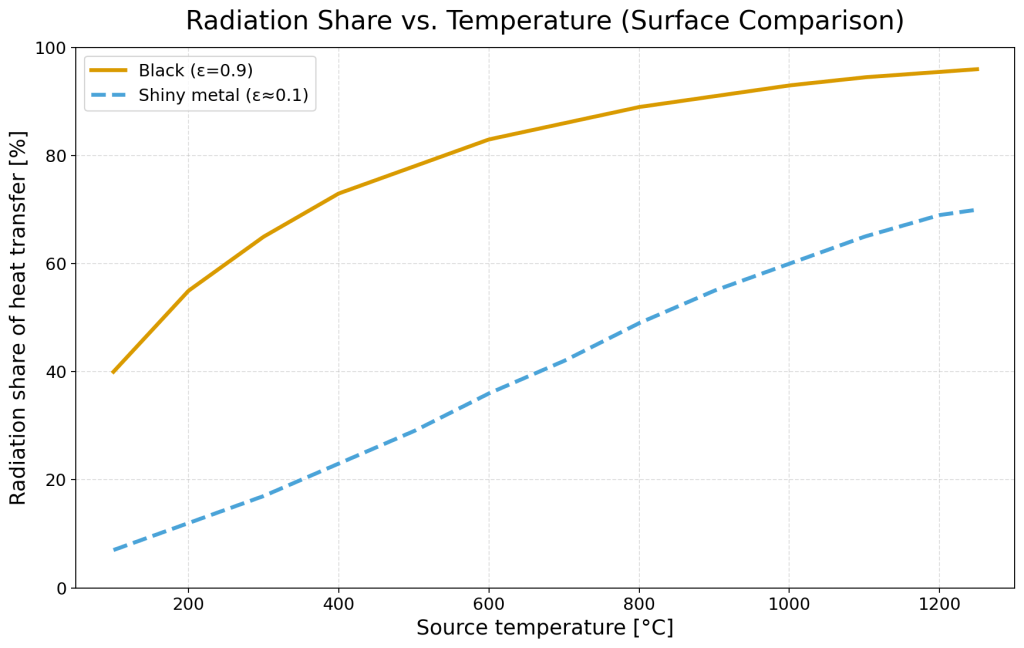
Here comes the nerdy and super fascinating bit. Bear with me. There are three modes of heat transfer. There is conduction, convection and radiation. Conduction is the propagation of heat through material, a good example is the cup when you make tea. You pour hot water into the cup and after some time the outside of the cup is warm, that‘s conduction. In my example heat flows mainly through the length of the connected metal pipes or if a glowing ember is touching the pipe directly. Alright, then there is convection which is the transport of heat through movement of fluids. In the tea example if you blow on your tea, the air removes heat from the surface. With my steel pipes, convection would happen by the hot gases of the fire passing by and heating them up. Lastly there is radiation and the immediate example that comes to mind is the sun warming your face on a nice day. In my chimney this happens from the heat of the flames and the glowing embers radiating onto the pipe surfaces.
That was the intro to what I find so fascinating about this topic:
The amount of total heat transferred from the fire to the metal pipes depends on a couple of things. One is the surface treatment and color of the pipes. Intuitively you know this already. The hood of a black car out in the sun gets way hotter than the one of a white or a silver car. That is because black absorbs almost everything. Light and heat are both just radiation, black looks like that because it absorbs all visible light and it gets so hot because it absorbs all radiative heat.
One more step and we‘re there.
The proportion of heat transferred by radiation depends also on temperature. A shiny silvery surface like polished stainless steel will take more than half of the heat in radiation above 800 C, for a black surface this point is reached at 130 C already! What a difference! What this means in other words is that if my steel surface remains silvery and my fire is above 130 C (which it is by far), then I miss out on a lot of heat transfer to the pipes > All the babble above was to say the pipes need a layer of black, fireproof paint.
Yes, what I did was explain what you already knew. Black surfaces get hot quickly. But engineering can tell the details and numbers of the whole thing. I just love it!
(Last thing before moving on, it all works both ways. Meaning if you have a hot surface and want to take a lot of heat from it, paint it black. It‘s the reason why all wood stoves and indoor chimney pipes are black.)
The single pipe configuration was not noticeably elevating the room temperature. But it was promising. I thought adding the second pipe as planned would double the heat output and painting the surfaces with thermal paint would increase it even more. I also switched out the axial fan for a radial one. Axial fans are not good at building static pressure.
I mounted it temporarily in its intended location in the chimney and made a big ass fire.
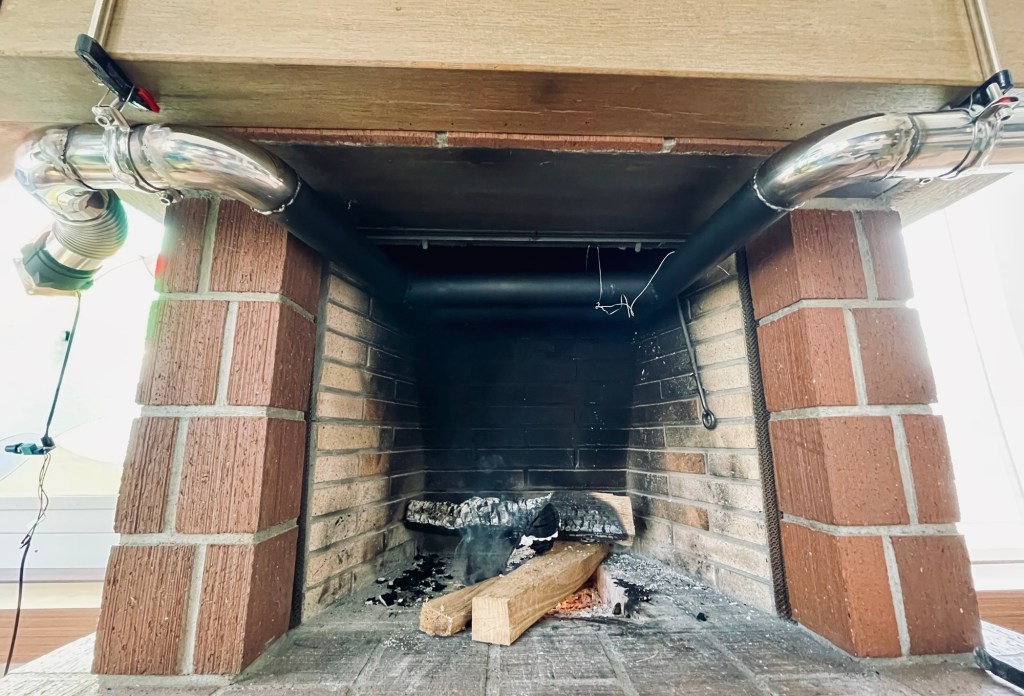
For comparison I also tried the „maximum“ version. Dropping the pipes directly in the flames.
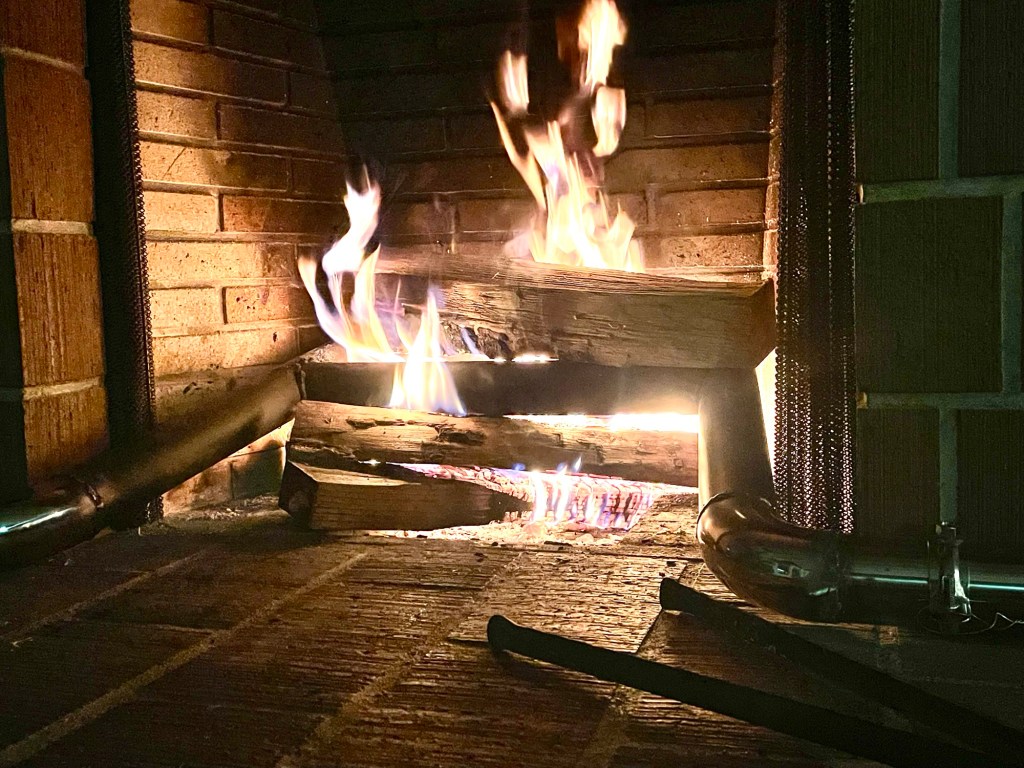
In the maximum configuration the exhaust got too hot to touch and over time the room got a bit warmer.
Challenges & Learnings
Perfect vs done Early on when the horrendous quality of my welds became apparent, I started to veer off track by getting out my angle grinder, cutting off big blobs and sanding down smaller ones. Only, the outside of the elbow pieces were much easier to get to than the insides. And because the elbow pieces‘ inside diameter matched the straight section‘s outside diameter, the joint had an overlap that I could not grind away. „Man, this is gonna take FOREVER“…Well, no need for all of that. I was losing myself in pursuit of perfection. What was worse, I was doing it for something that really did not matter and on a project whose success was not even certain.
There is a choice to be made in every project: Will you make a prototype and then the perfect version? Or do you put in all the effort to get it right the first time? It depends on the goal of the project, the level of motivation left in the tank and not least on the chance of success. I don’t think spending lots of time on uncertain outcomes is a good investment.
Welding is certainly a challenge in itself. For sure the quality of equipment and materials plays a role, but experience is key here. I would love to build more experience in this skill, but most of my projects are of the mechatronic kind and my workshop is not set up as a metal shop.
What I should have included as a goal statement was „quiet operation“. Getting enough airflow without making the living room feel like a hair dryer factory was not something I was focused on from the beginning.
It is a trade-off between airflow and noise. The axial fan was comfortably quiet, but put out way too little air. The radial fan was able to move heaps of air, but made its status known in the entire room.
Result
I cannot say it didn’t work. I also cannot really say it did… In the „maximum configuration“ of sitting directly in the fire, the air coming out of the exhaust was certainly hot and the fan going at full speed pushed a lot of it into the room. Still, the room temperature only rose by about 2.5 degrees. That‘s not too bad, but it took around 2 hours and I used way more firewood than I normally do.
The up-above-configuration puts out a lot less heat. So, given that even in the absolute maximum condition where the logs must be awkwardly placed around the pipes, using tons of firewood to get marginal warmth under the constant drone of a fan, I consider this version of the project a fail.
Have you tried something similar? Got tips or questions? Feel free to leave a comment below.

Leave a comment