Building a Gridfinity Workbench Tray
4 min read
The success of first adventures with Gridfinity made me commit to the system. Its use is not just limited to stationary storage. The next problem was the start and end of a work session. When I sit down to work, I like to have a clean workbench and not spend time cleaning up and putting things away first – or worse, work on top of the mess. It‘s satisfying to start out that way. I will make an extraordinary mess while I work, but when it‘s done I try to put things away for the next session.
The ’problem’ I have is that I don‘t particularly enjoy cleaning up and with my mode of clean workbench > artistic chaos > clean workbench I have to do that often. If I can make that process just a little bit easier…
This project is a short one, but it is a small contribution to a bigger cause.
Goal
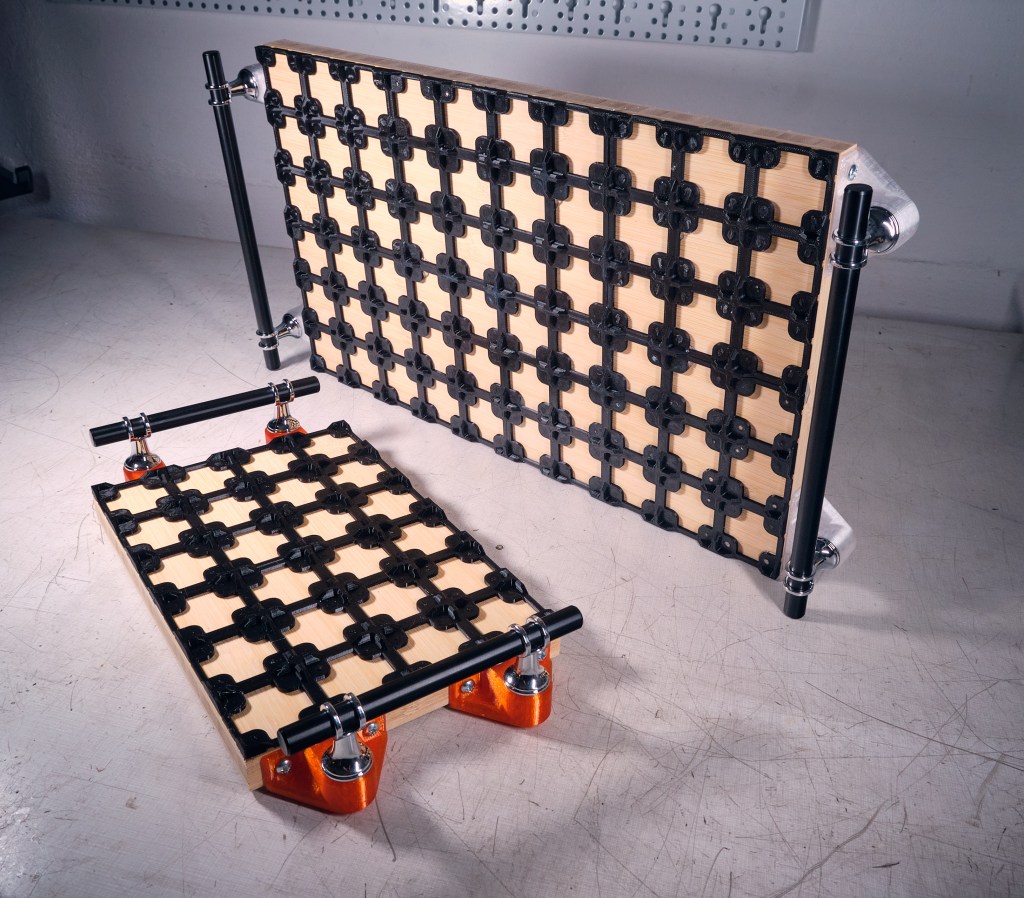
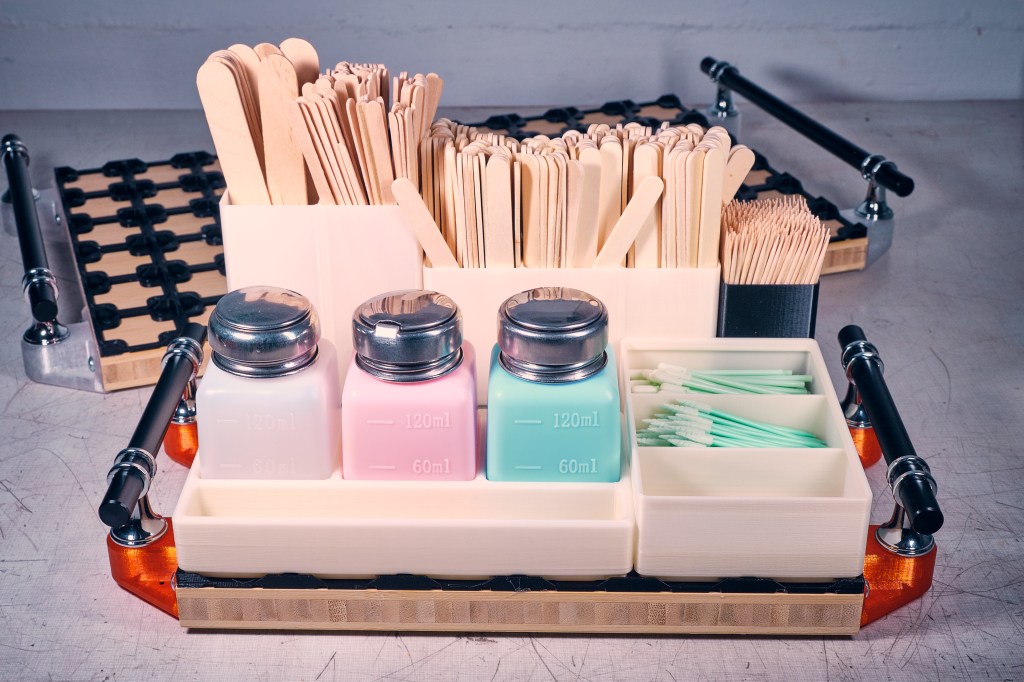
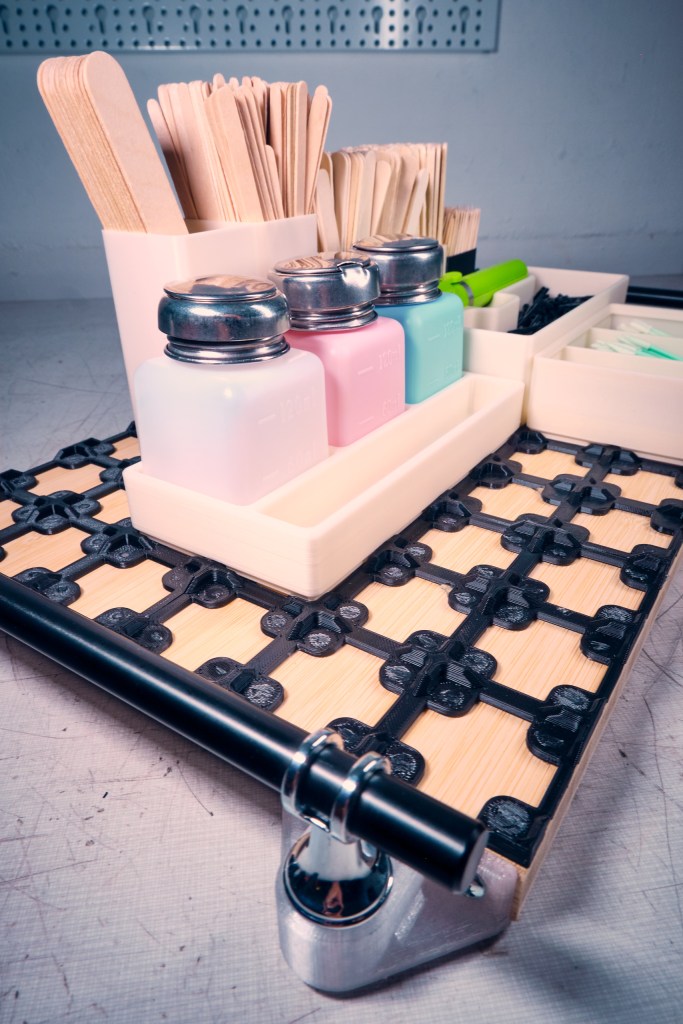
More and more tools, parts and consumables will be living within the Gridfinity system. The goal of this small project is to have an efficient and organized way of getting them to and from the workbench a little bit quicker and easier than one by one.
The tray should have some weight to it and not slide on the workbench surface.
Materials & Tools
- Wood boards
- 3D printing filament
- 3D printer
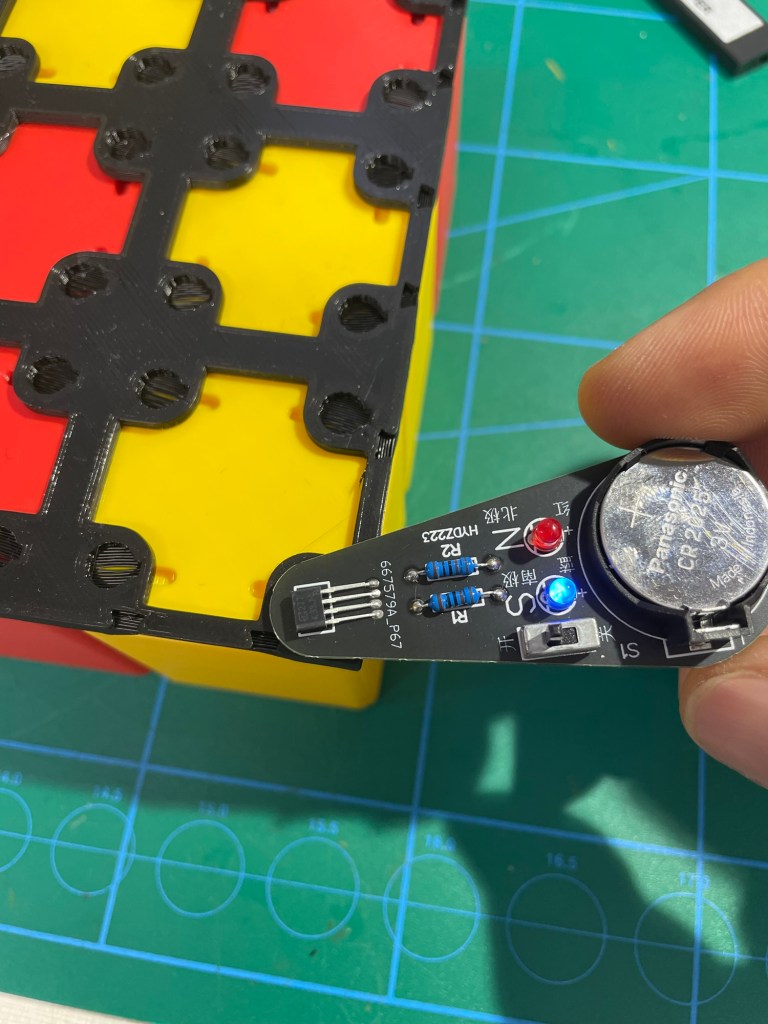
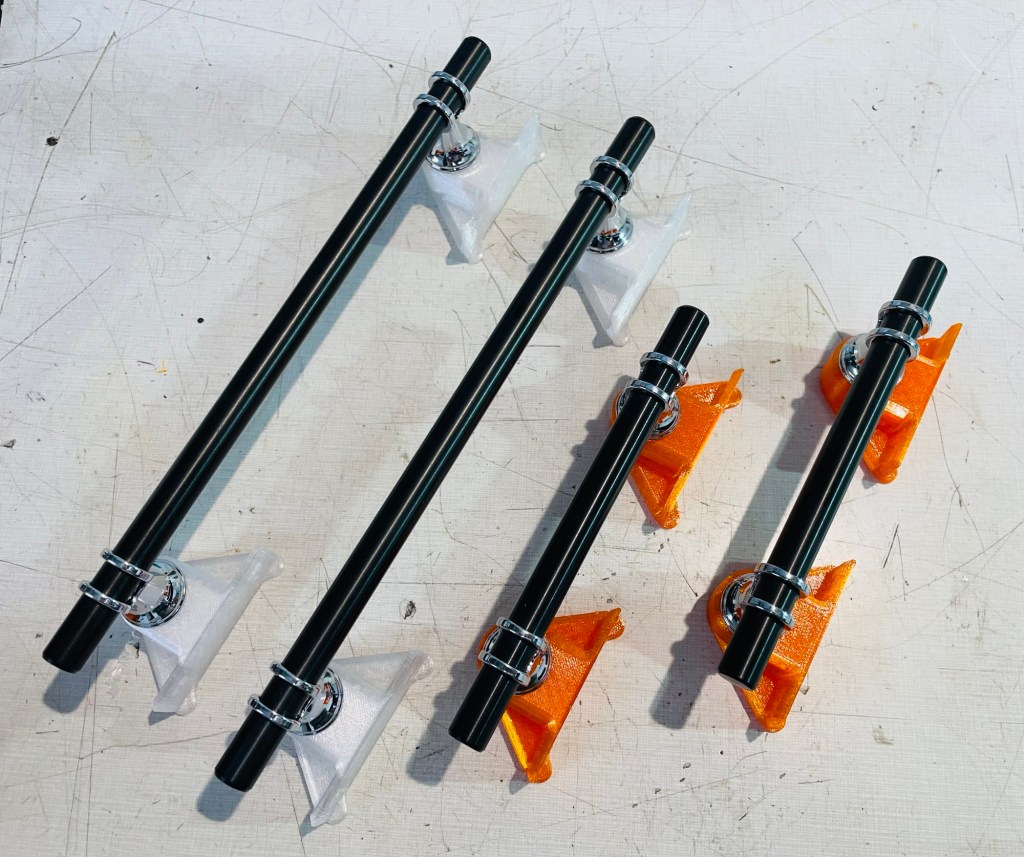
- Handles
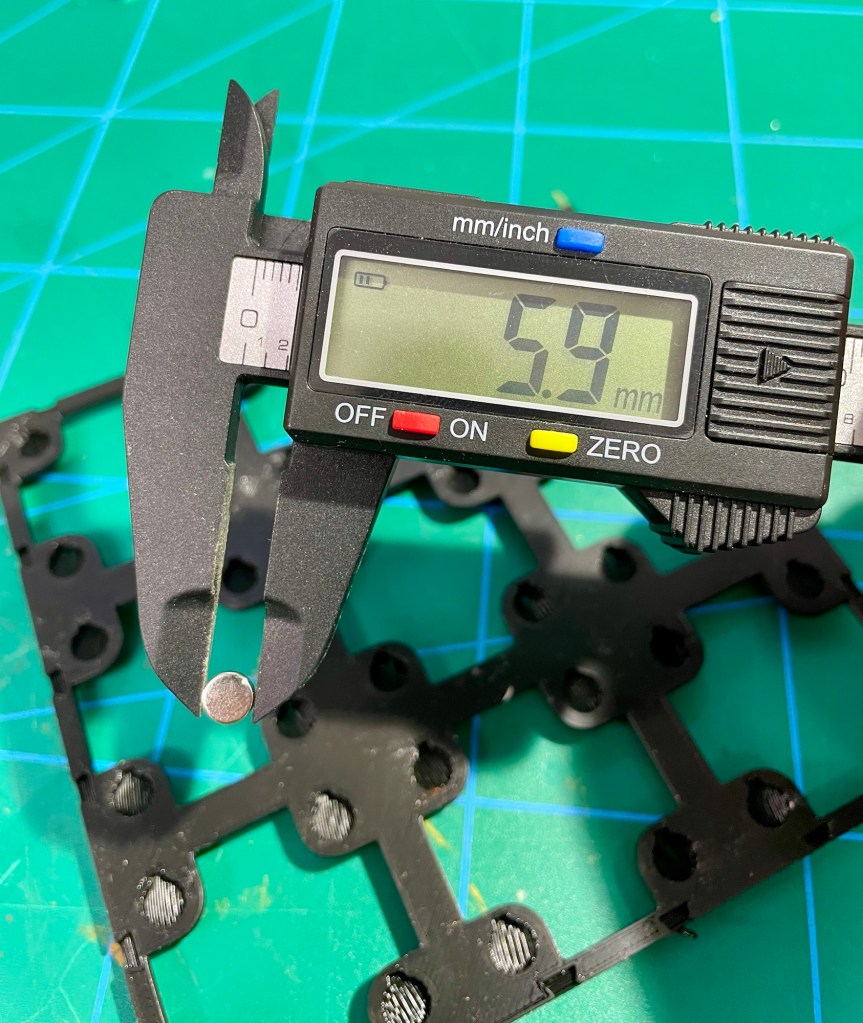
- 6×2 mm magnets
Process
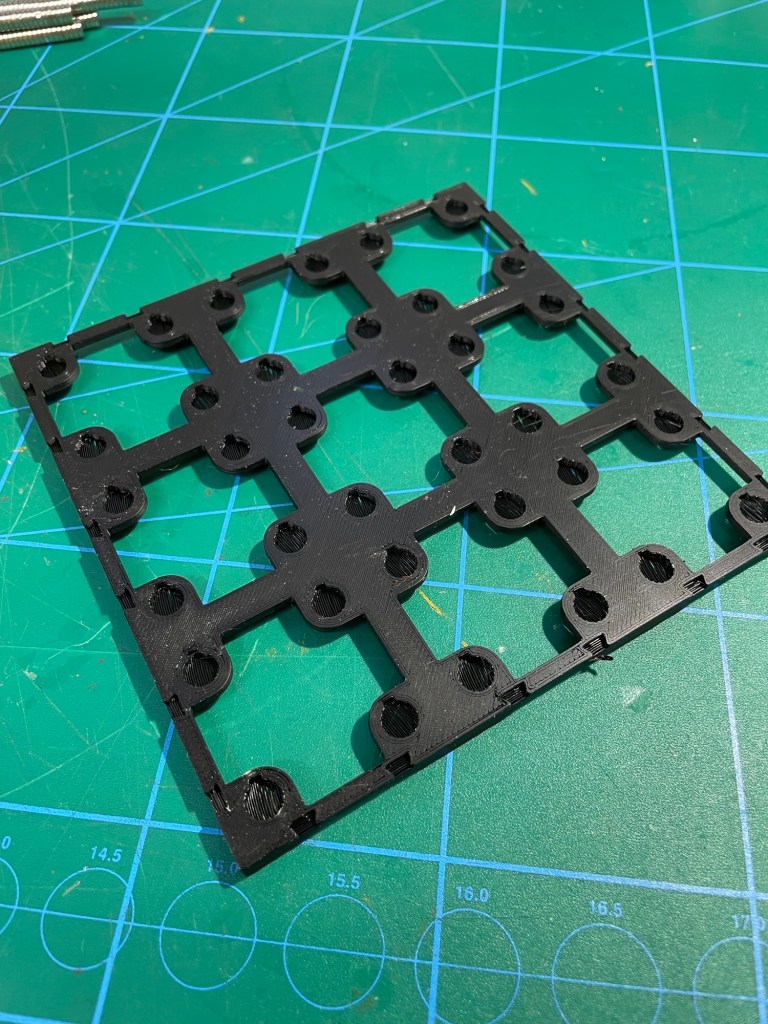
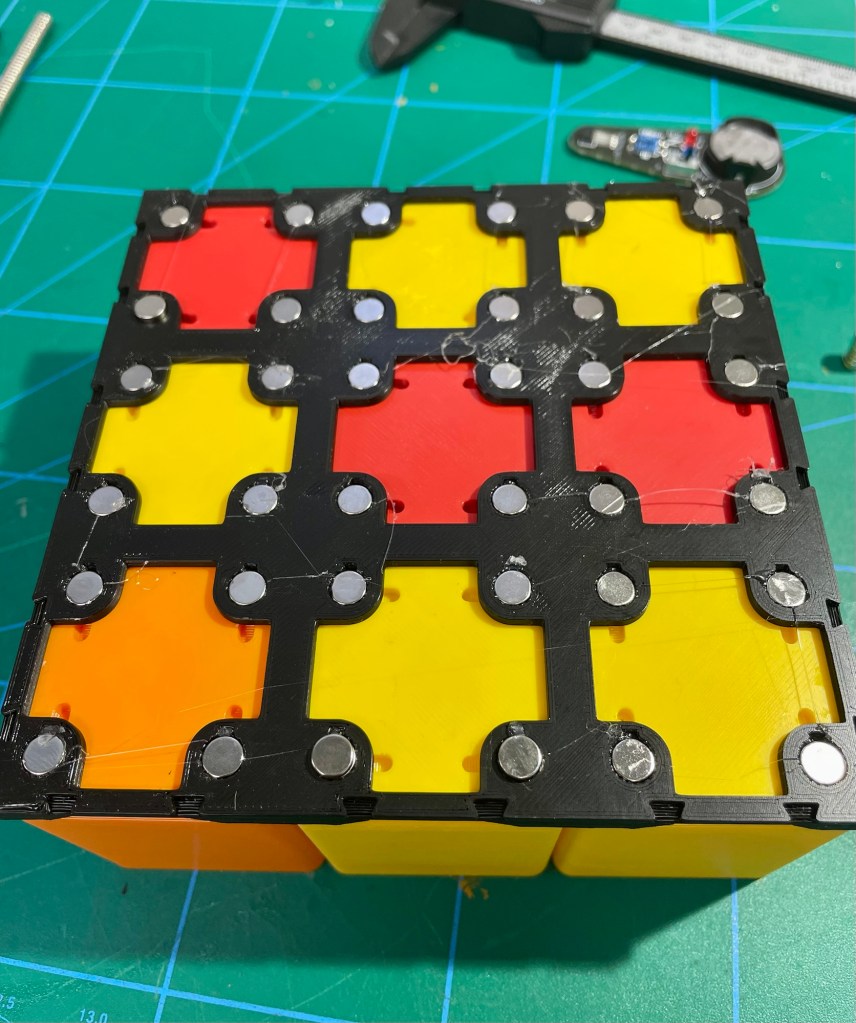
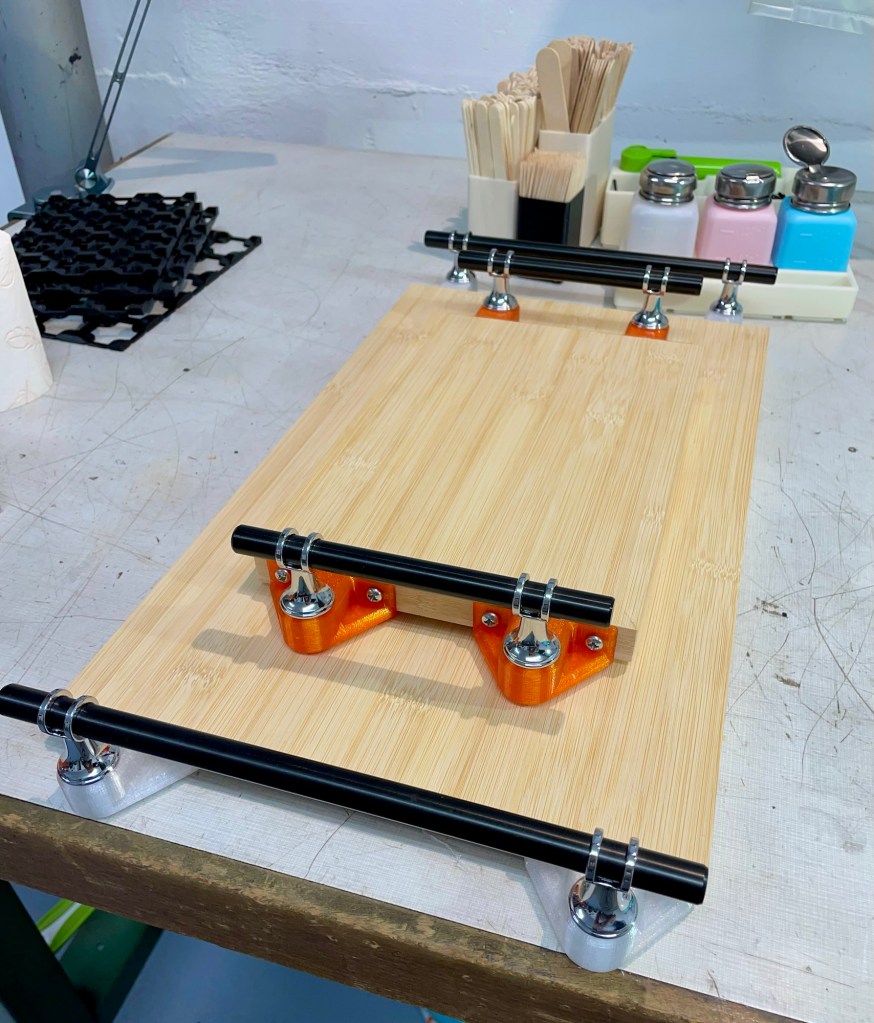
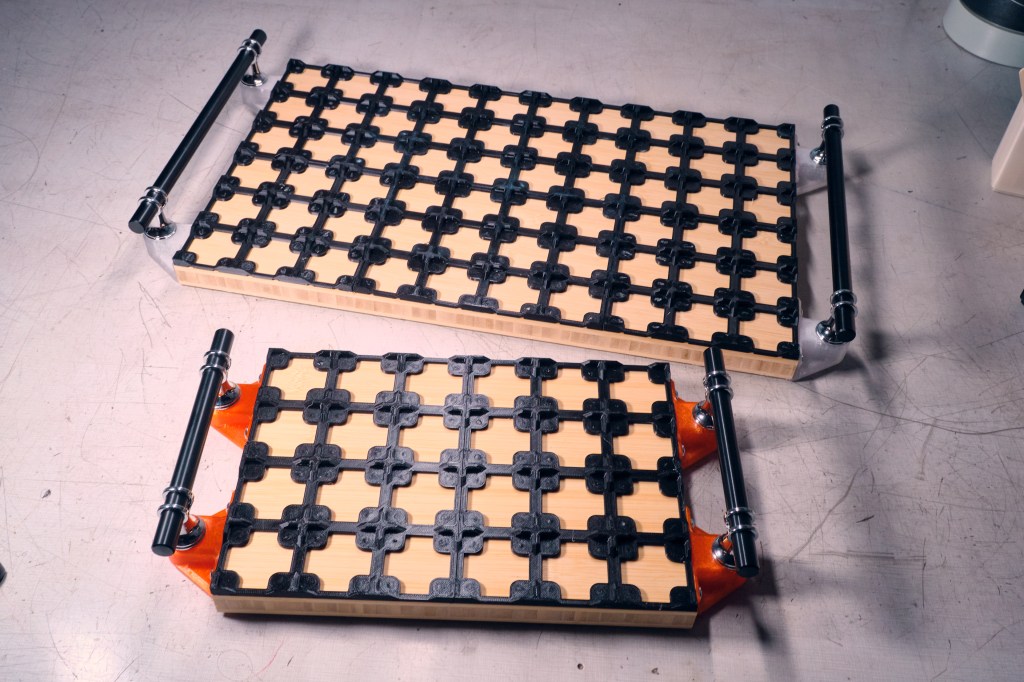
The first decision to make was on the size of the grid baseplates. I couldn’t settle for a single size and went with a 6×10 and a 4×6 baseplate. These went on the printer right away while I ordered wood boards and handles.
The nice thing about 3D printing is that you can make almost any part fit another part. It takes a lot of rigidity out of projects. Adapters and custom shapes are just super easy and cheap to print. But: they still have to be designed. So the investment is in the form of time.
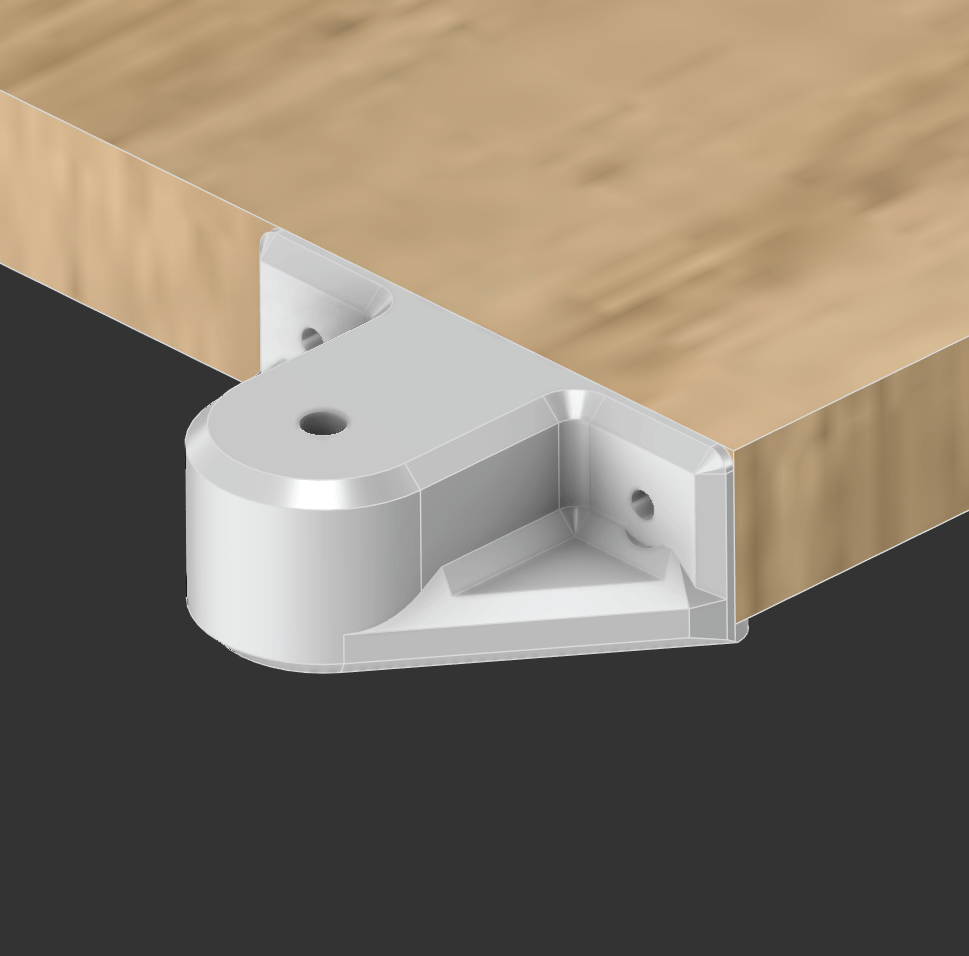
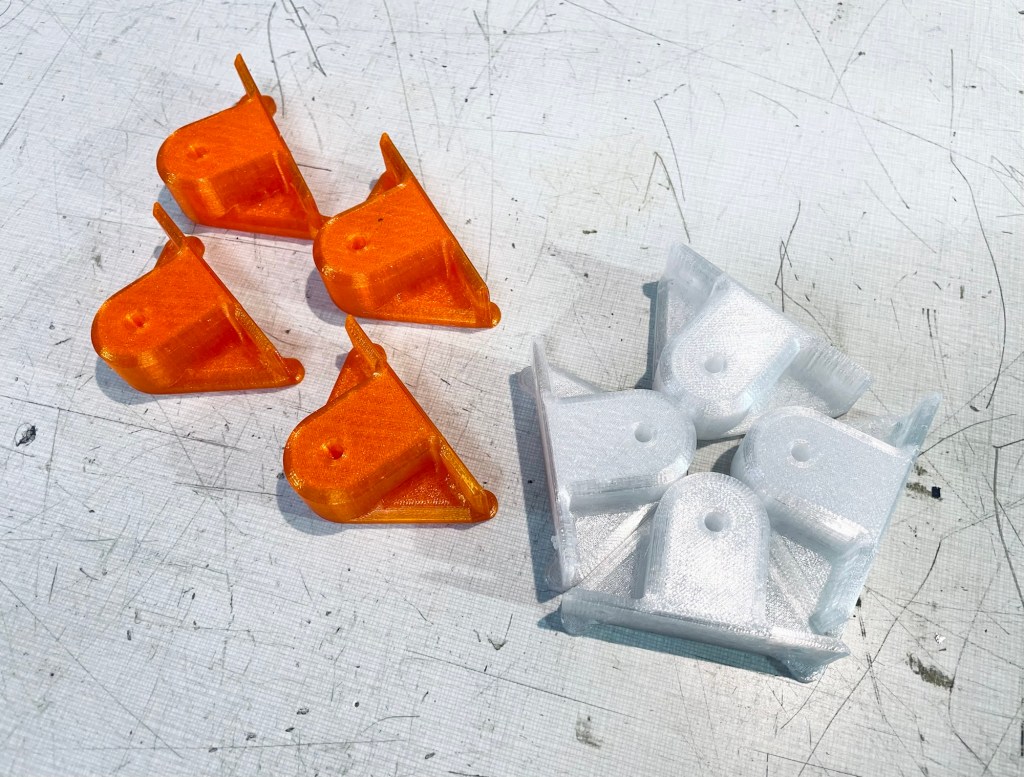
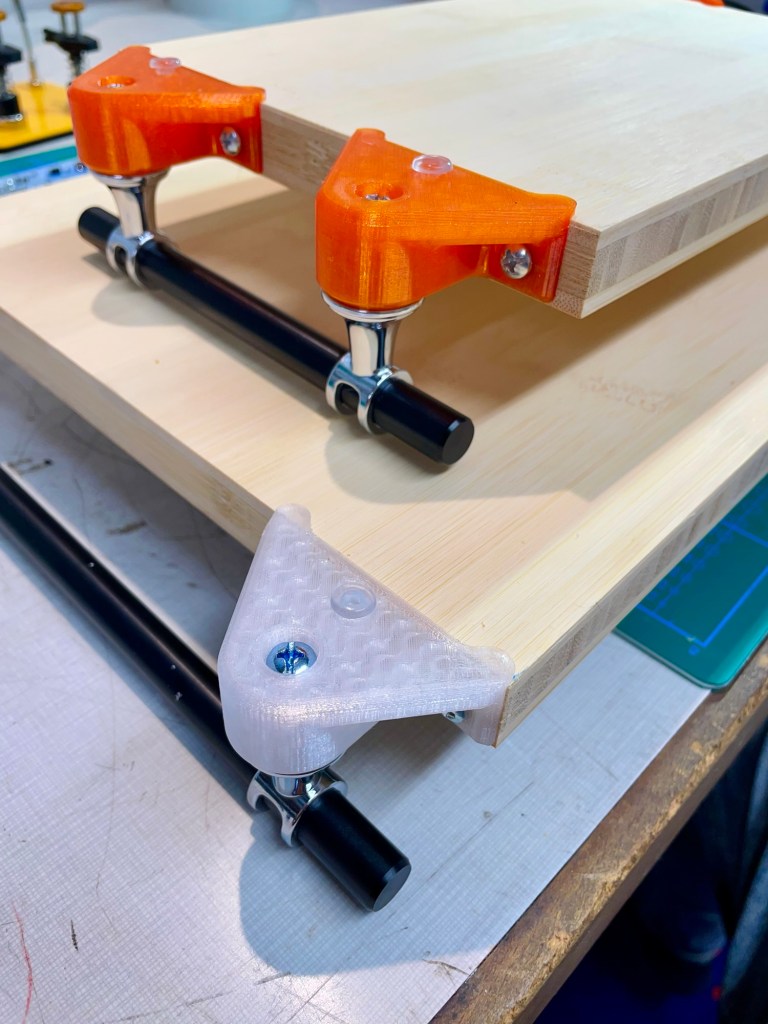
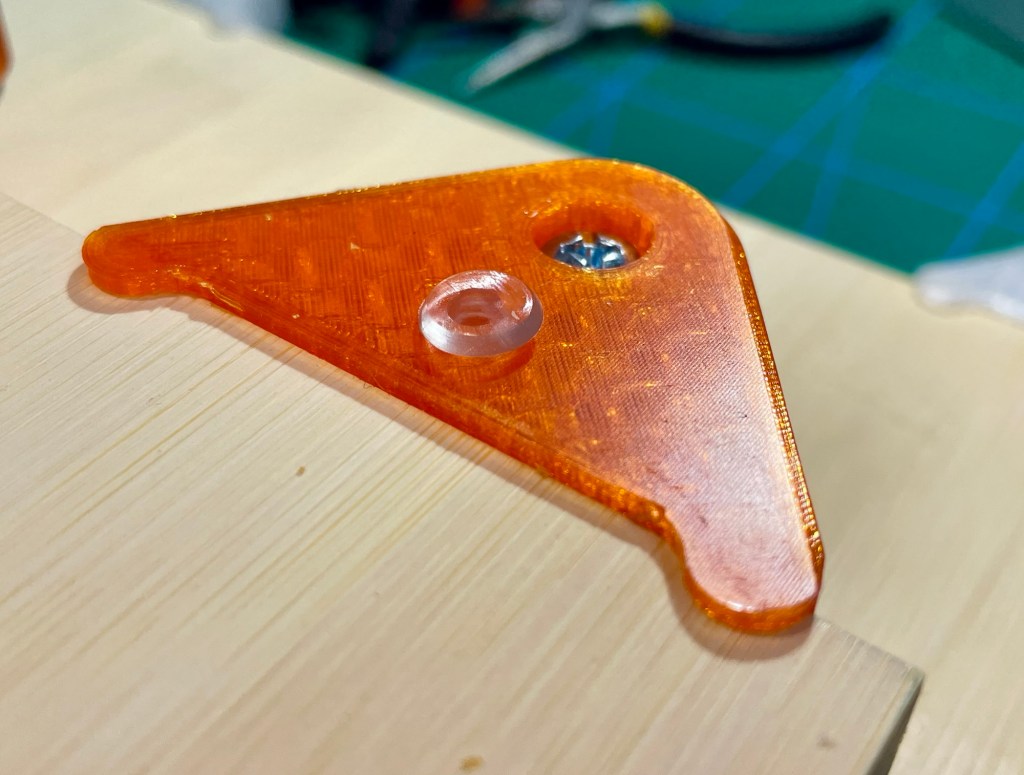
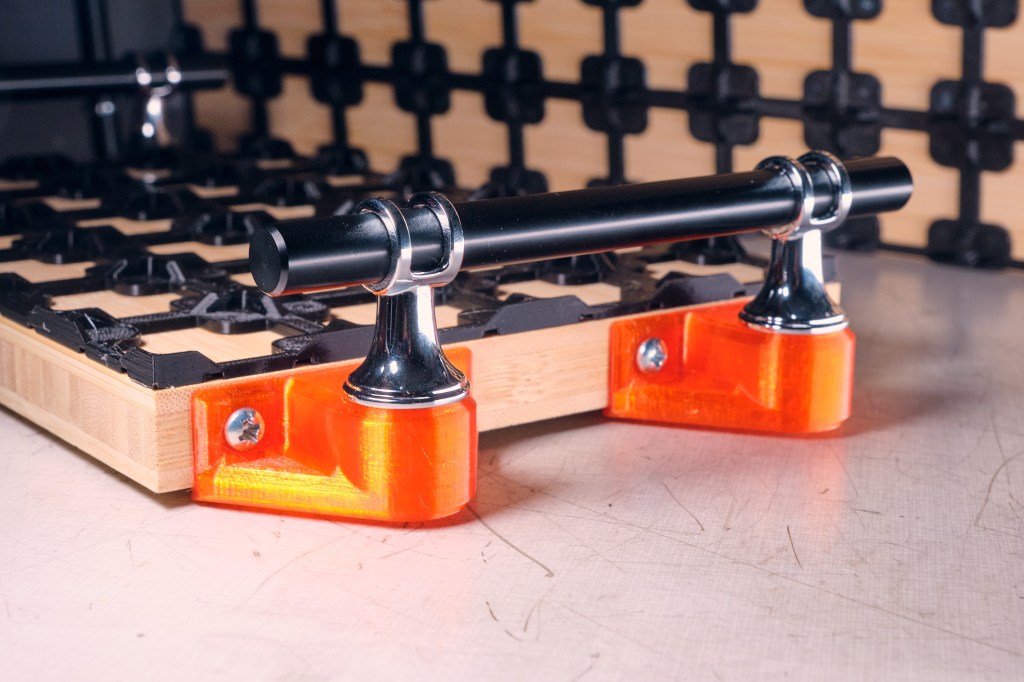
The pieces were quite simple. The design came down to answering the questions of how to attach them to the board, how to integrate the rubber feet and how to connect to the handles. Good looks are optional. I found though that a simple chamfer on many edges elevates the look and feel of a part instantly.
The baseplates are made to take 6×2 mm magnets with a press fit but they just fell out. They seemed to be undersize. I was not going to spend time in modifying the 3D model and print it again. I simply glued the magnets in place. To have support for pressing down while checking the correct polarity of the magnets, I placed upside down bins underneath the baseplates.
Challenges & Learnings
- Printing with PCTG was new to me. So far I had been printing with PLA almost exclusively. Where PLA sometimes doesn’t want to stick incredibly well to the build plate, PCTG sticks almost too well. It takes effort to get small bits and support material off without ruining the build plate surface. The lesson here is: Large prints without support material come off okay, just bend the build plate. As soon as you have small parts or worse, tiny individual one-layer pieces of support material, it‘s going to be hell to get them off. Easier to just burn down the house and buy everything new.
- The first version of the adapter pieces was sketched before drawing them in CAD. But when I did they looked off and I did not like the shape at all. I started again, this time with the approach of „form follows function“ with a much more satisfying result.
- The downloaded baseplates were supposed to have a friction fit for the magnets. However, they just fell out and I had to glue them individually. Now, just because hot glue is easy to squeeze out of the gun does not mean the overall experience is easy. In this case the heat of the hot snot sometimes softened the 3D printed parts and bent them out of shape. In addition the strings left behind from glueing dozens of magnets made cleanup quite annoying. At some point I switched to gel-consistency CA and this did the trick wonderfully. No bending, no stringing, no cleanup.
Result
Reflections
For such a small project, it took way longer than I wanted it to. I did not put in the effort to time things right. The best use of time would have been to do the designing, 3D printing and finishing of all those parts during the wait time for the ordered parts. Then with all parts available, final assembly is a quick last step.
Whether the trays really help keep the bench-space tidy remains to be seen:)
Have you tried something similar? Got tips or questions? Feel free to leave a comment below.

Leave a comment