
I Could’ve Carried a Flashlight. I Chose Chaos. Again
5 min read
One weekend I was pondering the question of what should go into my EDC bag (yes, another side-project. There are so many😅). I decided my EDC shouldn’t be about survival and gear for unlikely emergencies, but about things I actually use — and want to use — every day. Approaching the bill of materials like this made me think of the good ol‘ days when I used to constantly carry a TV-B-Gone with me and get chuckles from every TV I spotted and “scored”.
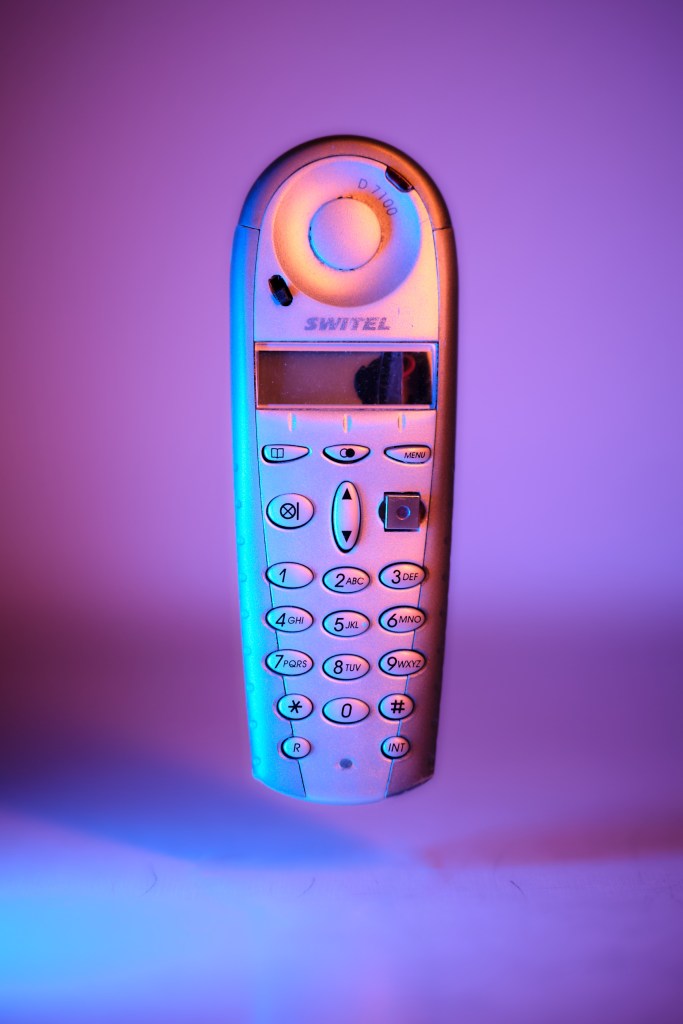
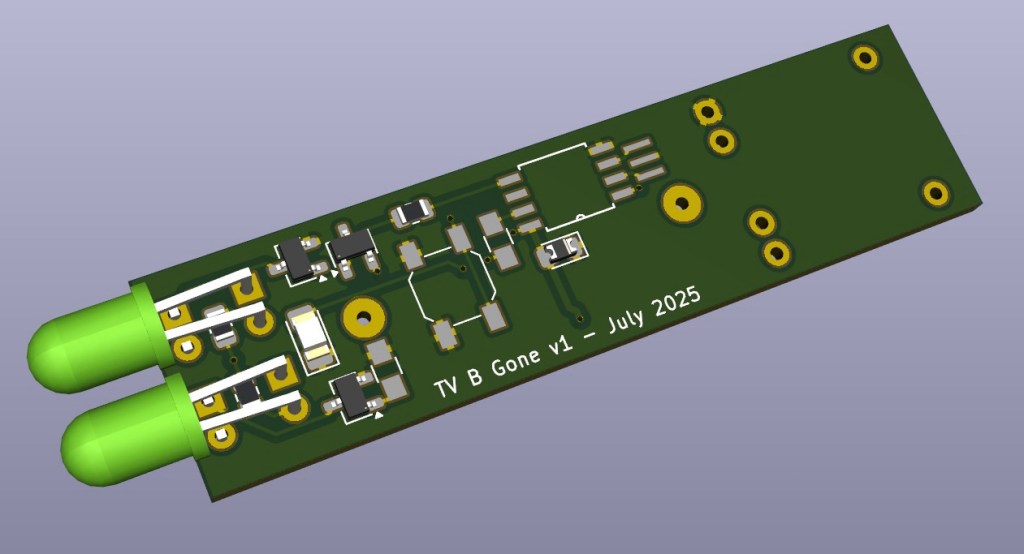
For context: A TV-B-Gone is a universal TV remote with one button and one function only: To turn off any TV.
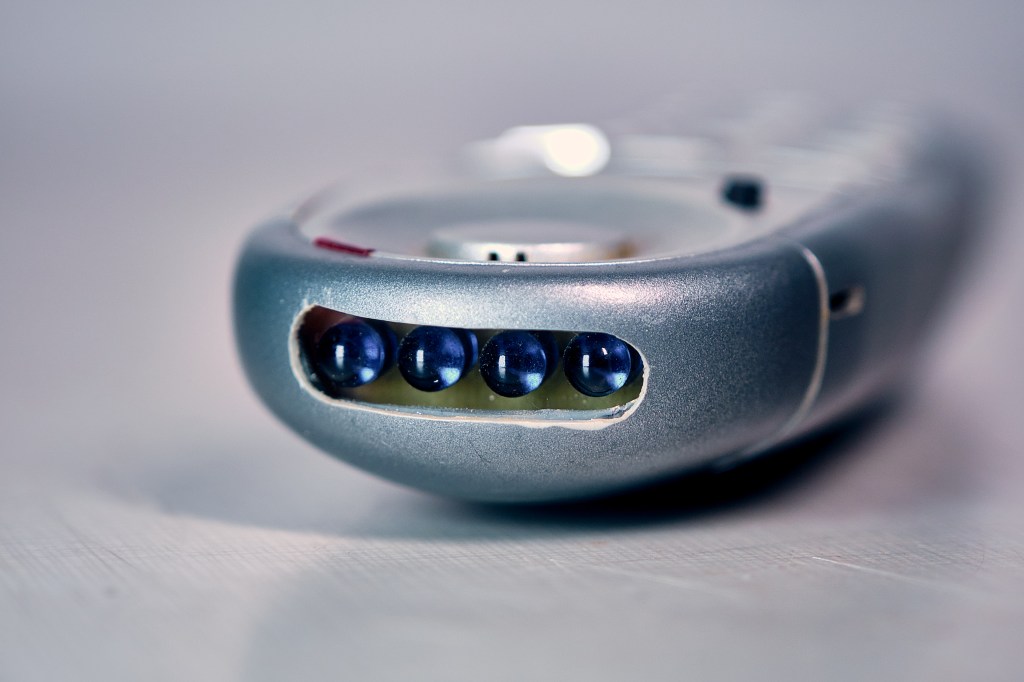
TVs (especially the last generation) are remote controlled by invisible infrared light. Each TV remote contains an infrared light source which sends a series of pulses to the TV. Each brand has their unique series of pulses – codes – for turning them on and off. The TV-B-Gone does something very simple yet smart with this: It just sends all known codes one after the other. That‘s it. Yes, this means depending on the position of a particular brand in that list, you may be waiting about a minute for the TV to go off. But that‘s a small price to pay for the prankster’s satisfaction.
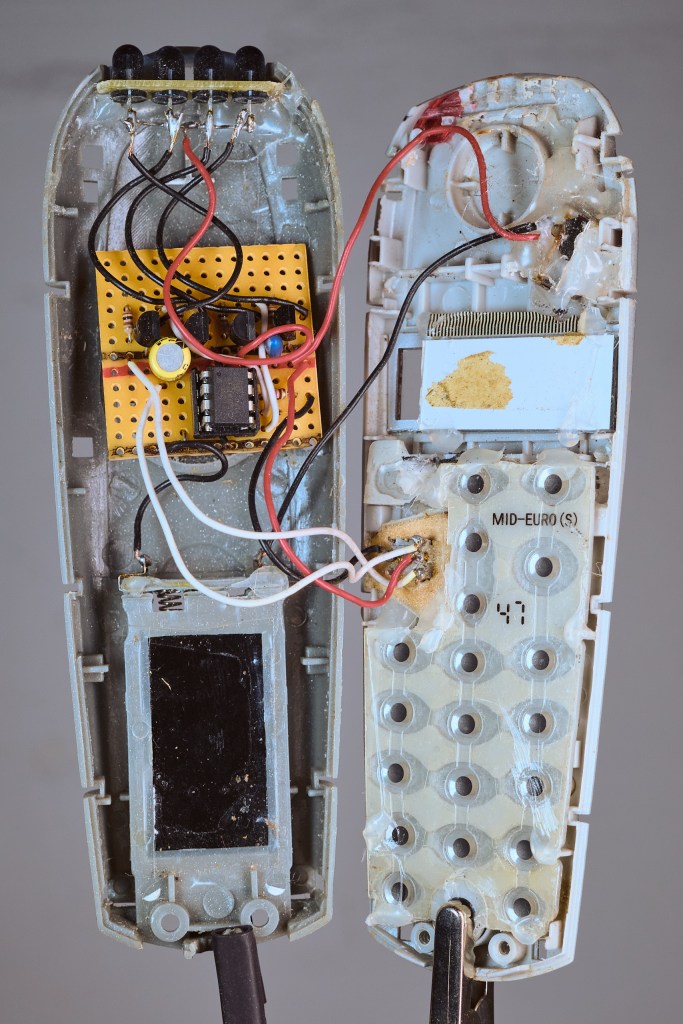
The circuit schematics and the code are openly available on the internet in many variants. Anyone with a soldering iron, access to parts and some creativity can make one themselves. So did I — many years ago. I present to you the not-so-sneaky, somewhat bulky version of a TV-B-Gone hidden in what should have passed as a mobile phone.
The old TV-B-Gone has been sitting in a dark drawer for far too long, while far too many TVs have gone unmeddled with.
I felt it was time to bring back that nostalgic fun and that’s what set off this project. Nowadays its usefulness might be somewhat limited, modern TVs get their commands more and more via the RF spectrum (radio signals) and not via IR, but maybe I can still get some. Let‘s see.
Goal
Since I wanted to keep it in my EDC kit, I needed it to be much smaller than before. Not to the extreme, but shrunk significantly. I also wanted to have a step-up in manufacturing techniques. My first version relied on perf-board and through hole components. For the new implementation I wanted to have proper PCBs and use SMD components.
Materials & Tools
Materials
- I chose to keep the 5mm through-hole IR diodes
- SMD components for everything else
- As power source I wanted to have something rechargeable and went with a single 14250 Li-Ion cell
- Not wanting to open the case for charging, I chose to integrate a USB-C charging circuit. I had one in my drawer still from an earlier project (yay for hoarding). It also has undervoltage cutoff which is nice.
- ATtiny85 microcontroller
- Wire solder and solder paste
Tools
- Soldering iron and reflow oven
- Microscope
- Oscilloscope – for troubleshooting
- Multimeter – for troubleshooting
- 3D printer – for jigs and tools, case
- PC – schematic and board layout of the PCB, programming
- Arduino – as programmer for the microcontroller
Process
PCB Design
The project was a great opportunity to get familiar with KiCAD, a free PCB software. In the past I had used EagleCAD but ever since it moved to Fusion, I never used it again. In my opinion, Fusion becomes less and less useable for the hobbyist. So I try to look for more suitable tools.
My starting point for the project was a project by zookzook. I ran into some issues with missing libraries and KiCAD threw a bunch of warnings at me but I skillfully ignored them (yes, this is a foreshadowing…). I just wanted to get the PCB to the manufacturer and took shortcuts.
Most components I sourced from AliExpress. The plethora of products and parts is astonishing, there is everything and more.
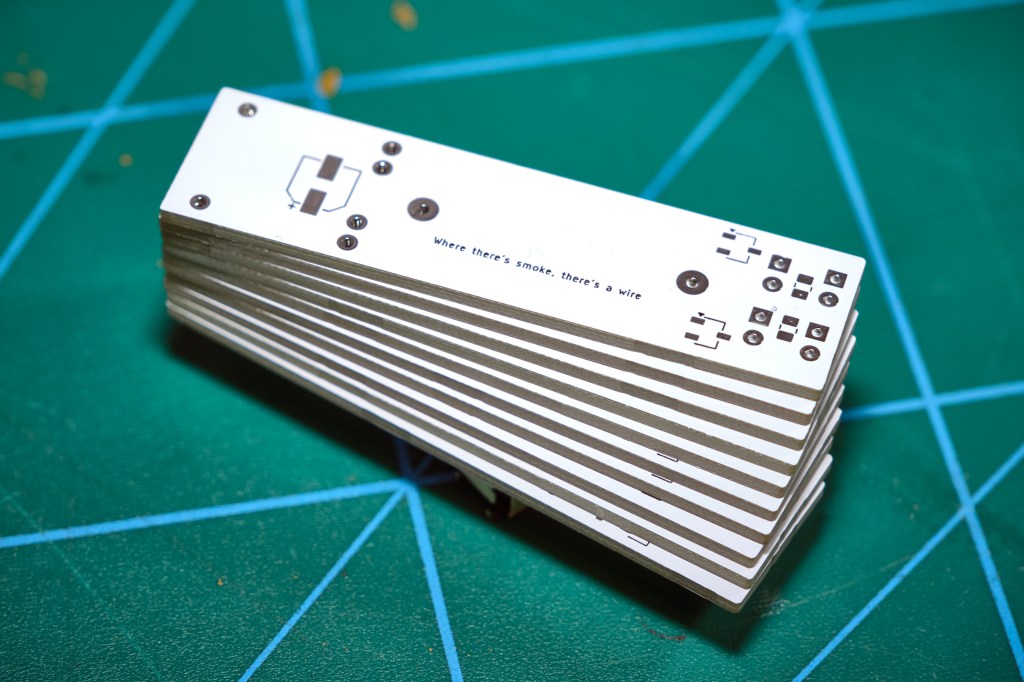
The PCBs were made by JLCPCB, an affordable and astonishingly fast service!
Soldering
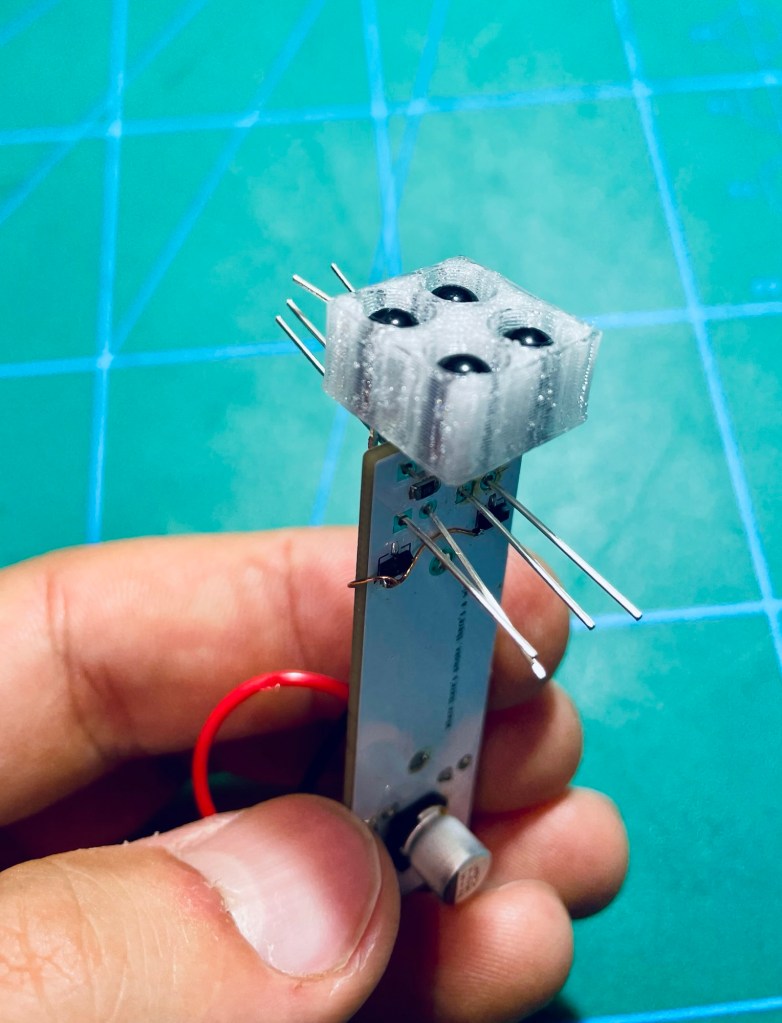
Once I had the main parts and the PCBs in my mailbox I sat down full of excitement for soldering. I got the board ready with all the components up to the microcontroller. This one I would drop in last. A printed positioning tool for the LEDs helped with their alignment for soldering.
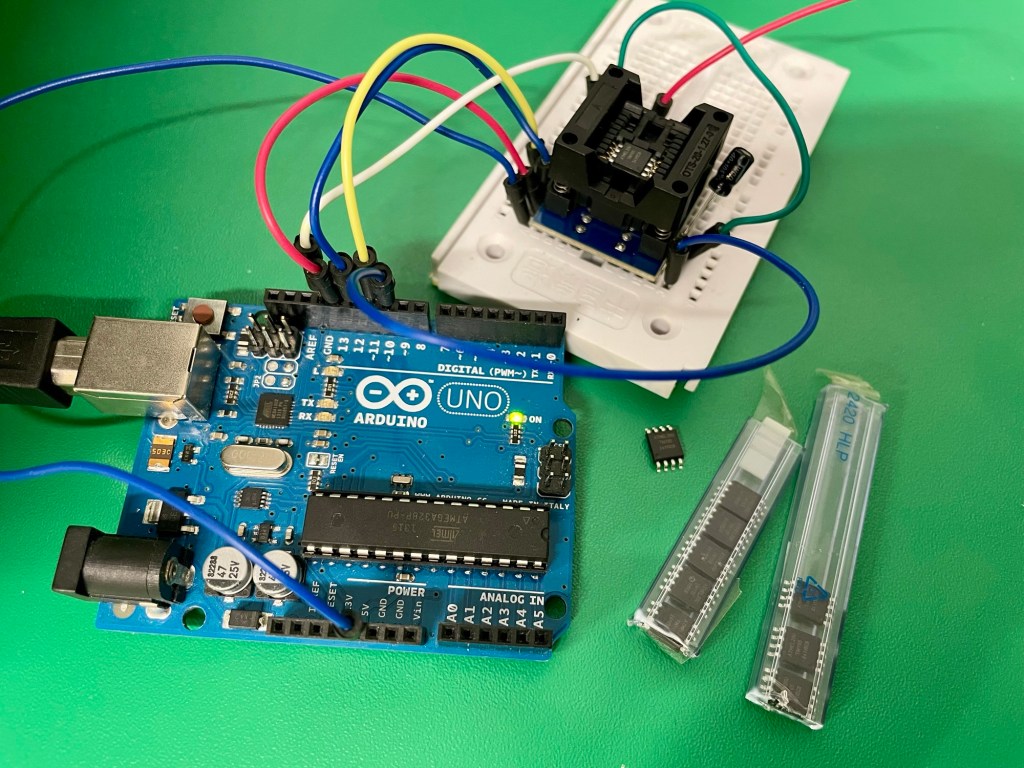
The microcontroller programming gave me a lot of trouble and I spent the better part of an entire Saturday just trying to get a connection. Finally I managed. What helped a lot in the troubleshooting process was having multiple Arduinos at hand. Since I could not get my PC to recognize the usual programmer, I used an Arduino configured as a programmer with one of the example sketches available in the Arduino IDE. Another indispensable tool in this process is an SMD/DIL adapter for the microcontroller. It‘s great for programming and troubleshooting.
There was funny issue when I temporarily placed the microcontroller on the PCB. It would not work. At all. On the breadboard it was just fine, not on the PCB. HOW can this micro be so picky? Of course it was not picky, I had just made a couple of mistakes in soldering and sadly enough also in the PCB layout, hehe. So much for skipping the design rule checker of the layout editor. Use it, folks. It saves you tears, time and money.
After I had wrangled the board into submission with some extra wires to fix the layout mistakes, I finally got some signs of life!
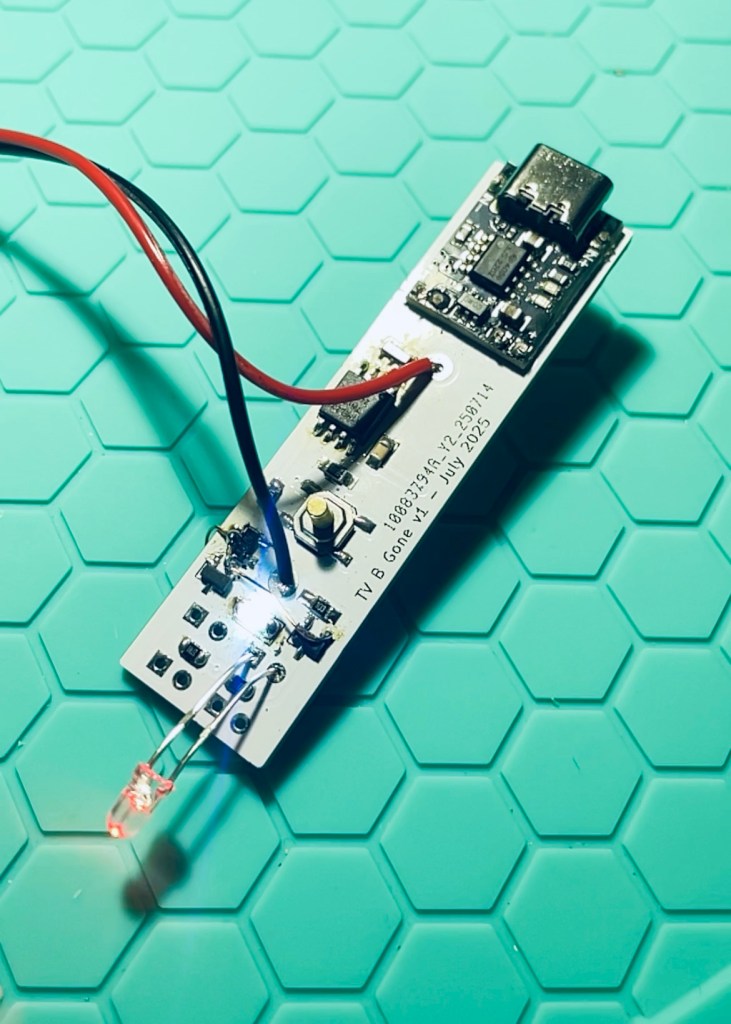
Now we get to the sad – but very avoidable – part. As you can see in the image above, the circuit was still on an umbilical to the bench power supply. As a last step I removed the wire and soldered the battery. Because I had not placed PCB silkscreen markings for many components, I mistakenly placed it in reverse and released trapped magic smoke. It must have been desperation and blind denial that made me quickly put it in the right way in the hopes that all would be good … it was not. The board got really hot and I chucked it out of my workshop in case it would catch on fire.
What a way to ruin the first board, ey? Lesson learned, board toasted – the project does get its happy end in the next part.
Have you tried something similar? Got tips or questions? Feel free to leave a comment below.

Leave a comment