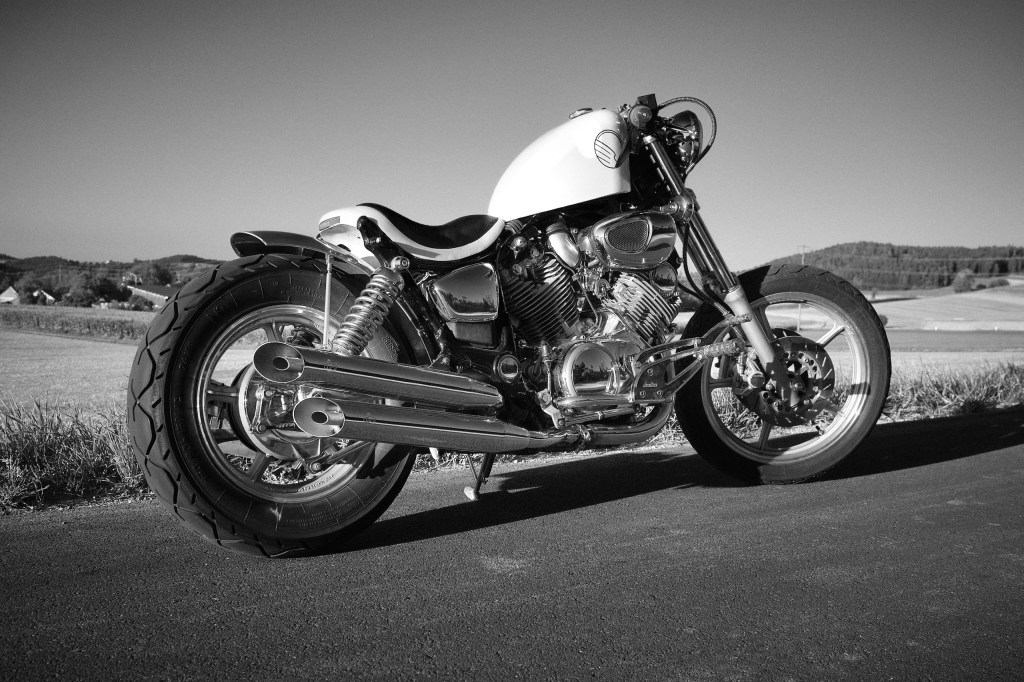
Built for Looks, Approved for Roads
7 min read
Process – continued
Missed Part 1? That’s where the frame got chopped and the fart registry came up. This part is where things come together.
Exhaust
Hehehe:) This is the smiley part. It was a great day when I found a compatible and legal exhaust for the project. Surprisingly, this modification fell under category A (modification not subject to notification or inspection). I would have assumed it is next to impossible to change something on the exhaust.
Not only did the new exhaust change the look to the cooler side, it also changed the sound in the same direction. The look was easy to judge from the pictures online, but the sound was hard to judge from the few crappy videos available on YouTube. I took a gamble and just ordered the pipes in the hopes it would improve the sound….. And it did! Starting the engine with the new exhaust instantly painted a smile on my face. Great day, great day.
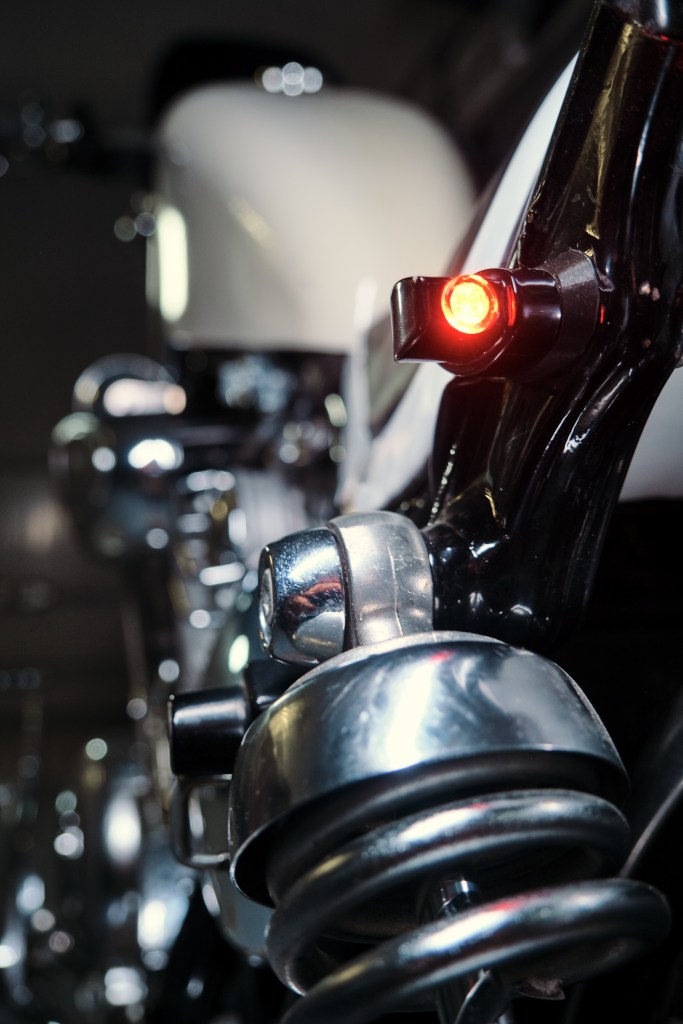
Electrical and Instruments
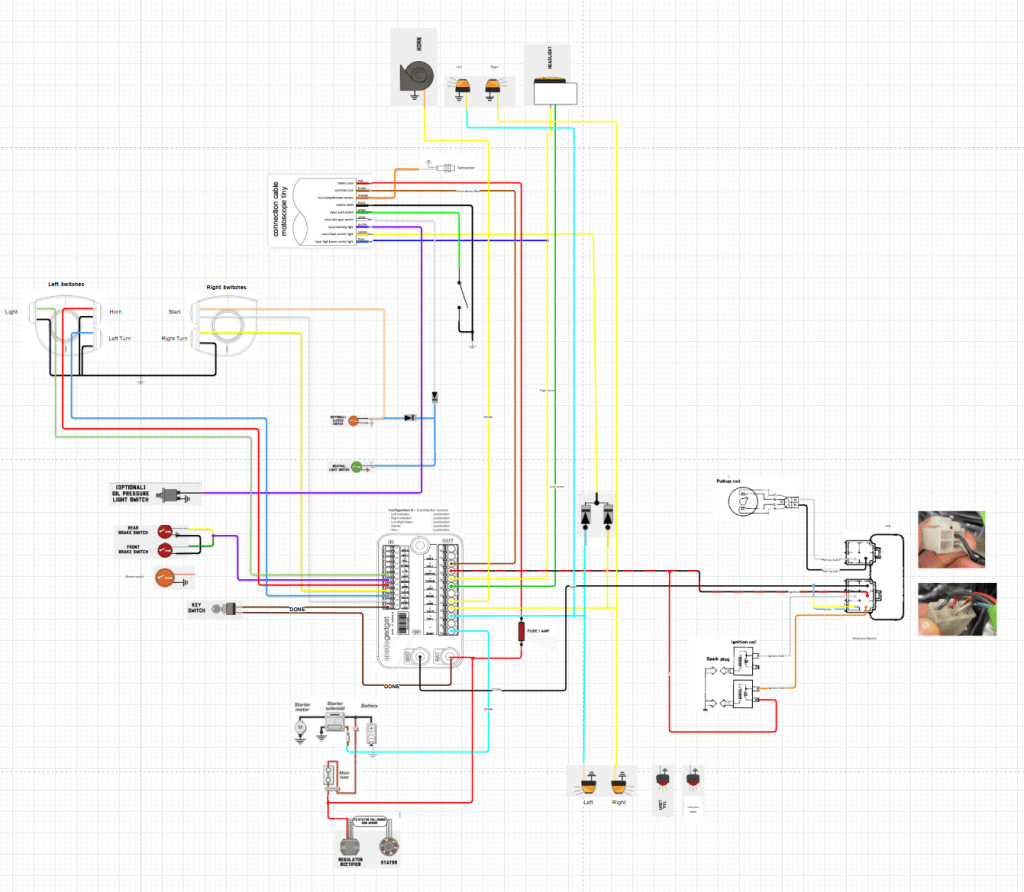
The entire project hinged on the legality of the frame-chop, but not exclusively. The second important thing that allowed me to even start the project was the existence of a universal control unit (motogadget mo.unit). This thing does so many jobs at once, it really simplifies biker life:
- It simplifies the wiring loom for older bikes. You can get rid of many components like relays, switching units, fuses, etc. The mo.unit does all of that centrally and in a small package. The wire harness becomes much simpler because basically all lines just go to the control unit with very few connections in between.
- It separates signal from power. The benefit is this: In an older bike like the XV750, consumers like the headlight are wired directly through the switches in the handlebar. Since signal (switch) and power (headlight) are in line, the entire loop from battery to switch to headlight back to the battery must be of the same wire diameter. Why does this matter? Well if you want to make a clean installation and route cables through the handlebar tube, you depend on having small wire diameters. A signal from the switch carries almost no current and can therefore be done with a very thin wire.
- Configuration is done in software, not in the cable layout. This means if you change your mind about something it is quick and simple to do.
There is also a bluetooth version of this particular control unit. It allows for configuration changes via smartphone and additional features. Since I wanted to preserve the vintage look and feel of the bike, I stayed with the basic unit.
The switches on the handlebar became simpler as well and all switch wires are routed through the handlebar tube.
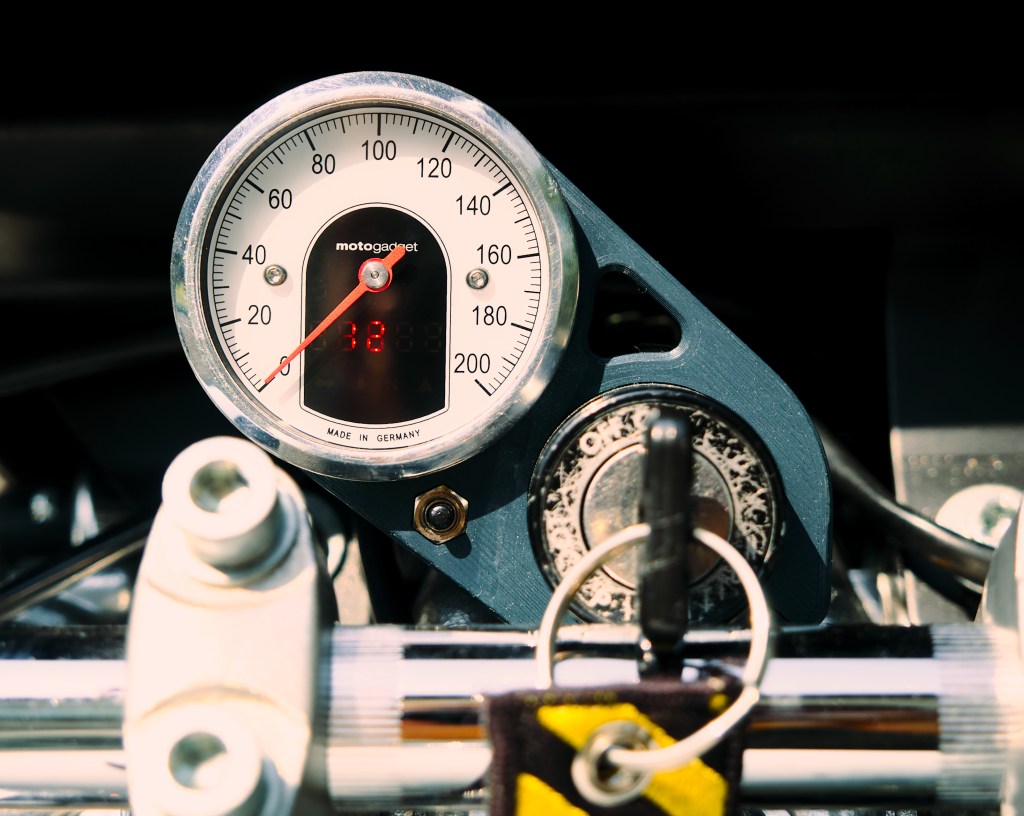
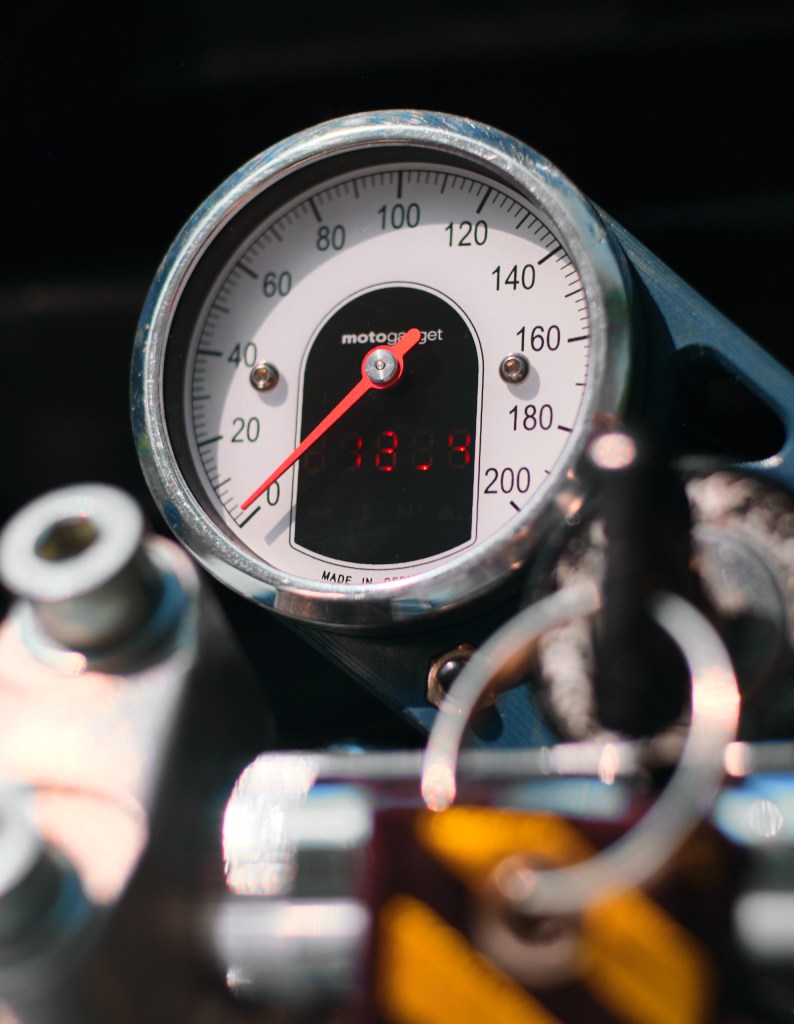
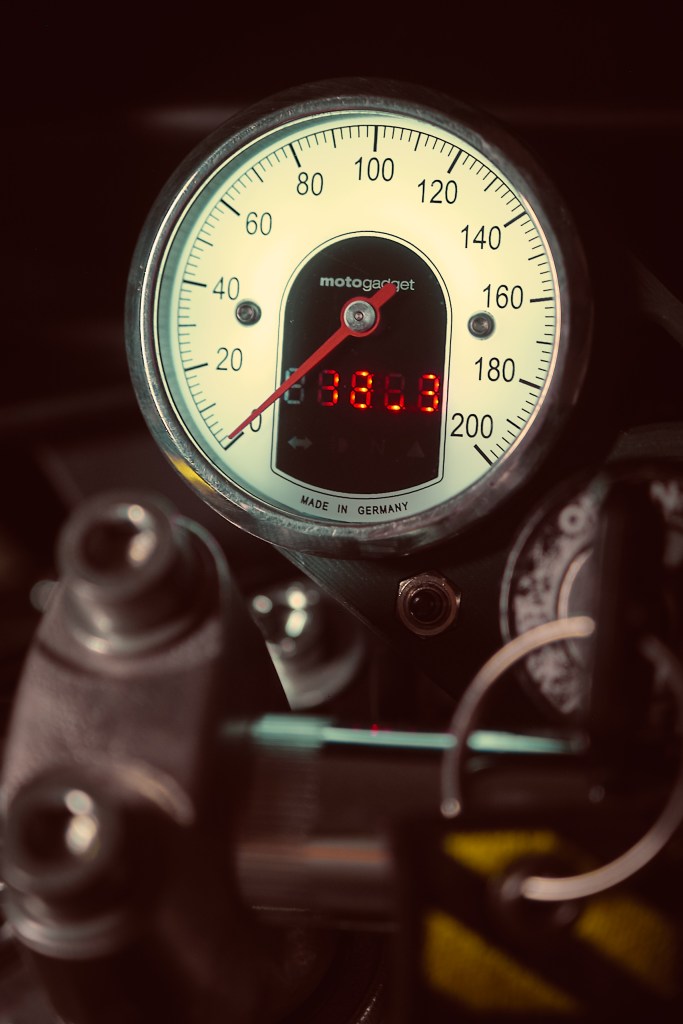
The instrument cluster was replaced by a speedometer combination (motogadget motoscope tiny). The motoscope combines the speedometer with all the indicator lights. Additionally there is a small screen for more info. I never really used the tachometer before. I felt the engine RPM could easily be judged by sound and therefore left it out completely. The only use I ever had from it was the indication of the RPM range where the throttle response was best. This was around 3’300. But again, I don‘t need an instrument for this, I know and feel more or less when I‘m there.
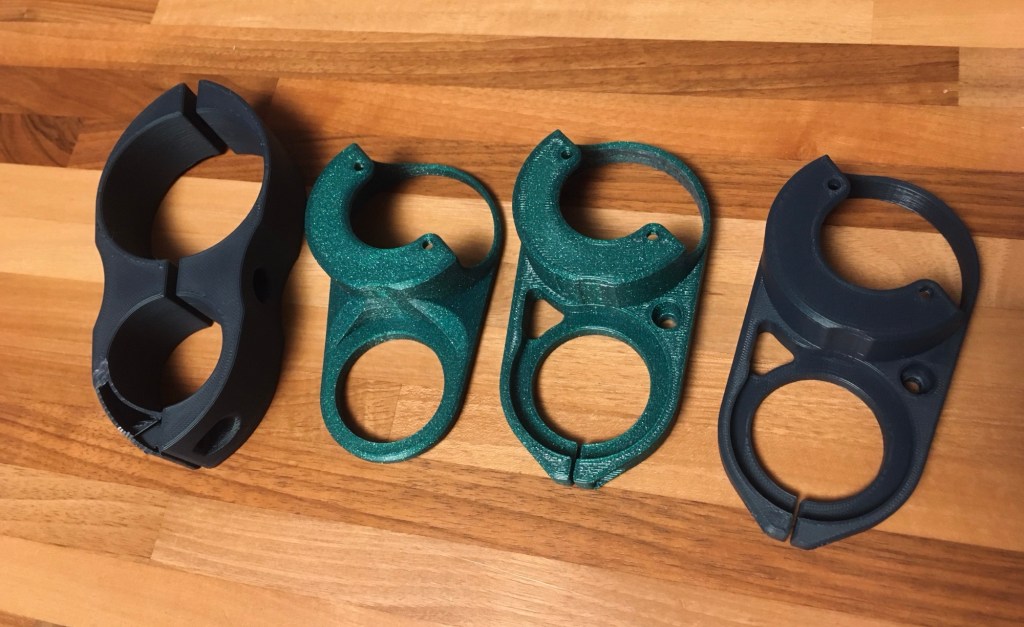
The old instrument cluster was one big chunk. Taking it out meant I had no means of attaching the new speedometer. At first I thought it would be cool to mount it offset from center on the fuel tank. Although I think it would have looked cool, I abandoned the idea. I did not want to peek down too much while riding and take my eyes off the road. The cylinder of the ignition looked like a good place and I got printing. It took a couple of variants until I had a satisfactory design.

Challenges & Learnings
The main challenge for me was the question of „Can I do it?“. After all, I am not a mechanic and have never owned or worked on a motorcycle before. Nowadays one can get far with a couple of YouTube videos and a wrench, but that‘s not always enough.
Another challenge presented itself in the limited space where all the magic had to happen. I had only a small garage unit to work on the bike… and store a ton of my other unrelated stuff.
My learnings for this project were:
- The importance of having a proper wiring diagram. I definitely felt the rush of this new project and wanted to rip out all the wires I found immediately. Good thing I took the advice of having a wiring diagram nearby as I did this.
Connected to this lesson is the one about making a new wiring diagram. No wire on this bike stayed the same and so the old wiring diagram became useless. Not only did it help me big time in simply planning the new layout, it saved my butt when later I had an issue and could not remember at all what I did. In theory you could get away with not making a new diagram because once you‘re done and the bike runs, why would you? Hehe, the key is in the words „if it runs“:) - The regulations and the inspection were not a challenge. Quite the opposite of what I expected. Okay, I didn‘t have much to go on. But from reading forum entries – because that‘s all I had to start with – it seemed like all the inspectors are jerks who hate bikers and their stupid projects, failing 90% of inspections just for fun. All in all you had to present a bike that‘s 110% perfect in all respects to have a slight chance at passing. I did not find that to be the case at all. Firstly, the guidelines are quite clear on what you can and cannot do. The categories help with the decisions on what modifications are worth the trouble. So if you stick to those rules, there should not be any issue. Secondly, the inspector was really nice (okay, that may be luck or a good day. Hard to judge) and the inspection was not like a day in hell. I came prepared with my documentation and what I believed to be a bike meeting all the regulations – and it passed. Also, I would have had no issue in coming back for another inspection if there had been a justified finding. After all, it is also in my interest to know I have a safe bike. And it‘s true the other way around: I benefit from knowing other bikes passing me on the road will not randomly explode their cylinder heads in my face.
Result
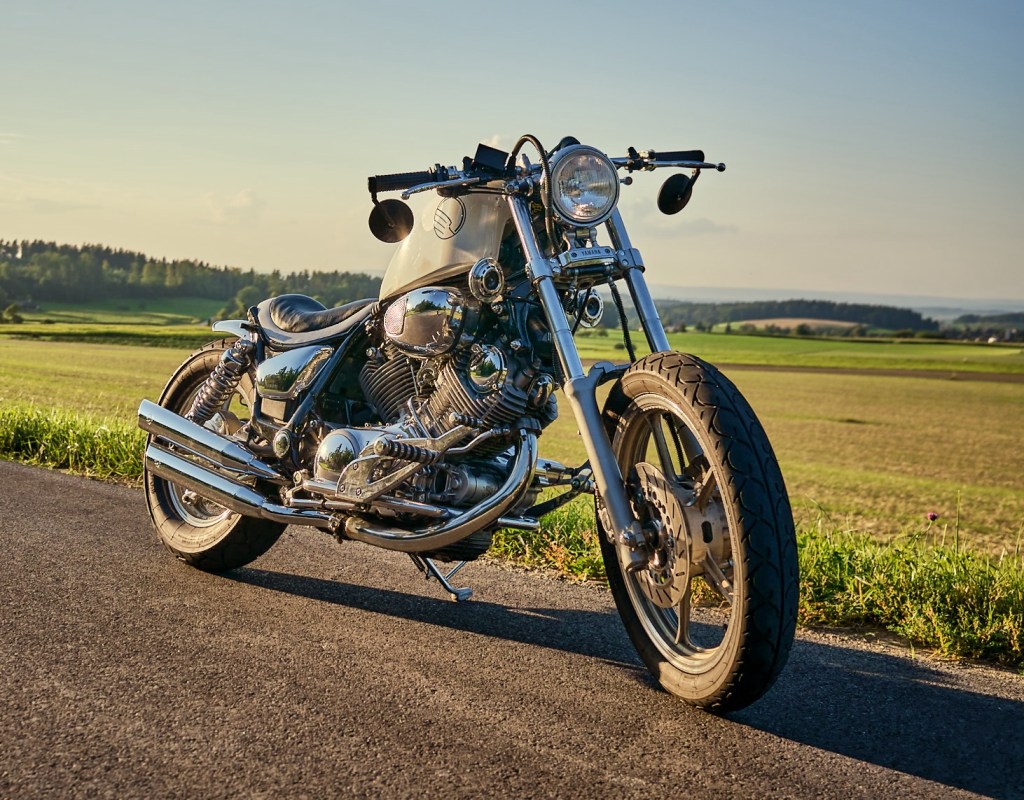
The result is a bike I can truly call my own. Here it is:
Reflections
This was one of the longer projects. There were many enjoyable moments and of course many that suuucked. But all in all I am really glad I did it.
Many projects start with an uncertainty. Mainly about how to reach the goal. What excites me, though, is the feeling of „I know I can get there – I just don‘t know how yet.“.
A thought on the all-the-jerk-inspectors-hate-bikers notion. Could it be that when someone ignores the regulations, builds a shit bike, then fails inspection and thinks the world is after him − the inspectors are not at fault? It may be like the story of the driver on the highway listening to the radio when an announcement comes on saying „Careful out there, there is a motorist driving against traffic!“. He looks out on the road and says „What do they mean „one“? There are hundreds!!!“.
I realize I could also be biased for having passed the inspection without problems.
Often I felt limited by what I was allowed to do on the bike. Still, as an engineer (and someone who likes to not get killed on the road), I appreciate standards. They exist for good reason (mostly). It is a balance between safety and curtailing freedom – and not an easy one. I would not want to be a regulator.
Resources
- Swiss guidelines for modifying and converting motorcycles
- Tamiya 1:12 XV1000 model
- Control Unit – motogadget m.unit basic
- Speedometer – motogadget motoscope tiny
Have you tried something similar? Got tips or questions? Feel free to leave a comment below.

Leave a comment