No Saddlebags, No Regrets
7 min read
Funny story. I had never really considered riding motorcycles until I spontaneously bought one. Riding my first bike instantly made me smile and say „Why did I not do this earlier??“. In Switzerland you ride with a learner‘s permit until you take the exam for the license. I guess this biker spotted the „L“ tag on my bike when he pulled up next to me at a red light and said „It‘s fun, right?“ – „YES! If only I had started earlier!“
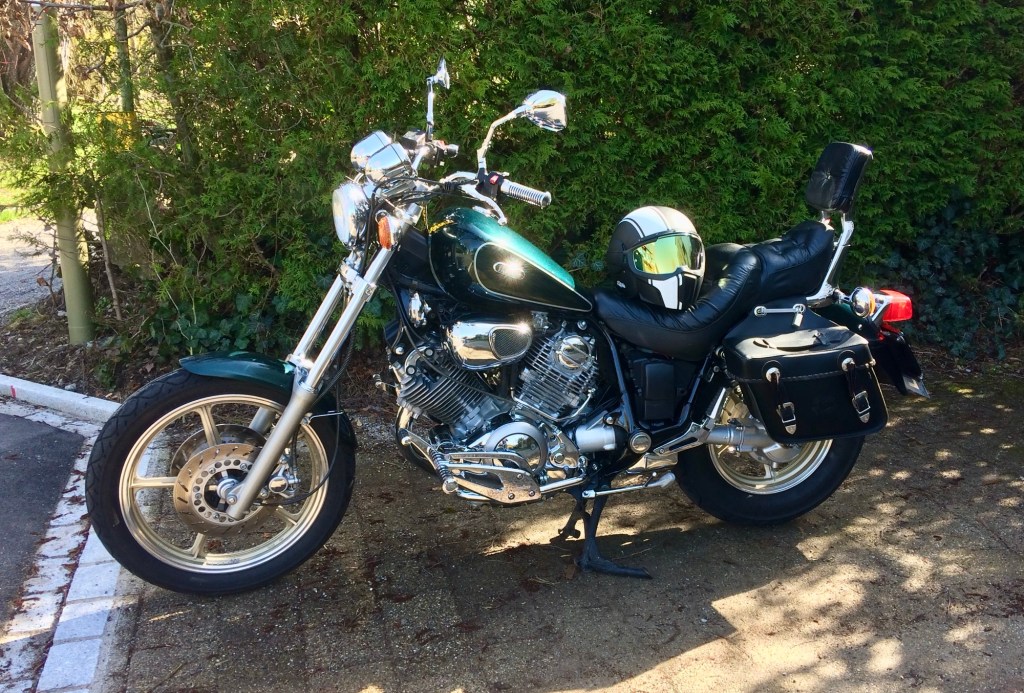
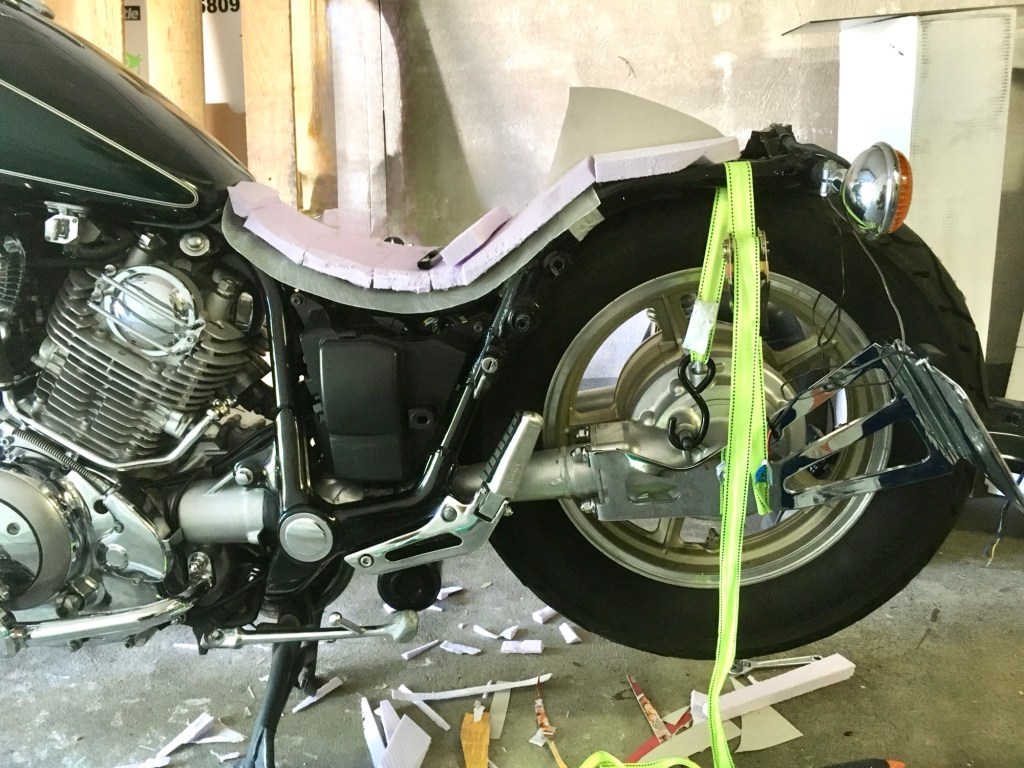
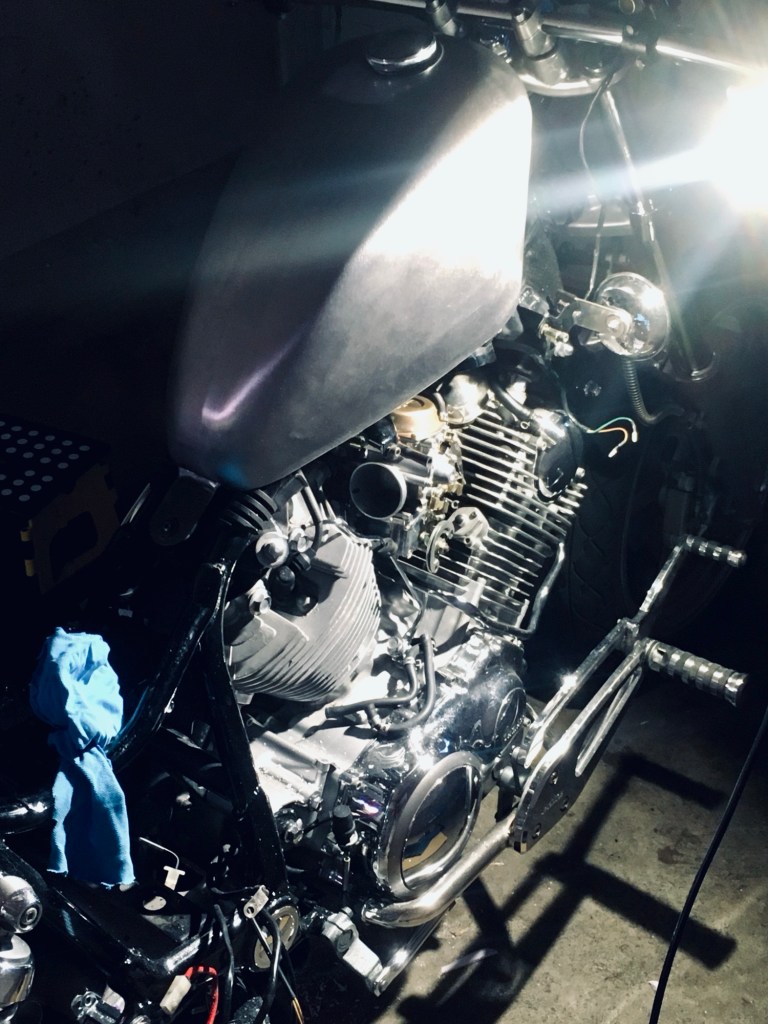
The riding was a blast. I was just not happy for long with the looks of my bike and got thinking what I could do to change that. An easy first step was to take off the saddlebags. The big – but admittedly super comfy – seat followed as I switched it for a single-seat „leather pan“. My dad chuckled when he saw it and said „That does not look very comfortable“ – „Yeah, it‘s not… but it looks cool!“.
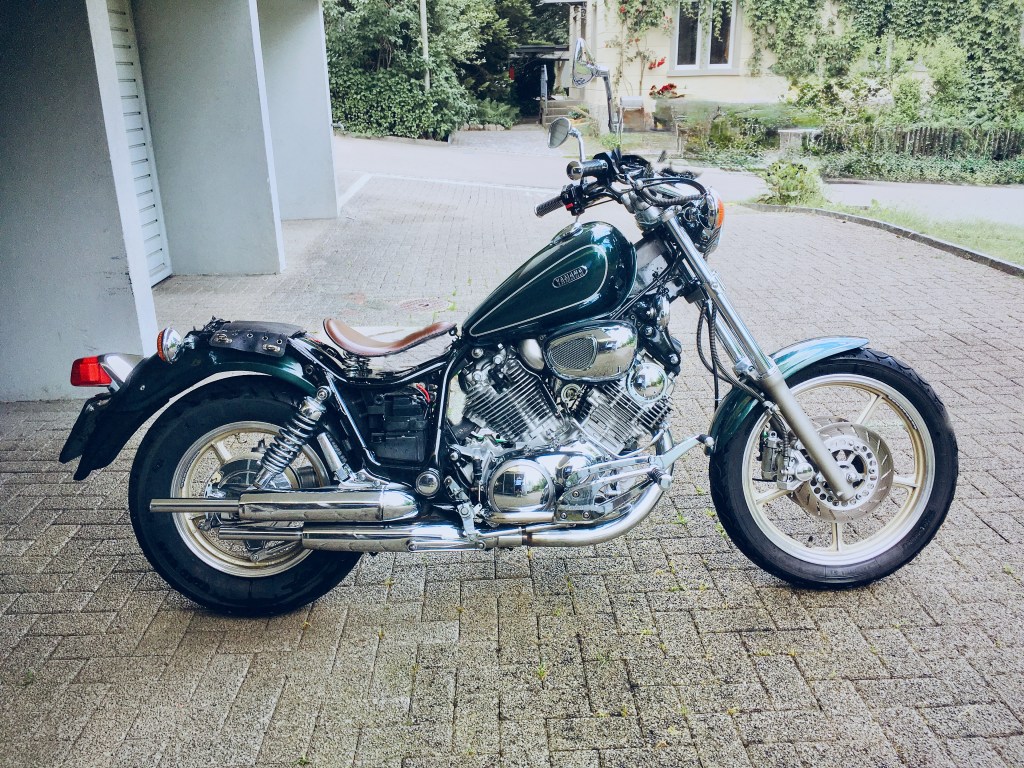
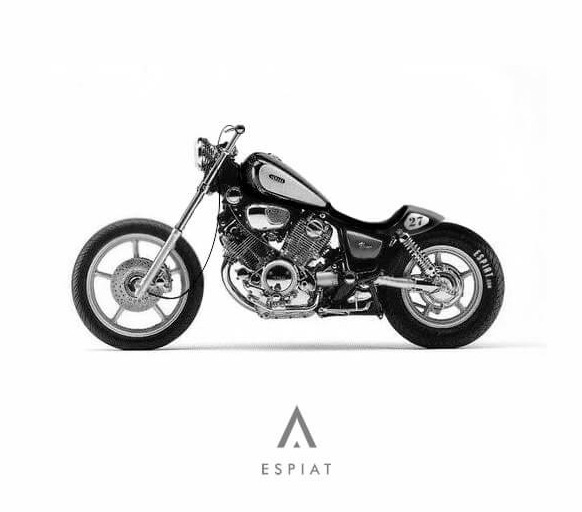
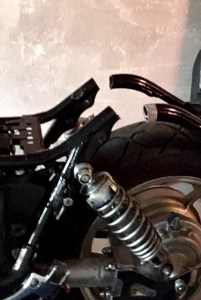
I rode around like that for a while until I felt I wanted to change more things about the bike. Particularly that monstrosity of a rear fender was bugging me. The way it now emerged from under the seat and kept on going towards the back, some way above the wheel, just did not fit. Some research revealed that many people before me had worked on XV750s and modified them to completely different styles, unrecognizable from the original. I found a build that I quite liked and took it as inspiration.
Goal
The goal was to get my bike to resemble as closely as possible the image of that bobber project I had found. I liked the clean look of the straight handlebar, the missing front fender and the chopped back. The look should not be too modern, it would not fit. After all, the bike is from 1994.
The other big goal was to get it through inspection. In Switzerland it sometimes feels like you have to get a permit to fart, then pay taxes on it and register it with the cantonal fart registry. Anyway, I would not modify anything that I could not get through inspection.
Thirdly, I had limited tools, workspace and zero knowledge of motorcycle maintenance. So whatever I did had to be done without specialty tools and could only take place in a small garage.
Process
The entire project only really took off with an unexpected clarity on the regulations. I knew I could not willy-nilly slap AliExpress parts on the bike. But I wanted to be certain, I did not want to spend money and energy on anything that would not get accepted in the end. It was during a routine inspection of the still unmodified bike when the inspector pointed me in the right direction. There is a good guide available, called the „asa 2b“. The most useful feature to me was the indication of inspection categories for every component of the motorcycle. It goes from the wonderful category A (modification not subject to notification or inspection) to darker corners like G (declaration of suitability from the vehicle manufacturer or a warranty from the vehicle modifier, accompanied by certification from a recognized inspection body) and others.
To keep an overview I made a list of all the planned changes with their respective categories. This would also help me with the booklet I made for the inspector, showing images of every change along with details about category, manufacturer, E-number, etc.
I won‘t go into all modifications individually, it would make the post way too long. If you‘re interested, drop me a line and I’ll be happy to give more details. I will just cover the most relevant or interesting changes.
Frame
The most drastic change to the motorcycle was the chopped back end. The regulations say that any change to the frame is a category G. The main problem with this category for hobbyists is the immense cost. Getting a modified frame approved by an inspection body can quickly go into 5 figures. The way around this is when someone gets a type approval certificate for a specific frame and a specific modification. They can then sell this certificate. I found one for the XV750 and with that the main hurdle was taken.
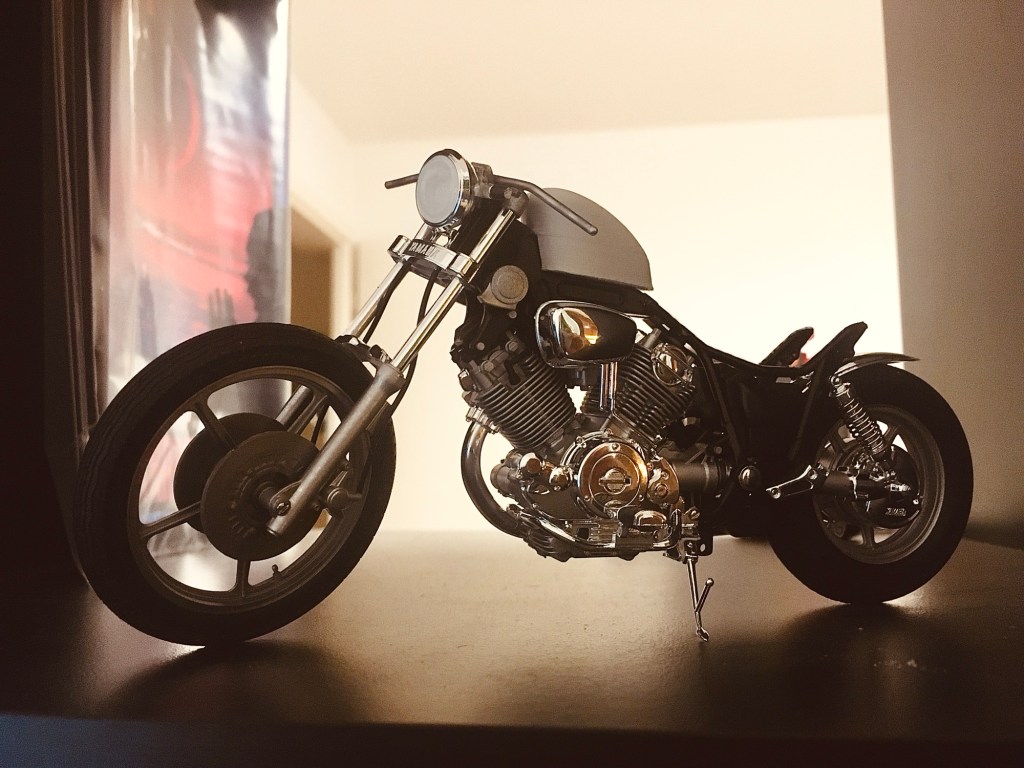
The XV750 turned out to be a popular bike, I even found a Tamiya 1:12 plastic model kit. To be precise, the kit is actually an XV1000 but they look the same, it‘s just a different engine size, and for my purpose it didn’t really matter. It was really helpful to visualize my ideas. I chopped the back and 3D printed a fuel tank. The concept looked good.
The certificate for chopping the frame indicated a specific length the frame must be at. I measured obsessively many times before taking the angle grinder to transform the bike into a solo-seater (measure 187 times, cut once was the motto here).
Seat
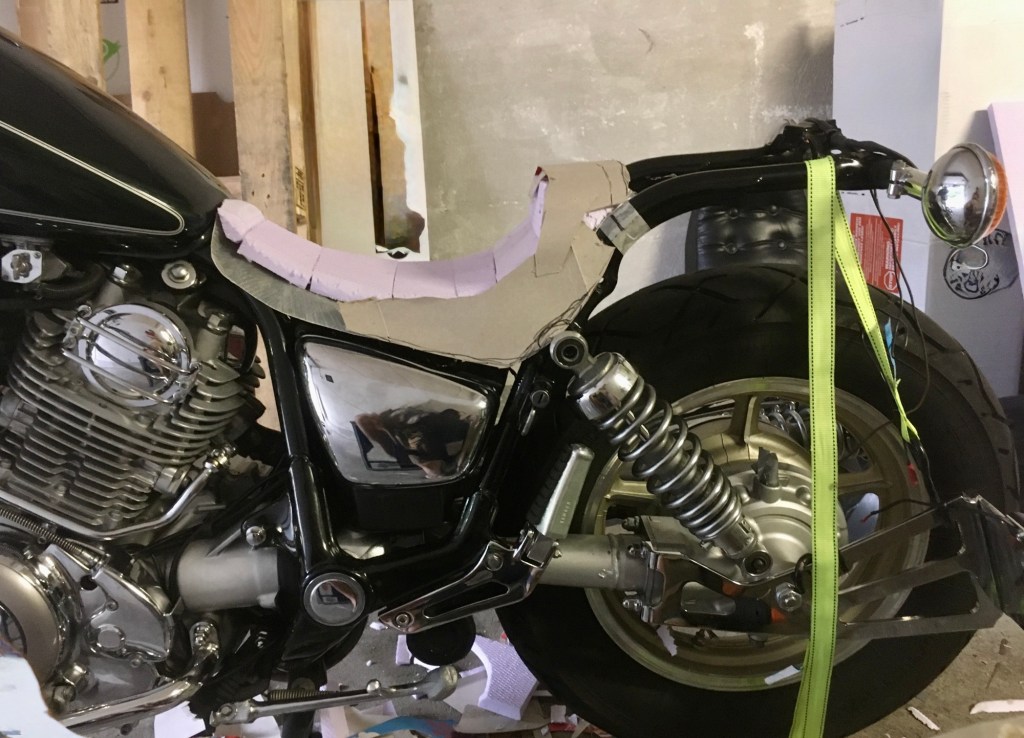
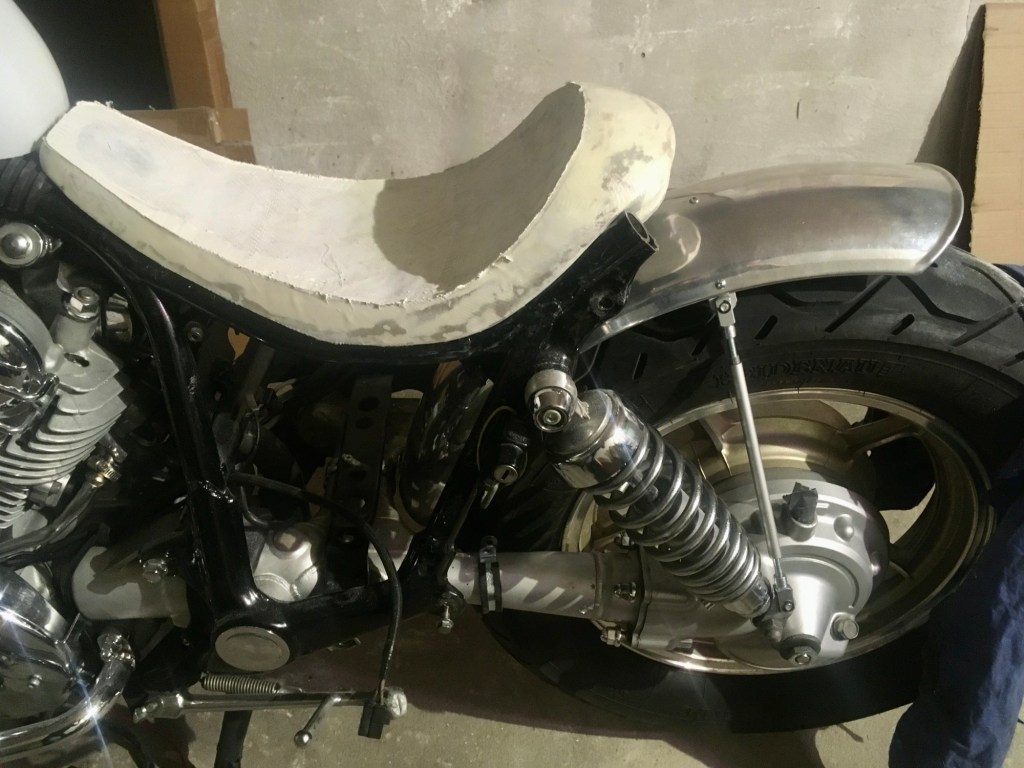
The leather pan from the initial mod did not fit the look I was after and I did not find anything off the shelf. So I had to make it myself. I started with cardboard and foam to get the rough shape. The travel of the back wheel suspension is something I had not considered when starting the project. If you go back and look at the inspiration image in the introduction, you will find the back wheel has nowhere to go. So either the image is just a mockup, the back suspension was locked or the seat moves with the suspension… I could not figure it out but had to find a solution for my project. The solution was a deviation from the really cool shape to create the needed gap for the wheel travel.
The seat is made of foam and a fiberglass shell. For the cushion I made a detachable molding and covered it with a soft material. This took a couple of tries to find the right one. I then covered it with black PU leather. What ruined the shape a bit was the regulation to have a reflector and it seemed that‘s the only place it could go, so I obliged.
Fuel Tank
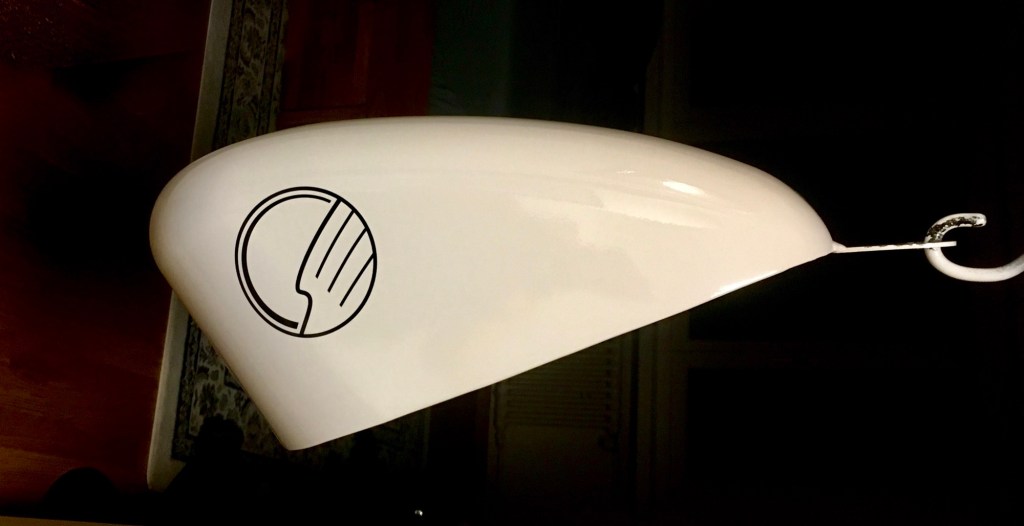
There was no specific initial plan for the fuel tank. I just stumbled on a combination of shape, price, and availability that I liked. I traced the general shape from pictures, scaled and printed it to check out the look on the plastic model.
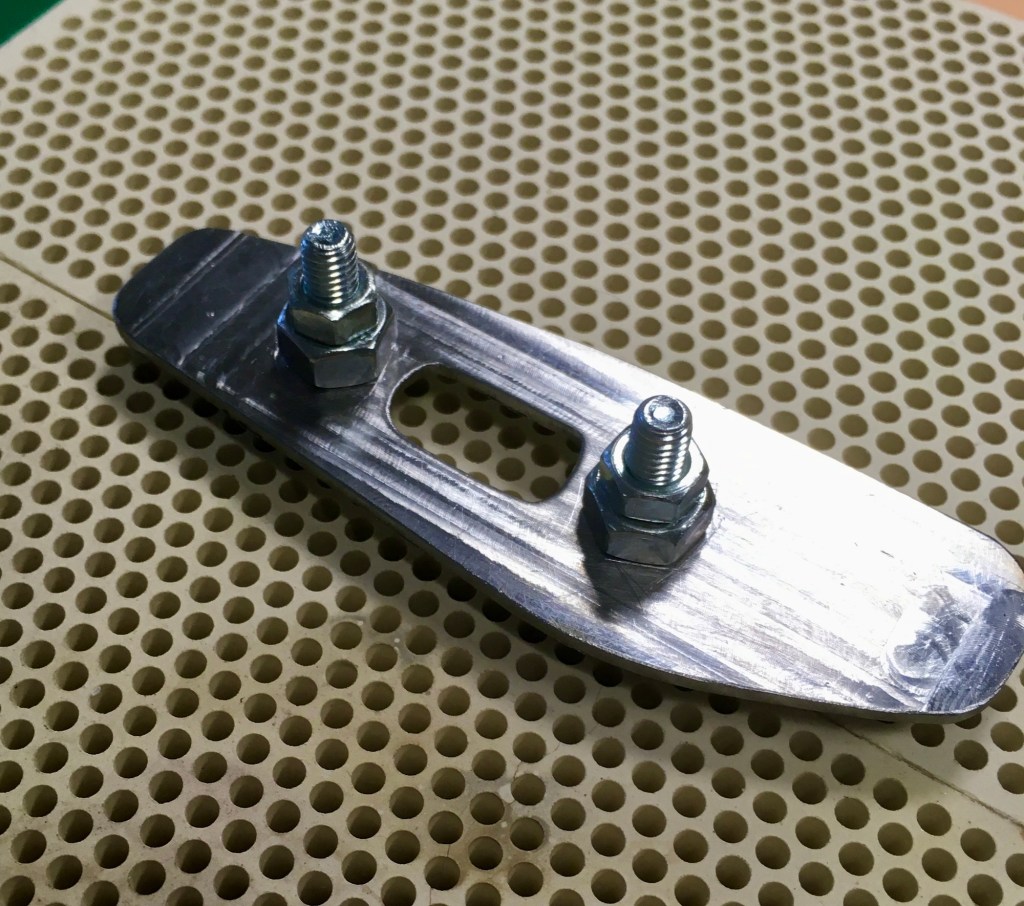
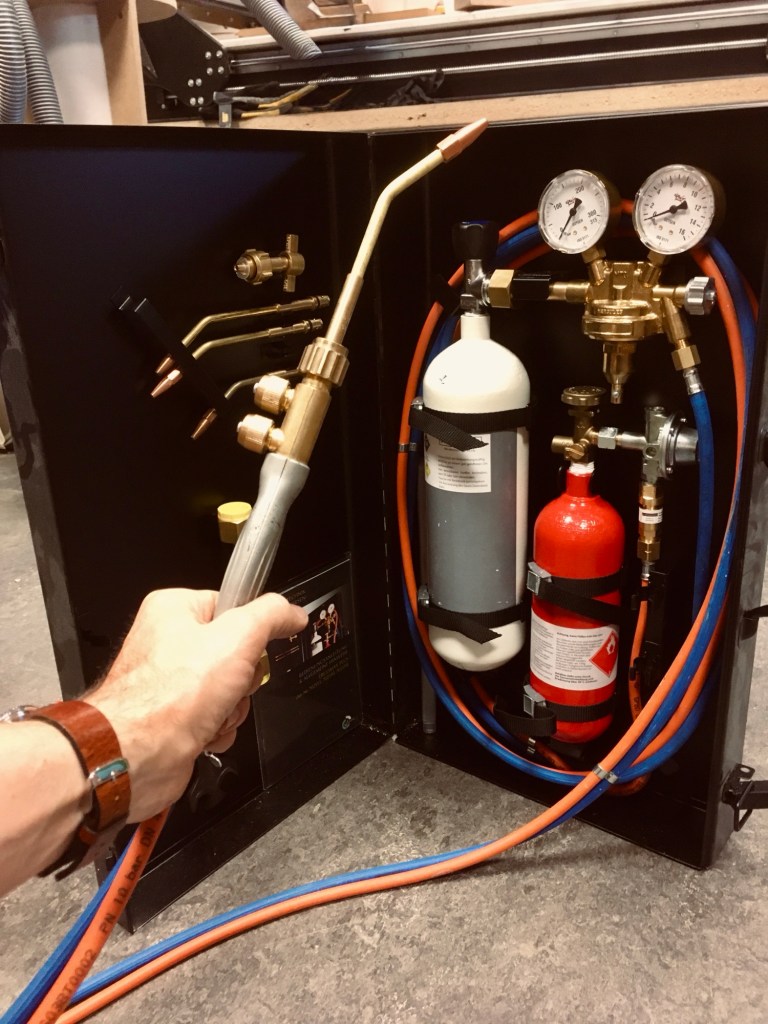
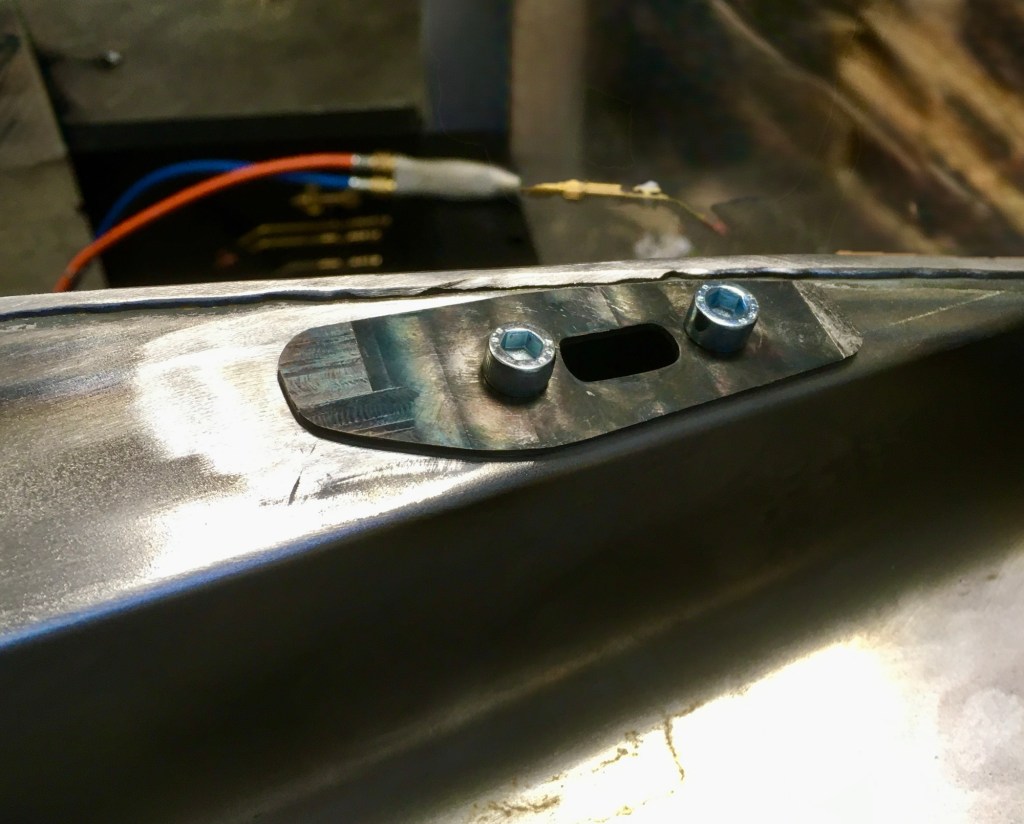
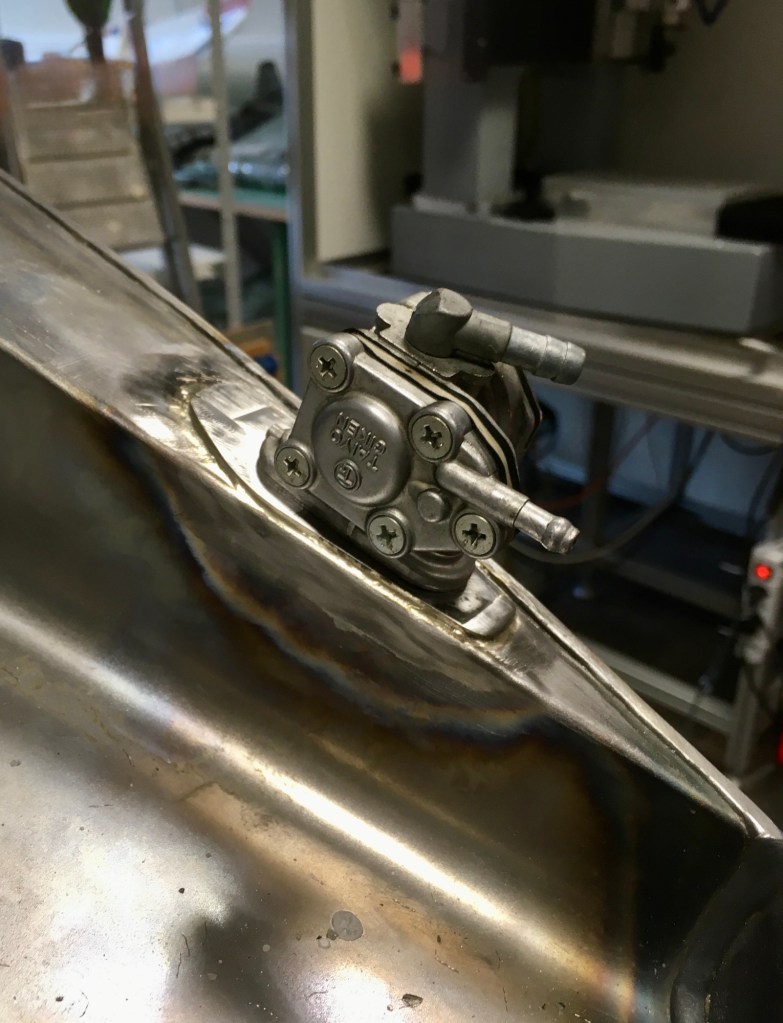
There was the hurdle of the fuel valve. The valve that came with the new tank was far too large. It seemed like it should be used between a garden hose and faucet. So that was not going to work. I remembered I had a very nice brazing kit sitting in my workshop that I bought but never really used. Now was its time to shine. I shaped a piece of steel to cover the previous hole and create the correct interface for the old fuel valve. Brazing is fun but quite tricky and I think it takes a lot of skill and practice to get it right.
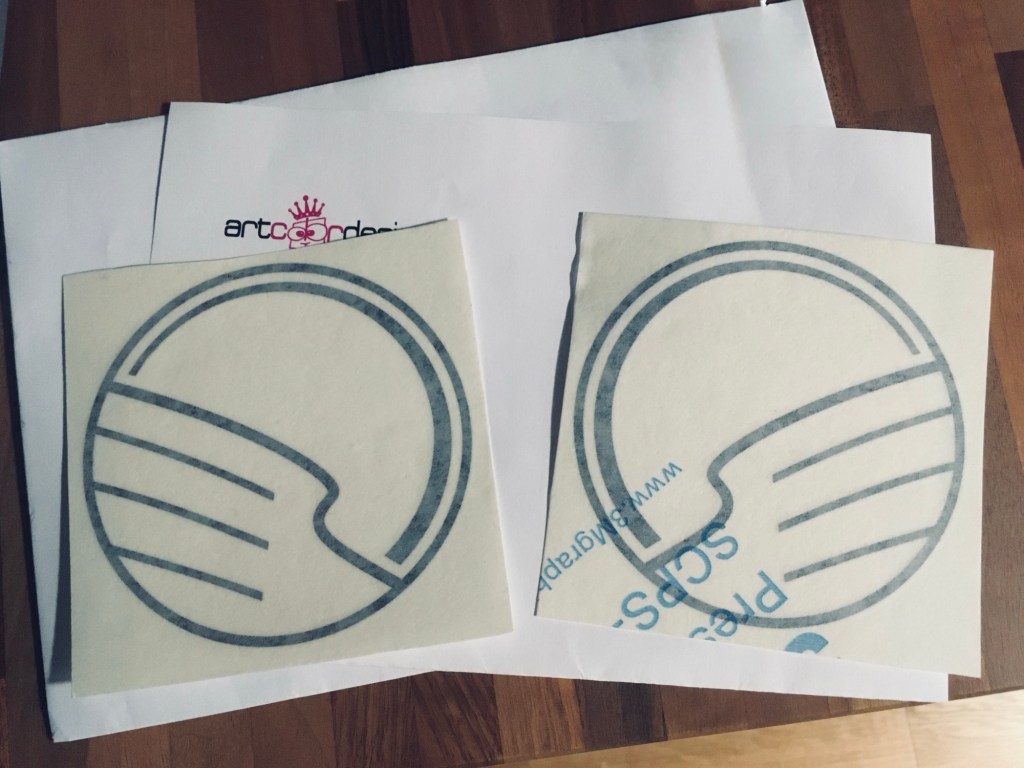
Now the tank was ready for paint preparation. A lot of sanding (the top thing I absolutely despise about my hobby. Fekkin hate sanding), filling, sanding (UGH!), filling and so on. I painted the tank with automotive rattle can paint from the hardware store. I also wanted to add a custom sticker instead of the Yamaha logo. I designed a stylized bird‘s wing, mirrored to face the wind on either side of the tank. A good friend connected me to a vinyl stencil and sticker maker to get them made. I finished the paint job with a coat of fuel-proof clear coat. Big mistake as it turned out. Firstly it seemed that there are multiple interpretations of “clear”. In my understanding it should be transparent only, nothing else. This clear coat, however, had a yellowish tint to it and made the fuel tank a different hue from the seat. Secondly – and worse – it turned out not to be fuel-proof. I discovered later that even the tiniest drop of fuel would eat at the paint and ruin it. How frustrating! But in a hobby like this you have to roll with the punches and just “embrace the suck”.
The tank was now painted — not perfectly, but good enough to move on. With that done, it was time to focus on the next topic: the exhaust.
More on that in the next part next week.
Have you tried something similar? Got tips or questions? Feel free to leave a comment below.

Leave a comment