
Gridfinity meets Lista
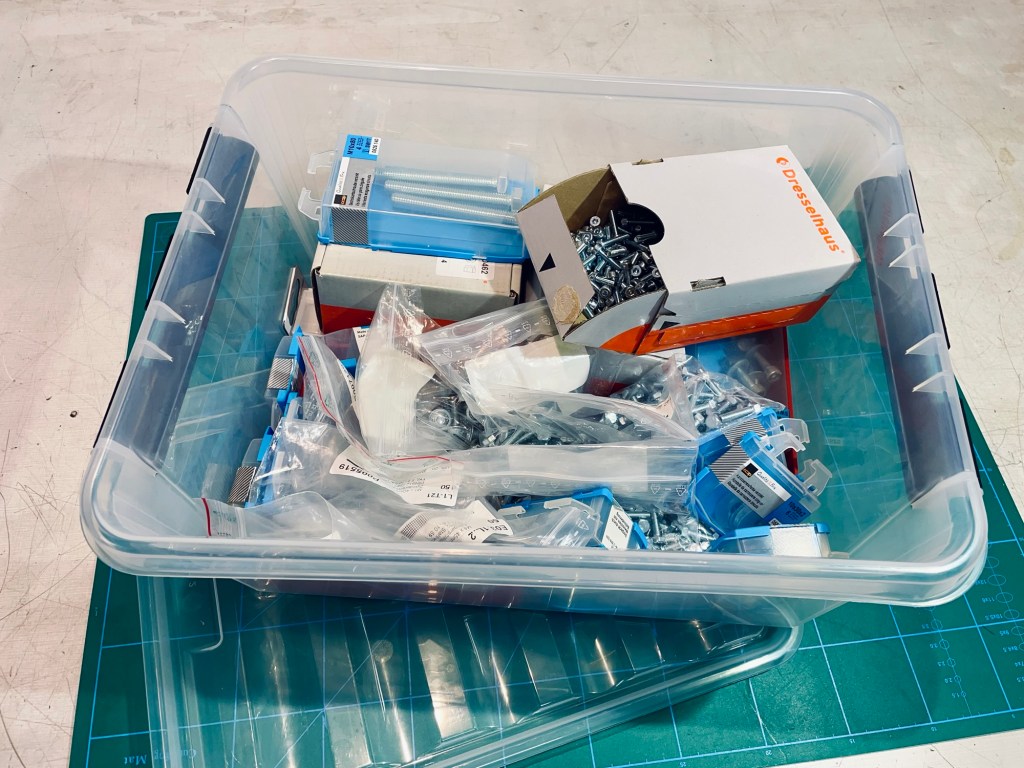
Having achieved one of my life goals of acquiring a Lista drawer unit (dream big, right?), immediately the question arose on how to organize all the nuts and bolts. So far they lived in individual plastic bags and little cardboard boxes inside some bigger plastic box. Of course whenever I needed something, I spent time looking for it.
Goal
I wanted to have a logical system with visual distinctions to separate the stock of bolts by their metric diameter. For example, all bolts, nuts and washers of size M3 would go together, same with M4, M5, etc. The idea is when you pick an M3 bolt, likely you will need an M3 nut or washer.
The system needed to be modular and I wanted to have the possibility to customize. Having a 3D printer, it made sense to have a sorting system I could print myself.
Materials & Tools
- 3D printing filament of different colors
- 3D printer
- Magnets, Ø 6 mm x 2 mm
- Internet access:)
Process
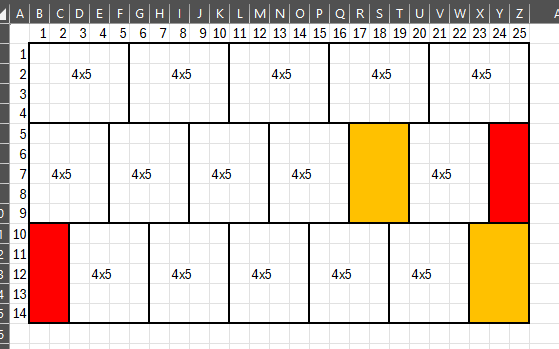
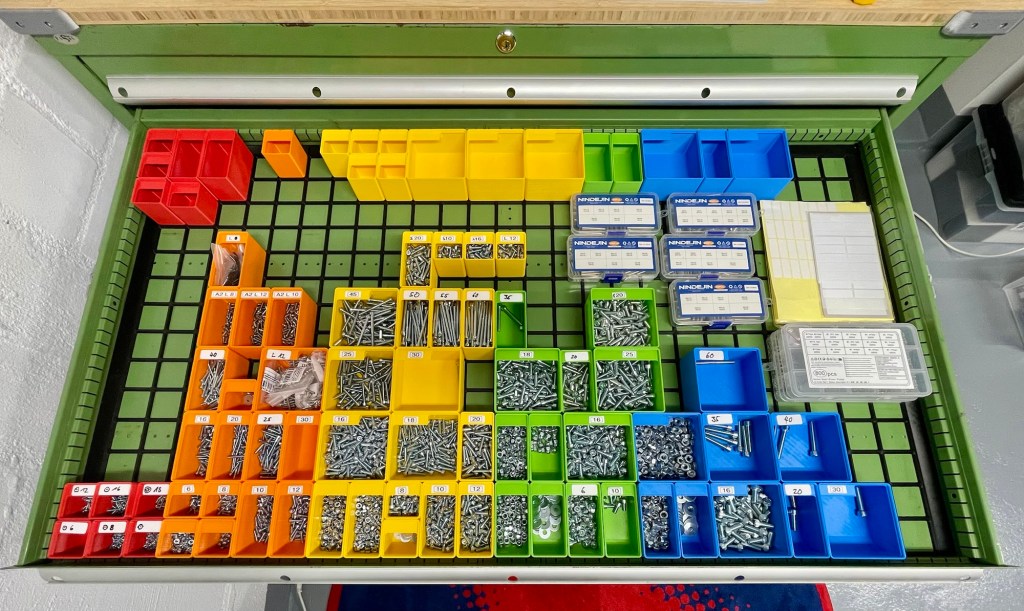
I liked the Gridfinity system by Zack Friedman a lot. It fits the bill nicely and I got printing soon after deciding on a layout. The drawer measures 1075 x 600 mm on the inside and so would take a 25×14 grid for a total of 350 units (it does not fit perfectly, but some 3D printed spacers filled the gaps easily).
My printer allowed for a baseplate of maximum 4×5 units. With two 2×5 and two 3×5 grids I could fill the entire drawer whilst avoiding intersections of four baseplate corners. I thought this would give the whole thing more rigidity as I was not planning on securing the gridplates to the drawer, only relying on the bins to hold everything down.
In height, the top drawer of the Lista limits bins to 7 units.
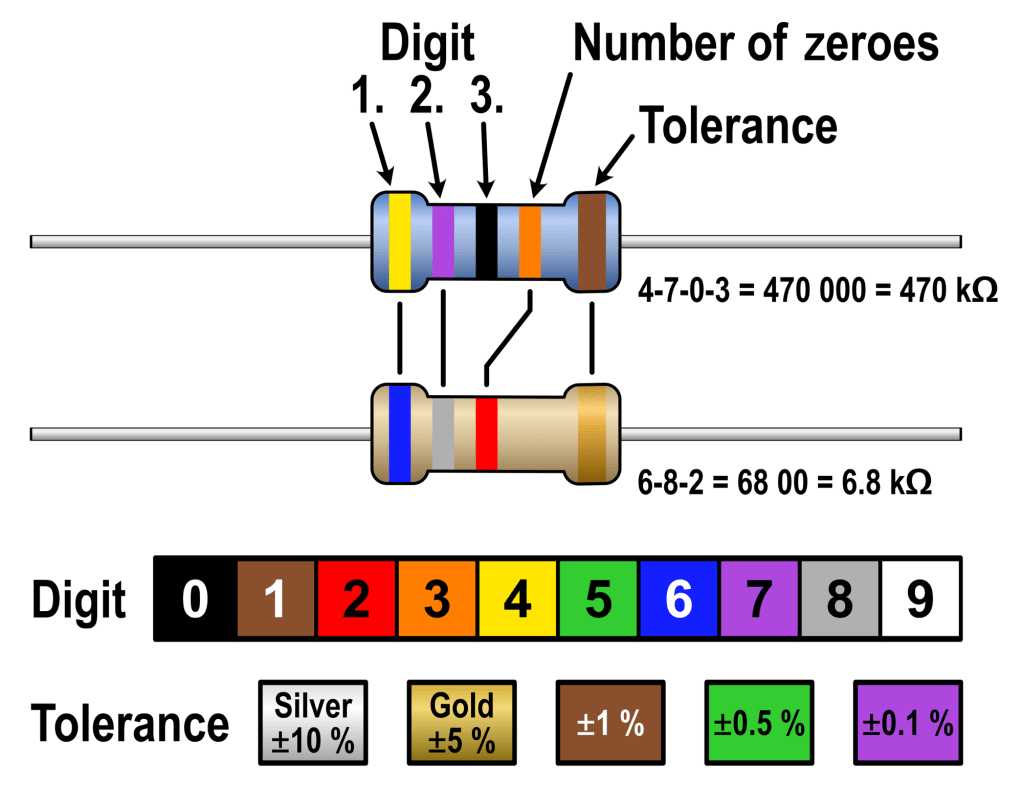
Back in the days when I extracted lots of resistors from broken electronics for my very first electronics projects, I have become used to their color code: Red means 2, orange means 3, yellow means 4, etc. Applying this to the bins would mean all M2 screws and nuts go in red bins, M3 in the orange ones,… you get the idea.
To configure the bins I used a really nifty generator, found here (you can quickly configure lots of other stuff too, I only used it for the bins). Because the drawers are made of steel I added magnets to the bins to stabilize them against tipping over and spilling the contents. It would also help secure the baseplates.
The job is not fully done with just printing the bins. The length of the screws for example has no indicator or color code. So a form of labelling is needed. I have seen awesome bin designs with integrated or snap-in multicolor labels. Looks perfect, but „Last Lap Laziness“ was kicking in and so I used simple handwritten stickers.
Challenges & Learnings
Apart from some wrestling the printer with the odd failed print, this project did not have major challenges.
I learned (actually only while writing this post, haha) that the gridfinity generator has many more things to offer than just the bins. Maybe the interlocking GRIPS baseplates would have been a good alternative to my press-fit system.
I also learned again that the internet is the coolest thing ever. One guy has a brilliant idea for a modular bin system, shares it, other people pick it up and create their own versions or even a super useful generator. And the whole thing is free! How cool is that? (Hint: Very)
Result
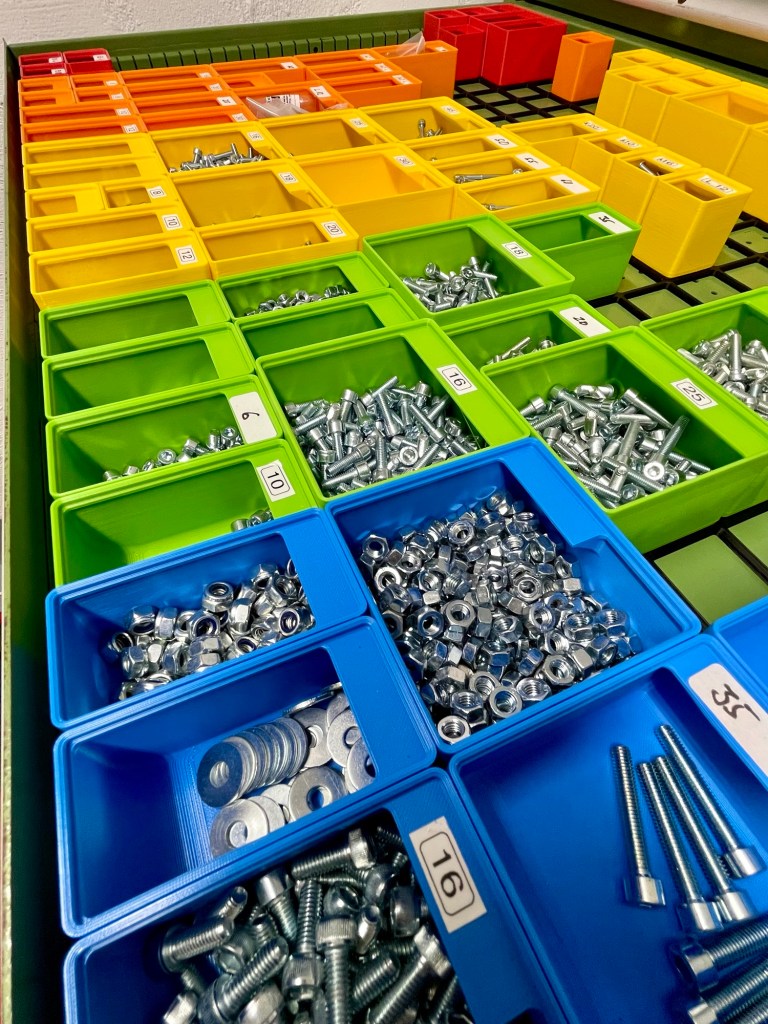
The outcome is a well-organized and colorful drawer with all the hardware neatly sorted. I like how easy it is to switch things around to reorganize. The magnets really help with preventing smaller 1×1 bins from tipping over.
The handwritten labels are a bit „meh“ but this one is a better-done-than-perfect project.
At the beginning I felt OCD-kinda feelings about having gaps and only a partially filled drawer. But it goes away when I close the drawer:)
Resources
Have you tried something similar? Got tips or questions? Feel free to leave a comment below.

Leave a comment